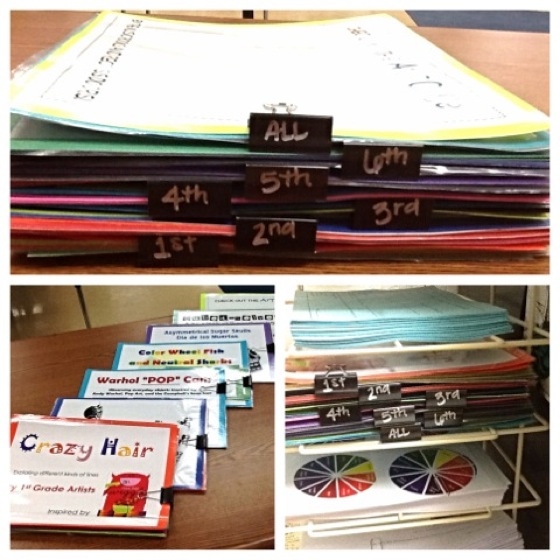
Recently, I was getting overwhelmed by my growing collection of signs that I put up with my student’s artwork in the hallway. The signs feature important information about the displayed projects such as the image or concept that inspired the work and the grade level that completed it. I like to keep them especially if they feature a project that was successful and effective. I also make sure to get them laminated so I don’t have to waste money reprinting them a second time!
Previously, I had been keeping them in grade-level order in a giant stack, but as I was putting the most recent ones away, I kept getting frustrated trying to find the extras or slide them into the proper places. My solution-oriented brain went straight into “SOLVE THIS NOW” mode. I racked my brain and immediately remembered an organizing hack I’d seen: labeling binder clips. I quickly grabbed my metallic silver Sharpie and some binder clips from my desk, and had my solution completed in less than 5 minutes.
I liked this solution so much that I quickly made some binder clips for my extra quantities of rubrics as well.
The benefits of keeping a metallic Sharpie on hand are endless: labeling iPads, labeling drawing books, labeling reading books, labeling shelves – basically writing on anything that is too dark for regular Sharpie!
What’s the latest art room hack you’ve found?
How do you keep your documents and handouts organized?
Magazine articles and podcasts are opinions of professional education contributors and do not necessarily represent the position of the Art of Education University (AOEU) or its academic offerings. Contributors use terms in the way they are most often talked about in the scope of their educational experiences.
