Picture this: 8 art students walk into an art room filled to the brim with beautiful art supplies. They all choose seats at the designated table and happily help each other put on art smocks. They do not touch anything. One student notices a mirror set up and says, “Oh, are we doing a self-portrait today?” Then, they all sit down and work with Sharpies and acrylic paint without getting any on their clothes.
This is every art teacher’s dream, right?
Well, I actually witnessed this very scene just a few months ago. However, I’m not sure if you’ll believe me when I say where. It wasn’t in an AP high school room. It wasn’t even in a middle school. In fact, I saw this scene play out in…a preschool.
To say that I was surprised is an understatement.
It was more like flabbergasted. Bowled over. Shocked.
As I’m sure you can gather, this was no ordinary preschool and no ordinary preschool art program. I was observing at a school called Preschool of the Arts, a Reggio Emilia inspired school located in Madison, Wisconsin. The things I learned can help all art teachers achieve a little more harmony in their art rooms.
Today I’d like to share some observations and practical takeaways that you can use whether you teach toddlers or teens.
The School: A Creative, Empowering Environment
If you’re unfamiliar with the Reggio approach to education, I encourage you to learn more about it. In short, children are viewed as capable participants in their own education. They are encouraged to express themselves through a variety of languages, including the arts, throughout the day. Although only schools in Italy can be true Reggio schools, it’s evident that PSA fully embraces the Reggio approach. From the student-made signs to the bright artwork adorning the walls, the school as a whole says, “Creativity and children are valued here!”
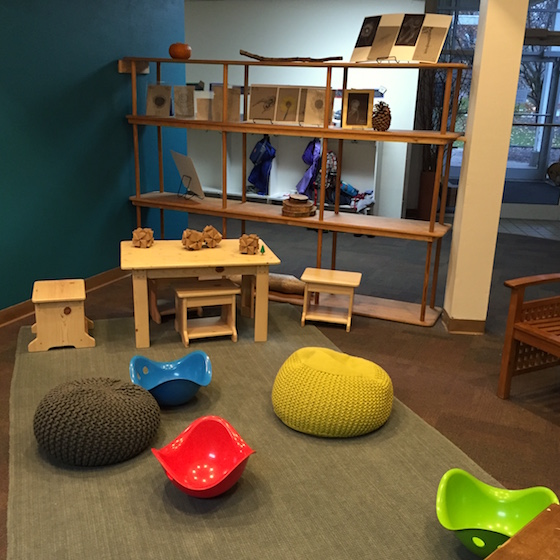

I was able to observe for a morning at PSA with one of their art specialists, Kristin Sobol. In addition to teaching at PSA, Kristin is an artist and illustrator. She graciously answered my (many) questions as she led groups of toddlers through engaging art experiences. Here’s what I learned.
The Art Studio: “The Third Teacher”
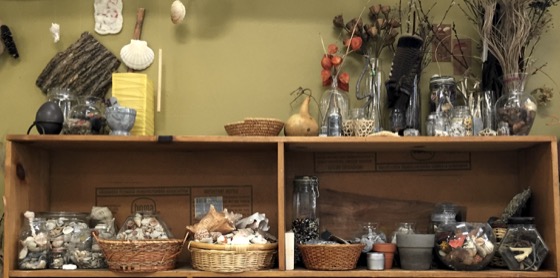
Children have many opportunities to create art in their regular classrooms, but the Reggio-inspired art studio is a truly special place that they get to visit once per week. In a Reggio school, the classroom setting is known as “the third teacher.” This term means that the space and the materials in it are purposefully arranged. Often, mirrors are incorporated into the space to reflect light and reading nooks are placed near doors to create a welcoming, home-like atmosphere.
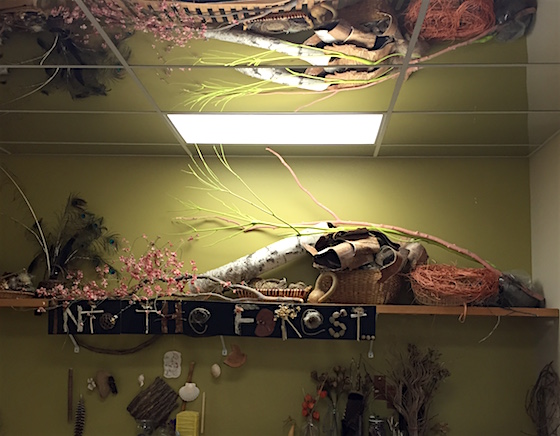
Special provocations are set out each day to encourage exploration. During my observation, three separate groups were using the studio space. One of the tables had the setup you see below.
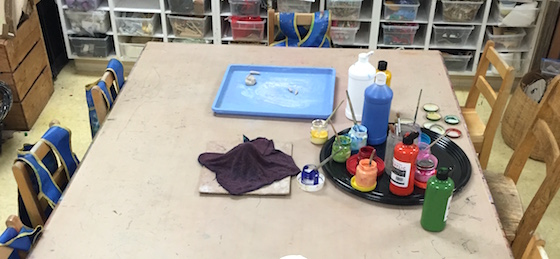
I thought it was so interesting that there was a covered object on the table. I’m sure the children were curious to see what was underneath! And just look at all of those paint colors ready to go.
Try it in your room!
- Hang a mirror to reflect light.
- Arrange at least one space for group work.
- Display beautiful materials.
- Create a reading or drawing nook.
- Paint one wall a soothing color.
The Materials: Inspiring, Permanent, High-Quality
As I mentioned, a key component of the Reggio approach is the idea that children are capable. While seeing three-year-olds using acrylic paint made my eyes wide, to a Reggio teacher, it would be completely normal. Students are taught the proper way to use the materials and begin practicing with them at a very young age.
I asked Kristin if she’d ever had a parent complaint about ruined clothing. She thought for a while and then said, “Nope. I can’t say that I have!” Wild, right? Because the Reggio approach focuses on building a community, parents are an integral part of their children’s education. Therefore, teachers prep parents to view these art experiences as valuable, and many parents automatically send children in older clothes on art days. It’s all about how you frame it.
Kristin told me that in addition to Sharpies and acrylic paint, her students often use other surprising, high-quality materials like Prismacolor colored pencils. The idea is that high-quality materials are actually easier for younger students to use. If you think about this, it’s true. Wouldn’t you rather use a smooth, pigmented oil pastel than one that drags across the paper barely leaving a mark?
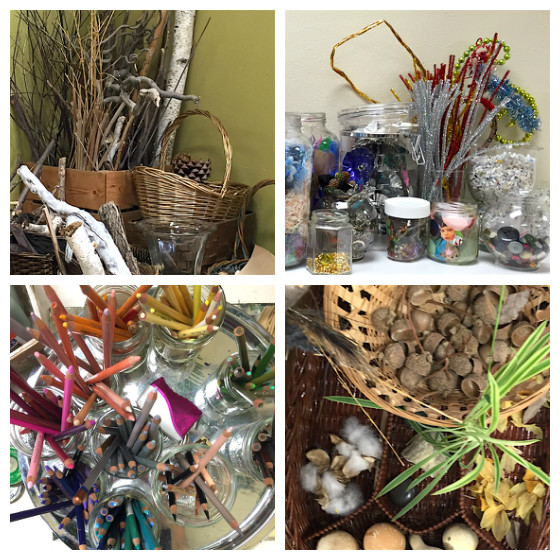
Another important aspect of the Reggio approach is incorporating nature into learning experiences. This idea carries into the art room, where there is a wide variety of natural materials from which to choose. I asked Kristin how the students left all of those materials alone and she said simply, “Well, they’re always part of the environment, so they don’t really pay them much attention.” Brilliant.
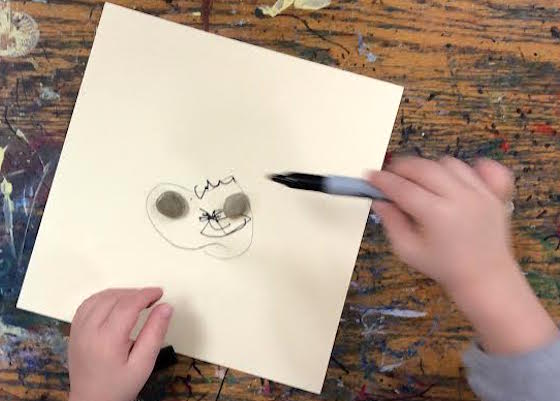
Here is one example of how nature was incorporated into an art lesson. Recently, students in a two-year-old room created their first self-portraits. First, they practiced drawing a circle. Then, they added rocks for the eyes. Those further along in their drawing development added things like hair, noses, and mouths.
Try it in your room!
- Introduce students to permanent materials.
- Mix natural materials with traditional art room supplies.
- Promote your art program to get parents on board with the mess.
- Splurge on at least one high-quality supply.
The Process: Documented and Displayed
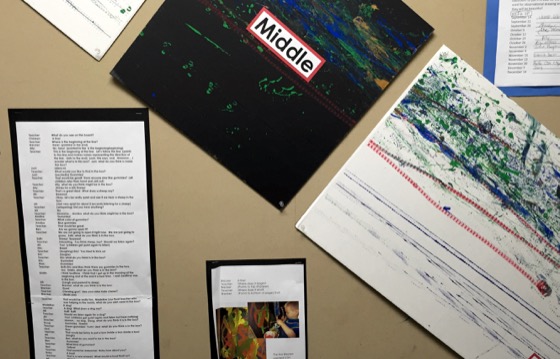
Documentation is a huge part of the Reggio approach. Throughout the art lesson, I saw Kristin taking notes and snapping photos. These get compiled each day and sent home to parents. Photos and scripts of discussions also get posted in the hallways and classrooms. Work is displayed at both adult and student levels so everyone can appreciate each other’s work.
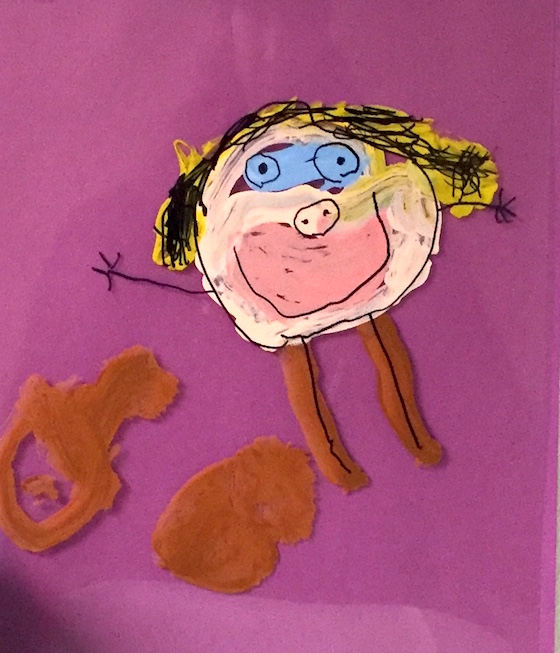
In addition, materials are chosen in order to show the process. Kristin told me, “Often, kids like to destroy their work or go over and over it so the part they did in the beginning gets obscured.” Reggio teachers think about what materials will counteract this tendency so they can still see the child’s process. Combining opaque and transparent materials often does the trick. For example, using Sharpies or oil pastels in combination with liquid watercolors allows teachers and students to see both the drawing and painting process in one artwork.
Another trick Kristin told me about was using transparencies. In this method, students draw with Sharpies first, then paint over the top with acrylic paint. When the paint is dry, the transparency can be flipped over, allowing the viewer to see both the drawing and the painting. If you have boxes of old transparencies sitting around your school, this could be a great project to try.
Try it in your room!
- Use opaque and transparent materials in the same project.
- Ask students questions and record their answers.
- Display artist statements alongside student work.
- Hang student artwork inside your classroom.
- Create a Facebook page, Instagram, or Twitter account for your school community.
I am so thankful to PSA and to Kristin for the experience of observing in the art room. I saw how small tweaks to a traditional school setting could have immense benefits. Try taking one idea from this article and see how it plays out in your classroom. Or, if you’d like, you can check out the AOE Online Class, Rethinking Kindergarten, where you will explore the Reggio approach in detail.
Have you ever heard of the Reggio approach before? What do you think?
What idea are you most excited to try?
Magazine articles and podcasts are opinions of professional education contributors and do not necessarily represent the position of the Art of Education University (AOEU) or its academic offerings. Contributors use terms in the way they are most often talked about in the scope of their educational experiences.

