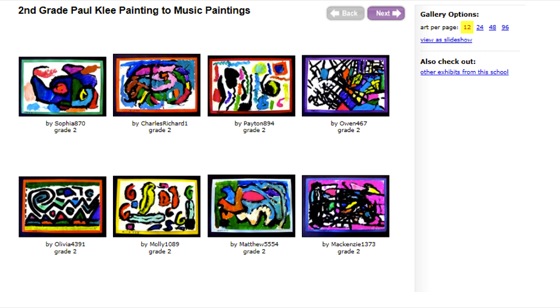
The process of creating and maintaining an Artsonia account can be intimidating. Rest assured, I felt the same way when I started my first Artsonia account. I wondered how I was going to get all 500+ students’ artwork photographed, labeled, and uploaded correctly one time, let alone repeat the process for each art project. Not to mention, how was I going to keep track of who had permission and who didn’t?
To wrap up Artsonia Week here on AOE, I’d like to share 10 insider tricks to help you create a successful and organized routine for maintaining your Artsonia account.
1. Use school-wide media permission slips for Artsonia: in order for students to participate in Artsonia, they need to have parent permission. If your school has a generic media slip for students to return, it can be used as a permission slip for Artsonia. In this situation, contact Artsonia and they will disable the permission slip feature.If your school doesn’t have a media permission slip, you will need to send home a permission slip with students, which brings me to number 2.
2. Create your own permission slip: Artsonia offers a parent permission slip to use, but I suggest you create your own. This allows you to add whatever additional information you want to your permission slip.
Here are some helpful hints regarding permission slips:
- Ask for parent e-mail addresses. This saves parents a step in the registration process and gives you easy access to parent contact information.
- State on the permission slip that this note gives you permission to publish artwork for the student’s tenure at your school. This way, you only have to collect one permission slip from everyone one time. On your second year, you would only need permission slips from the lowest grade level you teach.
- When sending a permission slip home, ask that it be returned with either a YES or a NO. This holds students accountable and minimizes the amount of lost permission slips. It also allows you to keep track of the students without returned slips, allowing you to send additional slips home.
- Color code permission slips based on grade. This will help you keep all the permission slips organized.
- Create a volunteer check box so parents can sign up to volunteer to help with the process.
3. Utilize parent volunteers: It helps if you have one or two parents come in each week to help with the process. They can organize, photograph, and upload the artwork for you!
4. Teach students to legibly write their names on the front of their artwork: It helps the process if students’ artwork is clearly labeled. When I went to upload, often times I didn’t need to look at a class list because I could upload without it. If you have two students with the same first name, be sure to have them write their first name and the first letter of their last name. Parents also like students’ name on their artwork if they purchase customized items from Artsonia.
5. Alphabetize artwork: It helps if you alphabetize the artwork before you photograph it. Since most gradebooks are organized alphabetically, it makes sense to photograph the artwork after you grade.
6. Set up a photo station: This is an area of your classroom where students, parents, or you can go to photograph artwork. My photo station was in the back of my classroom. I alternated white and black paper for the background. To minimize editing, be sure the lighting is good and the photos are taken directly over the artwork. Sometimes I stood on a chair, other times I laid the artwork on the floor.
7. Teach students to photograph their artwork: I taught 4th and 5th graders how to organize and photograph the artwork. You have the option of photographing artwork with a digital camera or using the Artsonia app on an iPad. Be sure to be specific regarding the process and how important organizing and good photographs are.
8. Keep digital files organized: After I photographed all artwork, I uploaded it to the computer and labeled each artwork with the student’s first name, last initial and name of the artwork. Then, I organized all the artwork into two separate folders, those with parent permission and those without parent permission. Once I finished organizing, it was easy to go in and upload only the artwork of students with parent permission. I liked having the other students’ artwork photographed in case a student decided later in the school year to participate. This allowed me to go back and upload previous assignments.
9. Use student check lists: If you want to save time, you don’t have to rename each photograph after you upload it. You can create student checklists to use when you photograph artwork. The check list has the class list along with the name of the project. After you alphabetize the artwork, write a number next to the name that corresponds with the artwork you photograph. For example, John 1, Sarah 2, Emily 3, etc. Then, when you upload, you know that John’s artwork was the 1st photo you took, Sarah’s was the 2nd, etc. This saves time of renaming files.
10. Share the galleries with students: After uploading a gallery, I put the Artsonia website on my interactive whiteboard and quickly show the new gallery to the classes. This gave students an opportunity to feel proud of their published artwork. In addition, it makes students excited to share and talk about the new gallery with their families.
Tell us, what are your insider tips for making Artsonia run smoothly in your classroom?
Do you still have any lingering Artsonia questions? Let us know in the comments!
Magazine articles and podcasts are opinions of professional education contributors and do not necessarily represent the position of the Art of Education University (AOEU) or its academic offerings. Contributors use terms in the way they are most often talked about in the scope of their educational experiences.


