I am all about getting my students’ artwork safely (and relatively anonymously) out on my art room sites, social networks, and fundraising sites. But photographing, editing, and uploading can sometimes be a real time-vaccuum! Especially if you teach 600+ budding artists!
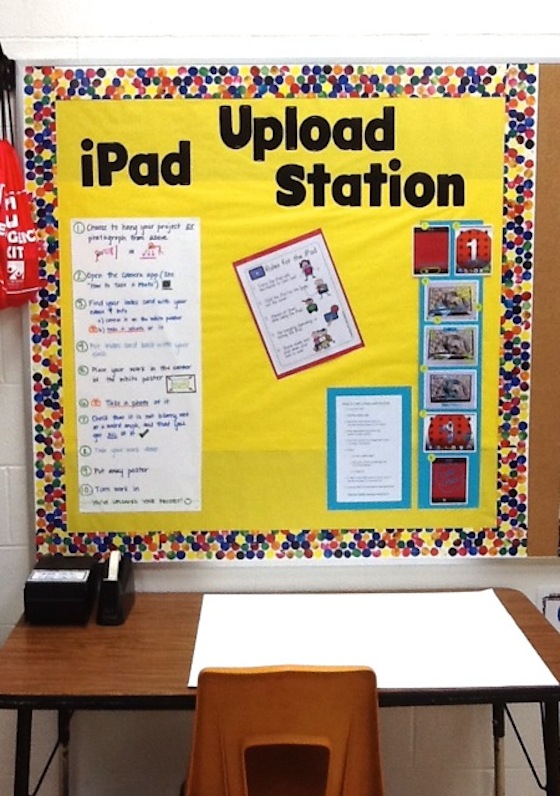
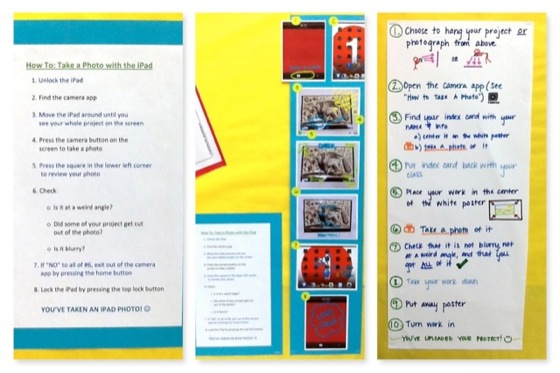
Here is a solution to save you time by enlisting and empowering your students: Create an Upload Station! Whether you use iPads or cameras, an upload station will save you valuable time and do double-duty teaching your students some photography basics. I teach older students (4th grade and up) to photograph their own artwork, so I may edit and upload the images to my selected sites at a much more efficient pace. My upload station includes rules for the iPads, how to take a photo using the iPad, and how to photograph a piece of artwork for site uploading purposes. I also include a stepstool for photographing from a bird’s eye view, masking tape to adhere the artwork to the white poster background if hanging up, and a small filing container that holds all the index cards with each student’s name, grade, and school year.
When setting up my upload station, I considered the following obstacles:
What if other students accidentally delete another person’s photo?
A really neat hint I picked up from a fellow art teacher to prevent photos from getting deleted or altered, is to download the free Dropbox app. Any photos taken on your iPad will automatically sync to Dropbox which can be password protected! (When first accessing the app you are prompted for both of these options…choose YES!)
How do you know whose artwork is whose?
I thought a lot about this process and what seems to be most efficient now is to have each student first take a photo of his or her name card (name, grade, year) and a then take a second, separate photo of his or her artwork. This way, in my Photo Stream and Dropbox their names appear before their work, and the images are free of any names for safety purposes when uploaded to the internet. Isn’t that A LOT of work to create an ID card for every student? It shouldn’t be. As long as students can write these legibly, I say, save yourself the time!
How do you fix weird angles or glare?
I give my students two options: photograph by hanging the work on the wall, or photograph from above – a bird’s eye view. I have a plain white poster hung on the door next to my upload station that students can tape their artwork to (for a clean border), and a poster they can leave on the table or move to the floor for photographing from a bird’s eye view. I have also included a stepstool to help the bird’s eye view photographing process. In addition, I tried to place my upload station away from too many fluorescent lights or direct sunlight to combat glare. If needed, you can straighten photos easily in most basic photo editing apps.
Is there enough time for students to do this?
In an ideal world all students would finish their projects at the exact same time, but in our art room world, most students finish at different times. The extra time the early completers have allows them time to photograph while their classmates finish. You may also want to consider scheduling an uploading and catch-up day into your calendar.
What about the younger grades (K-3)?
When adept and efficient, I enlist older photography and uploading “experts” to help with the younger grades’ artwork. For the beginning of the year, you may have to photograph, edit, and upload yourself. This isn’t to say that these younger grades couldn’t be taught these skills too though!
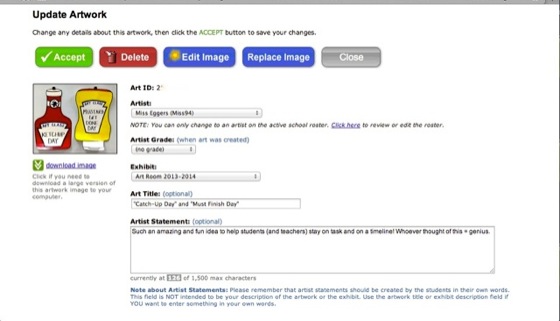
In addition to a streamlined, autonomous photographing process, students can also take charge of the Artsonia importing process! Like Heather talked about earlier this week, the Artsonia app now features the opportunity for students to compose artist statements about each of their artworks to be displayed with their images in their Artsonia galleries. You may just have to navigate the students to the importing tool and the artist statement feature within the app. Artist statements can be created as a step in the importing process or by accessing that student and their artwork in the roster tab.
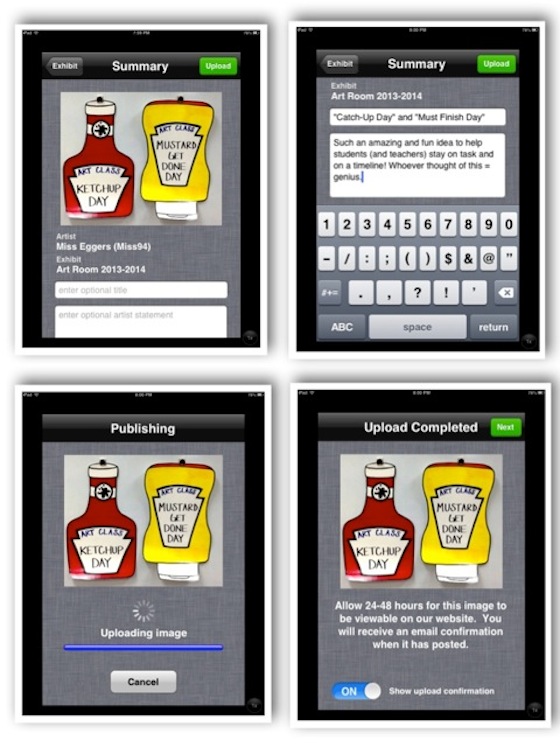
The best part is that you still have the final say by previewing and editing online before the image is published to your art room’s Artsonia site. And don’t forget, you’re facilitating an aspect of critical thinking for each student, reflection, with ease.
Forget those extra hours! Let students take charge! Enlisting their help at an upload station teaches them photography skills, allows them autonomy and ownership of their artwork, familiarizes them with the idea of a safe electronic identity and creates critical and reflective thinkers. Best of all, the students LOVE being able to help!
So tell us, how do you have your students help with Artsonia?
What uploading and photographing processes work for you?
Magazine articles and podcasts are opinions of professional education contributors and do not necessarily represent the position of the Art of Education University (AOEU) or its academic offerings. Contributors use terms in the way they are most often talked about in the scope of their educational experiences.
