It’s no secret art teachers are short on time. We all wish we could have more time with our students. During my 14 years at the elementary level, my schedule was such that I only saw each of my 1300 students for 15 hours per year. Yikes!
Since I had so little time with them, I had to think hard about exactly what I wanted to teach my students. I decided I needed a way to make learning fun and relevant. But perhaps most importantly, I needed to figure out a way to make the learning stick!
My solution? A yearlong theme-based curriculum.
I found using a theme throughout the year worked wonders for me and my students. Their retention was incredible!
Here are 4 steps to successfully using a yearlong theme in your classroom.
1. Select a theme you can build on.
Finding a theme that works for you and your students is an essential first step. Don’t skimp on brainstorming time here! You’ll want to find a theme that allows you and your students enough room to explore. At the same time, you want it to be narrow enough that it feels focused.
Here are a few themes that have worked well for me:
- The Elements and Principles of Art
- Art Detectives Through Time
- Museum Mania
- The ABCs of Art
- The History of Art Through the Eyes of Our Future
- Visualizing Virtue: Creative with Character
- eARTh…it’s got ART!
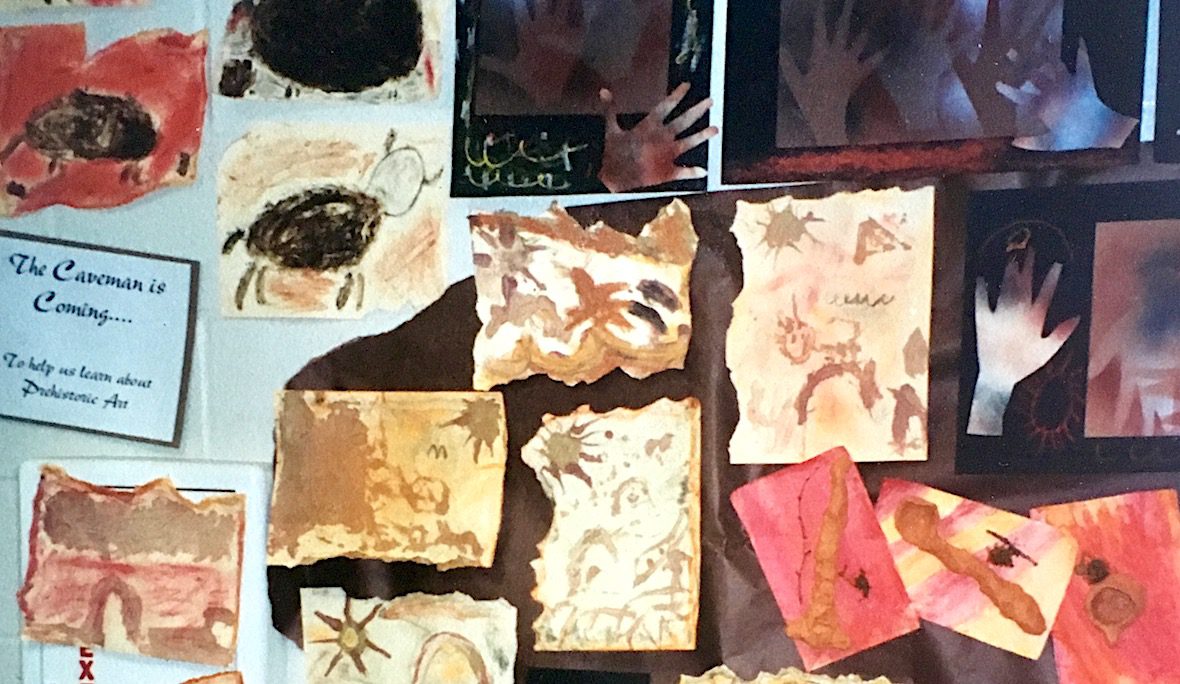
Once you have your theme, it becomes the guiding light for all of your students all year long. For example, when our theme was “The History of Art Through the Eyes of Our Future,” all students started by studying Prehistoric art, but each grade level did something different.
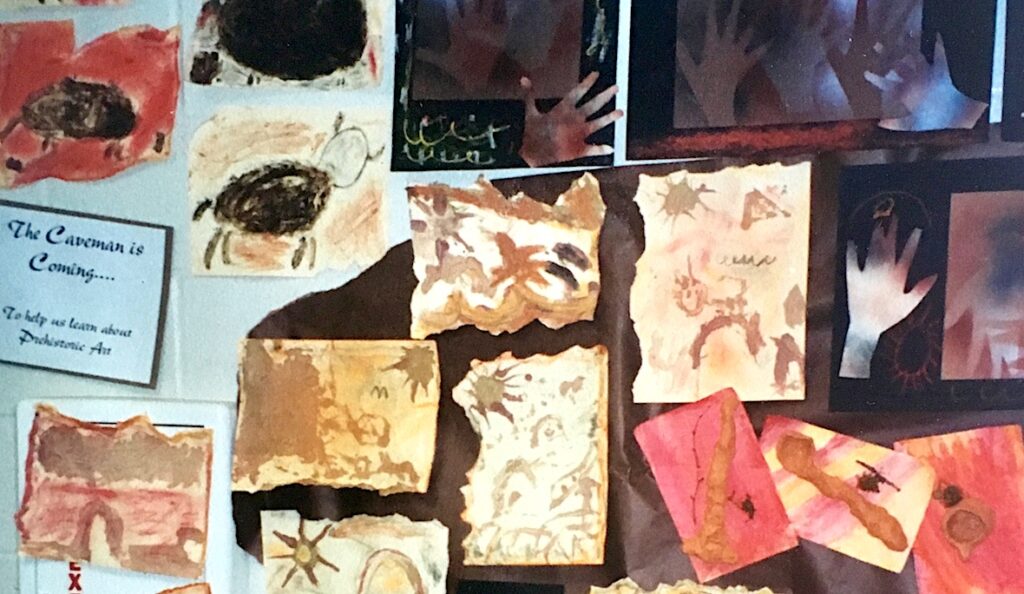
- Kindergartners painted with dirt.
- 1st graders made rock paintings.
- 2nd graders learned about positive and negative space with hand studies.
- 3rd graders created clay bowls and “cave tools.”
- 4th graders made stick paintings.
- 5th graders created cave wall paintings using dirt, rocks, sticks, and symbols to tell their stories.
We hung all of this incredible art up in our atrium creating our own art cave. I even dressed as a cavewoman and carried a sign that said, “ART…The First Language.”
It worked! My students loved it, our community loved it, and I realized that the kids didn’t forget it! From there, we moved onto the art of ancient Egypt and right on through art history! Choose a theme you can build on in a similar way. Your students will love it!
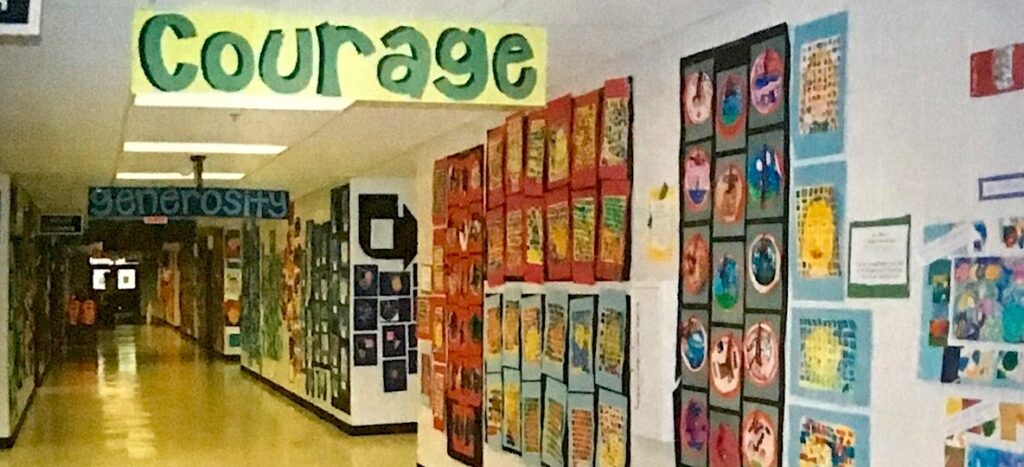
Once you get started, you’ll realize you can do all sorts of amazing things. I started leaving my hall displays up as we completed each part of the theme and that become the end-of-the-year art show!
2. Get your community involved.
Once you’ve chosen your theme, make sure to let your staff, parents, and other community members know what it is and offer to display art throughout the community as well.
In my case, after a few years, other teachers in my building began coming to me to see how we could collaborate on the themes together. If you’d like to try this, just make sure to clearly state you have your own art standards to meet first!
Letting your school community in on the theme can also increase parental involvement. Try rounding up some parent volunteers to help you come hang work or reinforce work that’s already hung so it lasts all year.
3. Use your displays to create your end-of-the-year art show.
By leaving your displays up throughout the year, you can actually work on your end-of-the-year show all year long! As new exhibits are added, the show starts to take shape. As the final show date approaches, you can start your other prep work.
Here is a list of to-dos you may want to consider.
- Send out invitations.
- Teach your students to be docents by reviewing important concepts.
- Make brochures and maps for your attendees.
- Find a costume or outfit for yourself to wear.
- Collaborate with other teachers to bring in music, technology, dance or other extras.
For even more tips on planning an amazing night, check out this article.
Another plus of preparing all year long is it helps the theme and information stick in students’ brains. You will be amazed just how much your students are able to recall as they take their family, friends, and community members through the show!
4. Consider building an assessment into the art show.
You may be surprised at the sheer amount of information your students retain using this method. Why not document it so you can share it with your colleagues and administration? Think about how you can work in a creative assessment with your theme.
For example, one year our theme was “eARTh…It’s Got ART” where we learned about art from different parts of the world. The assessment came in the form of a “Passport to Learning” to tie everything together!
You can download an example to use with your students or as inspiration below!

Regardless of what you choose, when the show comes down, put all of the artwork, along with the assessment for each piece into a portfolio. It will truly be an amazing reflection of your students’ learning!
What themes have you used in your classroom?
How do you organize your elementary curriculum?
Magazine articles and podcasts are opinions of professional education contributors and do not necessarily represent the position of the Art of Education University (AOEU) or its academic offerings. Contributors use terms in the way they are most often talked about in the scope of their educational experiences.