Art teachers love Piet Mondrian! His pieces are some of the most recognizable works of modern painting. Draw in students of all ages with his simple use of geometric shapes, bold lines, and primary colors. Mondrian is also the perfect artist to reinforce foundational color theory and design principles. But did you know that you and your students can go deeper? Try the STEAM idea below to inspire innovation in your students. They’ll light up as they transform flat shapes into three-dimensional forms!
Join us as we rediscover the iconic artist, Piet Mondrian. Then, add a fresh STEAM twist to light up the art room!
Introduce Mondrian and Neoplasticism.
In the early 20th century, Piet Mondrian’s style evolved from traditional, representational trees to abstract compositions. The further he pushed into abstraction, the more he simplified his work to basic lines, shapes, and colors. He called his style Neoplasticism. It comes from the root words, neo meaning new, and plasticity referring to the ability to be shaped and molded. Mondrian believed that pure abstraction was a new way of tapping into spiritual ideas and universal values. As the art moved away from depicting the real world, the ideas came front and center.
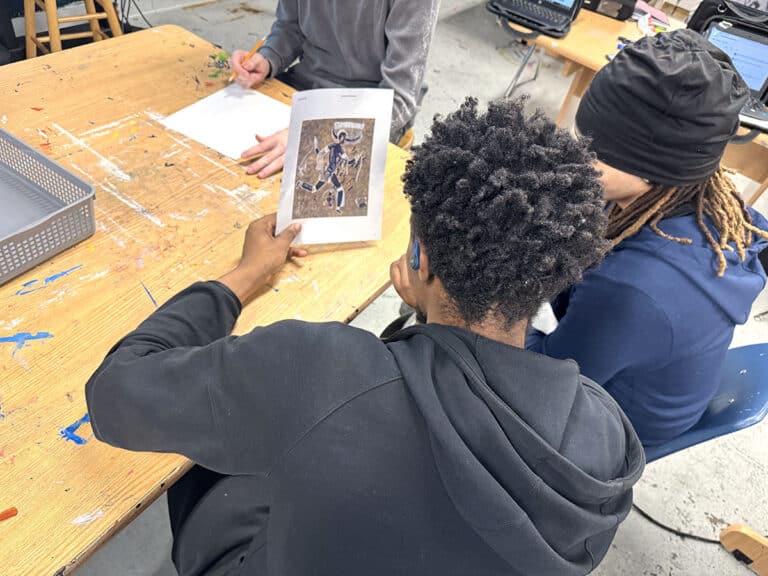
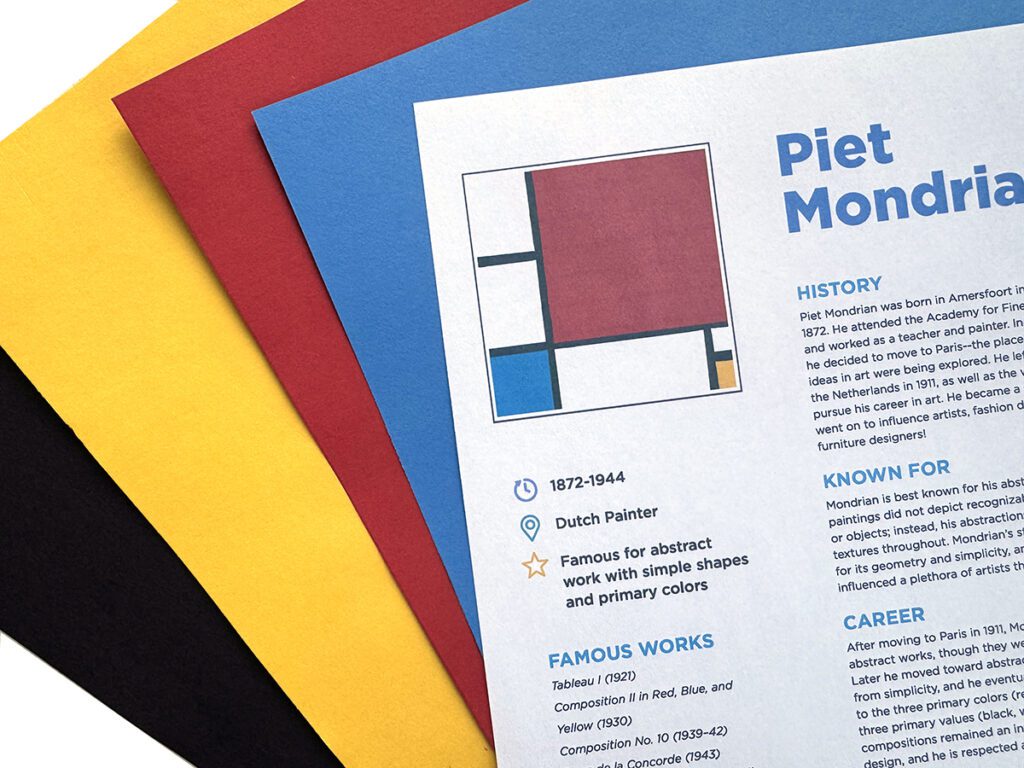
Instead of making your own handouts about Mondrian, save time and download his artist bio in FLEX Curriculum. This student-facing resource includes a brief biography, an artwork image, and several facts. FLEX includes biographies of numerous diverse artists from the past and present, along with lesson plans, videos, and anchor charts to help put the ideas into practice. If you want to bring these artist bios to your students, fill out this quick contact form to learn more.
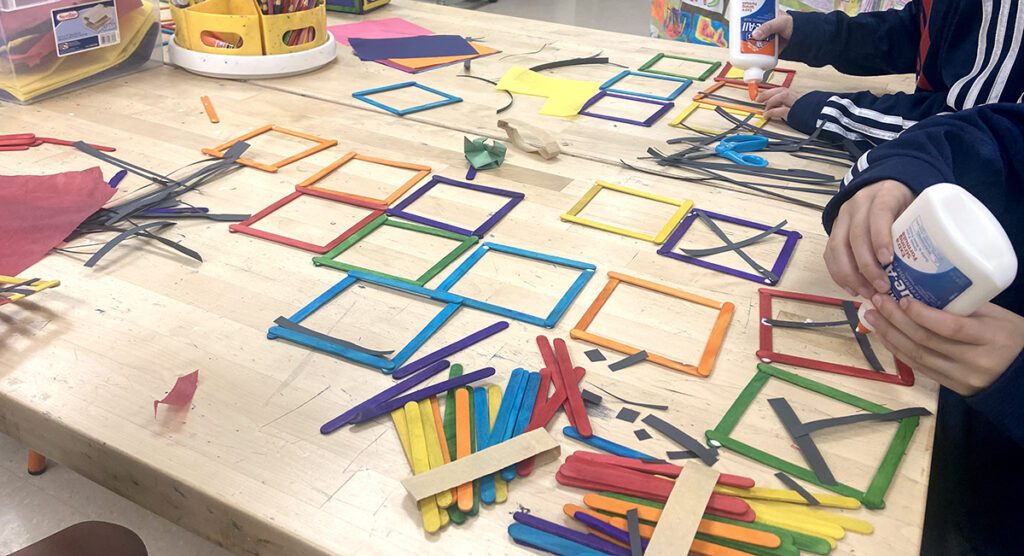
Turn basic shapes into forms with a Mondrian-inspired sculpture.
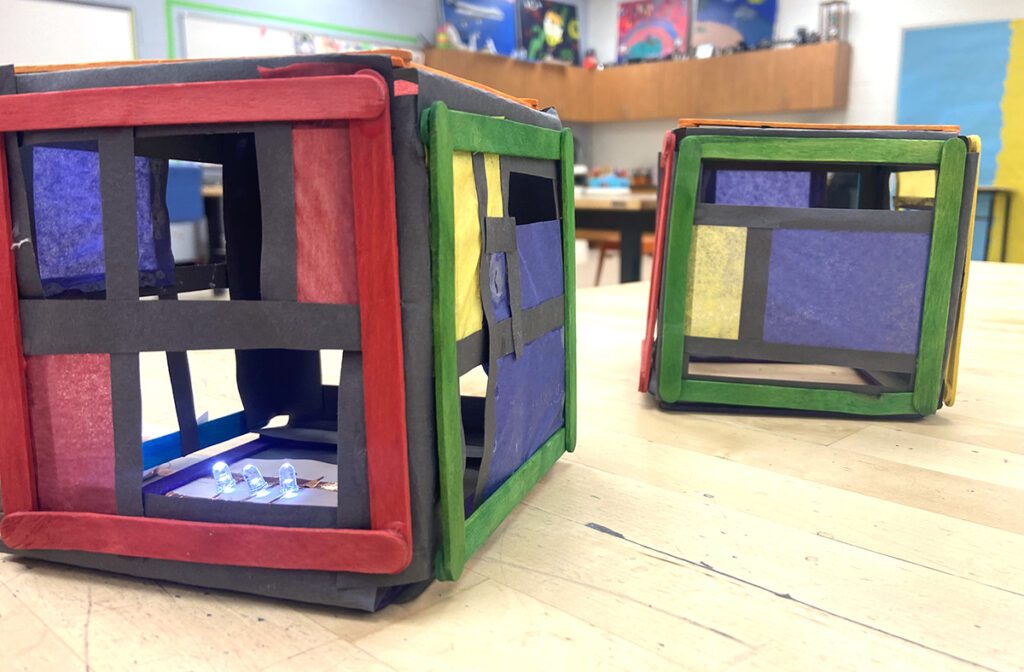
Piet Mondrian revolutionized abstract painting by breaking things down into the most essential elements. Try this idea to teach or reinforce the elements of art. Students will love building a form that feels anything but basic with the steps below!
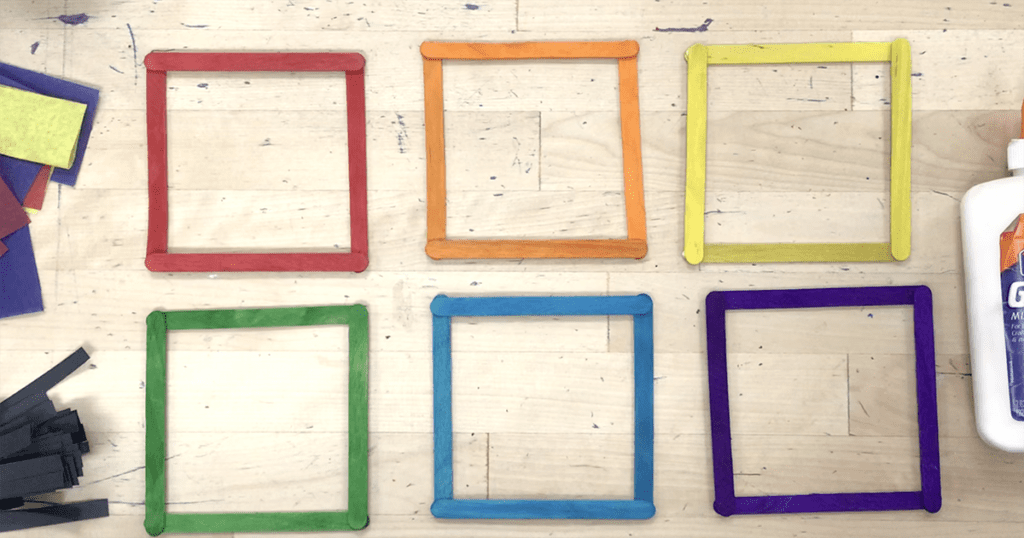
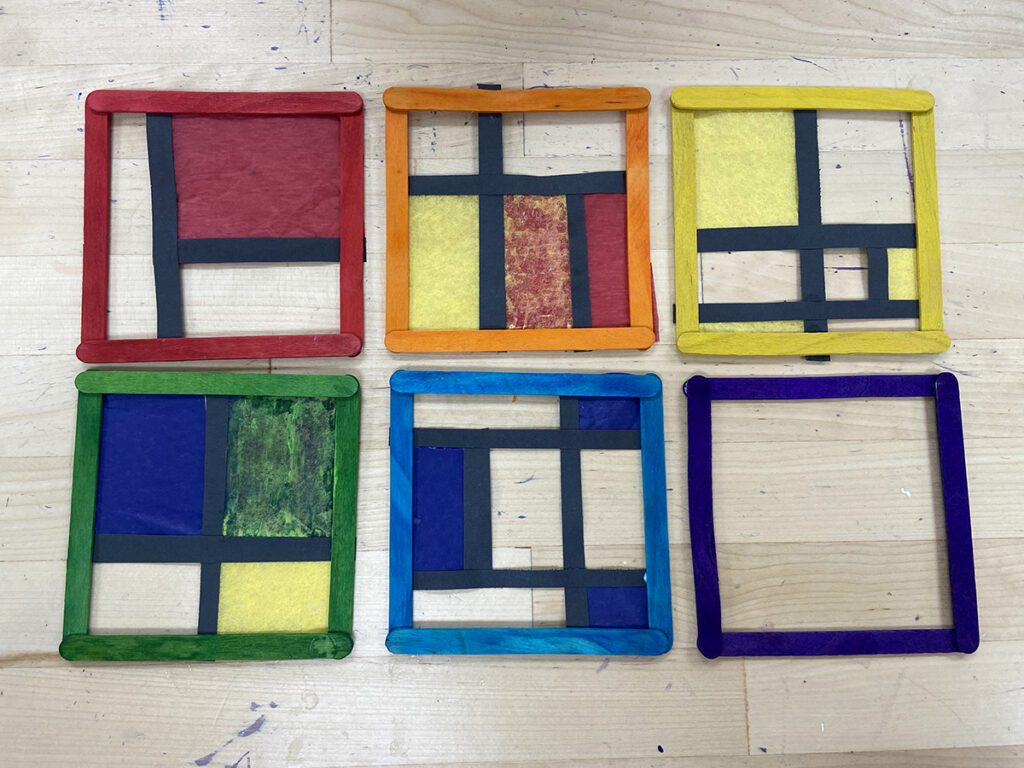
1. Glue six squares of craft sticks.
2. While the glue is drying, introduce Piet Mondrian and his artwork with the FLEX artist bio discussed above.
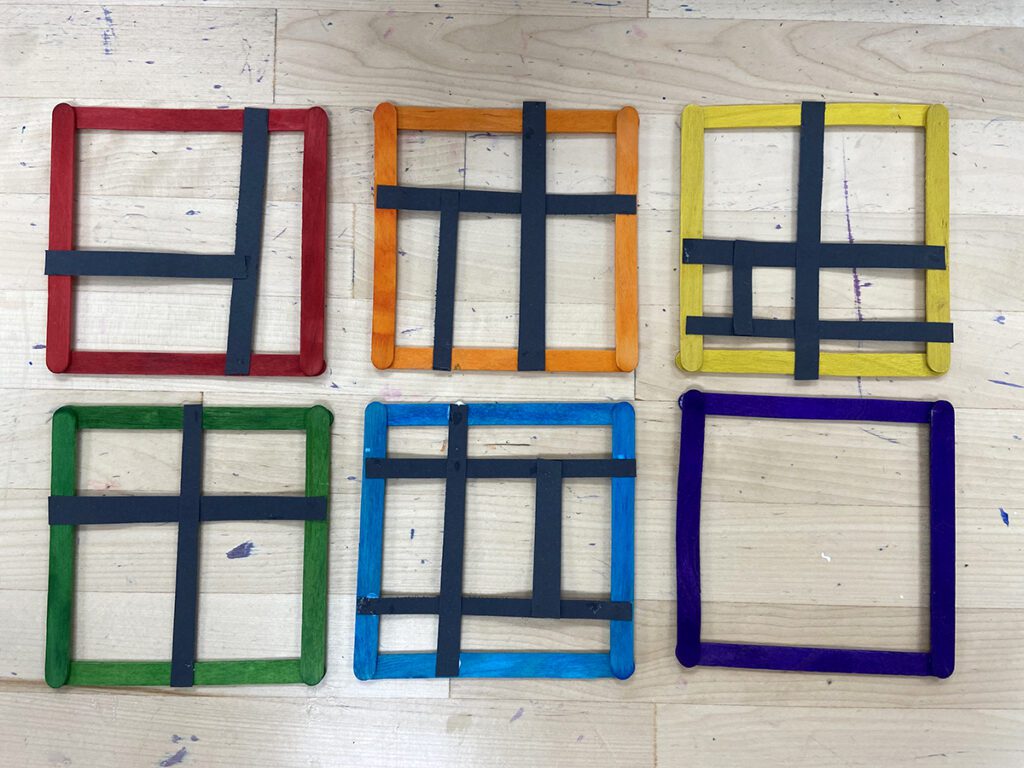
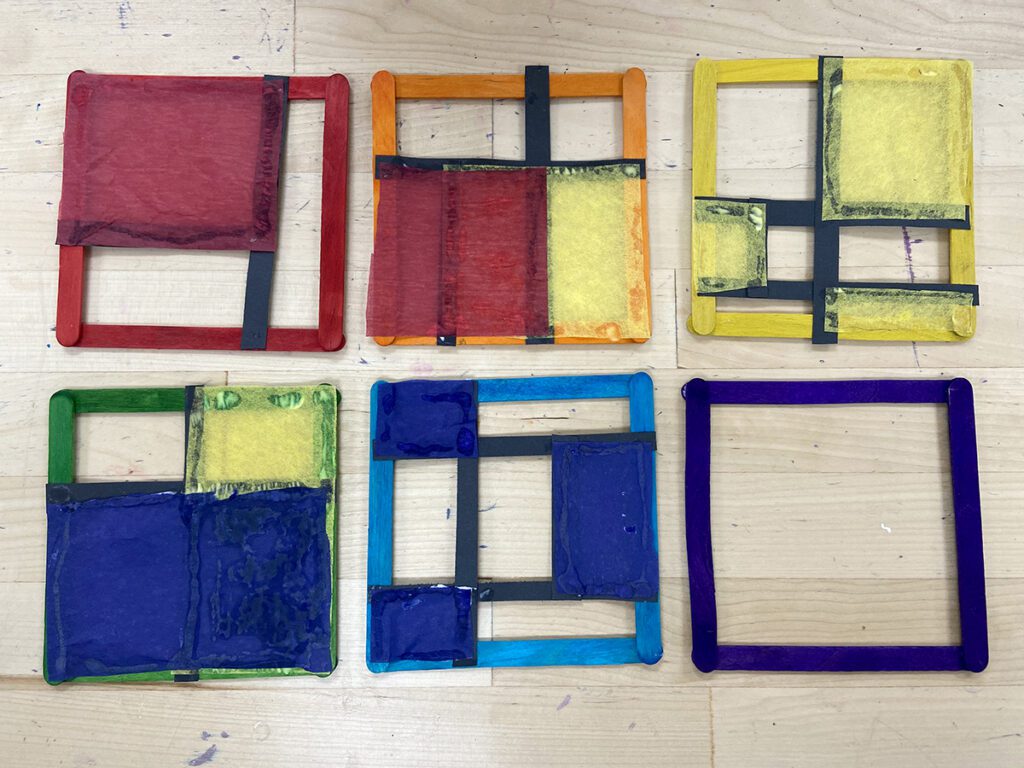
3. Apply the principles of design to make interesting compositions on multiple squares with construction paper and tissue paper. Leave one square empty for easy access to the interior during gluing.
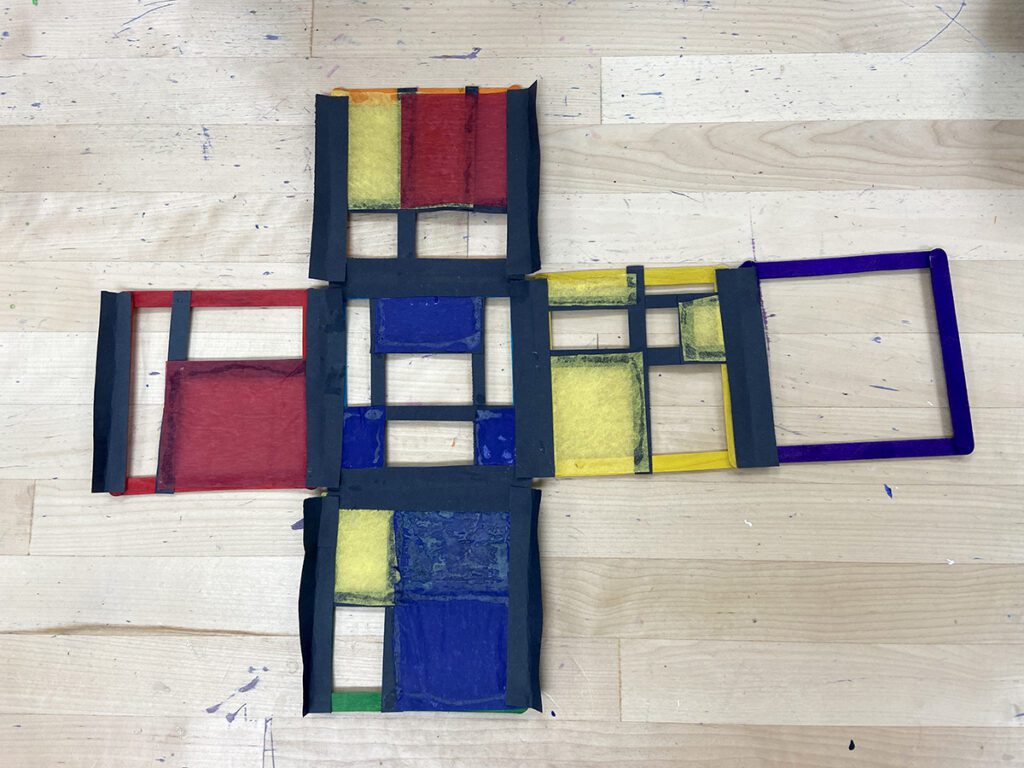
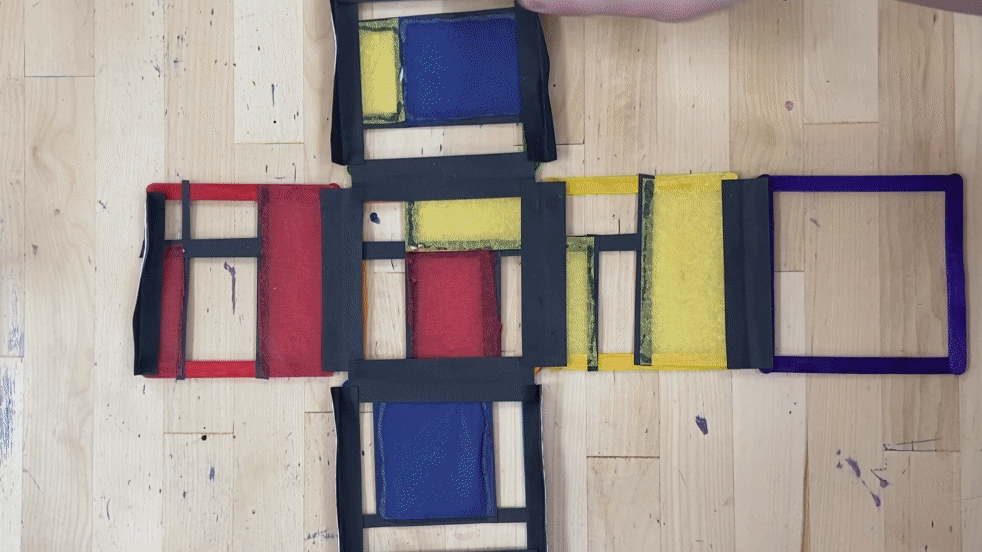
4. Arrange the six faces of the cube as a flat “t” shape. Crease strips of paper and glue them to the craft sticks to create hinges that connect all of the squares. If you plan to wire the sculpture using paper circuits, set the piece aside and wire the lights on a strip of paper while the glue dries. For easy wiring instructions, skip to the steps in the next section.
5. Fold up the sides to form a cube and secure with glue.
Use paper circuits for a STEAM connection.
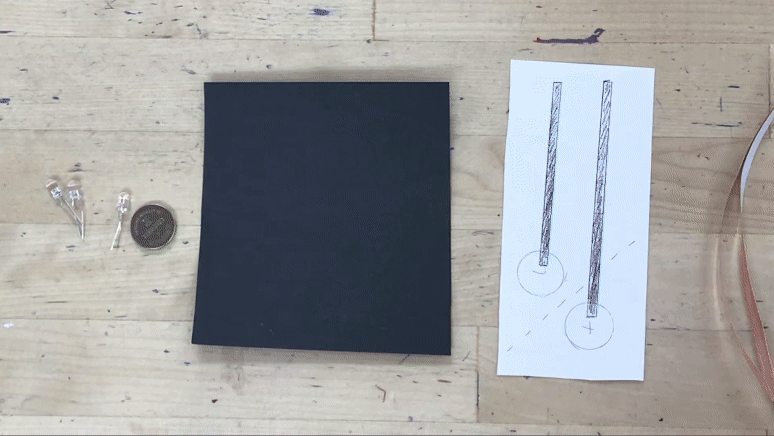
Add LED lights to the sculpture to amaze your students! You may be surprised to learn that working with paper circuits is easy. All you need for a parallel circuit are a few basic materials including copper tape, LED bulbs, and a coin cell battery.
Follow the steps below to add lights:
- Run two parallel lines of copper tape down the paper an inch apart. Stick as many LED lights as you like on the circuit as long as they are all oriented the same way.
- Mark one line of tape with a “+” and the other with a “-.” It doesn’t matter which is which.
- Each LED light has a positive (+) terminal and a negative (-) terminal. Bend the positive terminal (the longer metal prong) so it touches the “+” line of tape. Bend the negative terminal on the LED light so it touches the “-” line of tape.
- Tape the LED lights in place with copper tape.
- Fold one end of the paper at a 45-degree angle to make a switch. The two lines of copper tape should align as though to come in contact with each other.
- Attach the battery at the end between the two pieces of tape. The positive terminal on the battery must make contact with the “+” line of tape and the negative terminal on the battery must make contact with the “-” line.
- Open and close the fold or “switch” to turn the lights on or off. Use a binder clip to keep the paper folded and the circuit closed.
Adjust this project idea for different levels.
For younger artists, keep the design simple. Focus on color theory so each side represents a different color scheme or color relationship with the layered tissue paper. Older artists can represent a different element or principle on each face of the cube. Alternatively, students design each face of the cube in the style of a different art movement, artist, or theme.
Piet Mondrian is a staple in many art curriculums because his work emphasizes the elements of line, shape, and color. Show Mondrian’s paintings and FLEX Curriculum artist bio to your students to introduce this iconic artist, kickstart great discussions about abstract art, and help them visualize the elements and principles of art. Bring your standard Mondrian lesson to another dimension with this idea that transforms shapes into forms and encourages a STEAM connection. Make your students’ projects and smiles truly shine with this idea!
What is a favorite project you’ve recently refreshed?
How do you fuse art history and STEAM in your art room?
Magazine articles and podcasts are opinions of professional education contributors and do not necessarily represent the position of the Art of Education University (AOEU) or its academic offerings. Contributors use terms in the way they are most often talked about in the scope of their educational experiences.