It’s time to learn something new! Needle felting gives you the opportunity to create in different ways and with some different materials. In this episode, Cassie gives you an overview of her favorite–and most dangerous!–tools (6:00), all of the different surfaces you can use for needle felting (10:00), and processes and techniques that will work for you (14:30). Full episode transcript below.
Resources and Links
- Some of Cassie’s favorite needle felted sweaters
- All Things Needle Felted
- Here is the rundown of the Studio: Fibers course that Tim mentioned
Transcript
About four years ago, I remember I was having one of the those days. I had gone to art teacher in battle and I had lost and the kids had totally won. You all know what I’m talking about. Every now and then, and maybe more often than we’d like to admit if you’re me, we have those days. When I have days like that, I like to treat myself because after all, I have gone to battle and lost. So, I should have a reward or something. These are the things I tell myself.
Anyway, really close to where I teach is a cute little downtown and in that downtown is my most favorite store Anthropologie. Now, you ladies out there, if you’re familiar with the store, then you know there is no section of Anthropologie where people who teach should be shopping. Meaning, everything in there is so wildly expensive. It’s kind of bananas, but, hey, I will treat myself.
When I spotted this one sweater, I locked eyes with the sweater and I just thought, “You know what? After the day that I have had, that sweater is coming home with me. I don’t even care what the price tag say is. I’m buying it.” That’s what I told myself until I actually did see that price tag and saw that it was pretty close to $200 and I dropped that thing like it was a hot potato.
That’s when I looked at it again after, of course, picking it up off the floor and as I’m examining this sweater, I realized I maybe could make this sweater. It appeared to be felt in the sweater. Perhaps it was something that I’d heard of called needle felting. I wasn’t really sure but I thought that after a little bit of investigation on the YouTubes, I might be able to figure it out.
That night, I went home and I started messing around on the YouTubes and that’s when I found this video of a little British woman who is needle felting. She was on a talk show and she was sitting next to a younger lady and the younger lady asked her, “So, what can you needle felt on?” And she said, “You can needle felt on anything?” And the girl said, “Do you mean you can needle felt on like a coat or a jacket or a sweater?” “You can needle felt on any surface. It doesn’t matter what it is.” And the girl like me just kept asking her. “What about jeans? What about this? What about that?” Because my mind suddenly was racing with ideas and when she said, “Needle felt on anything.” I suddenly went to my closet and started digging out just about anything that I could possibly embellished and/or decorate.
I have been happily stabbing things. That’s what needle felting is ever since. I thought I would share that process with you today, how you can enjoy this new craft, how you could bring it in your art room. Let’s today chat about all things needle felting. I’m Cassie Stephens and this is Everyday Art Room.
One of the reasons I thought I would share the process of needle felting with you today is because when I discovered that sweater and I learned how to needle felt, I found this brand new craft where I suddenly was so inspired to create. A couple of weeks ago, in fact, back on Episode 22, I was talking to you about how to breakout of your creative slump.
Now, it was several years ago for me when I found myself in that creative slump and when I was chatting with you all about it, what I realized something I didn’t necessarily touched on too much was exactly what craft or what artistic path you could possibly be taking to help get yourself motivated out of that slump. When I found myself in that slump, I knew that I wanted to be creating and making something but I didn’t know what.
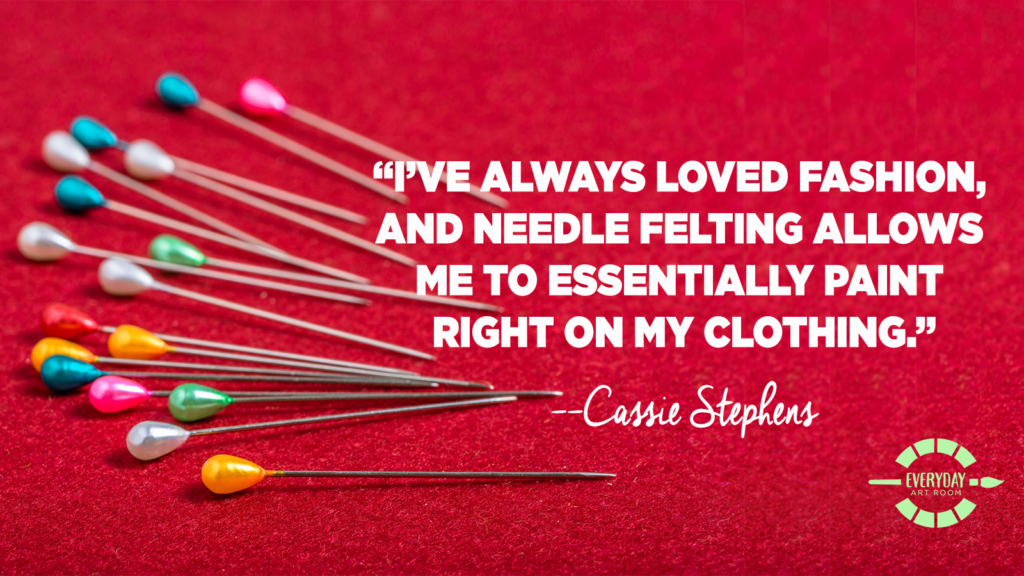
When I found needle felting, I suddenly realized that I could put together a couple of things that I absolutely loved. I used to really enjoy painting. I have always loved fashion and in this respect, with needle felting, you’re essentially using fibers to paint on your clothing, at least if that’s the avenue you want to take when it comes to needle felting. You don’t have to limit yourself, however, just to needle felting on clothing. I’ve needle felted works of art, little postcards a little bit with my mom. I’ve done some three-dimensional needle felting but we’re going to focus today on the 2D.
Perhaps on an upcoming podcast, we can chat more about three-dimensional needle felting, but all of that to say, this is the creative outlet that really pushed me out of my slump. So, as you can tell, I’m very passionate and excited to share needle felting with you all today. And hopefully, if you find yourself searching for a new craft, this will be something that you’ll give a shot.
So, if you decide to give needle felting a go, let’s just chat about the supplies, and if you’re a visual person, I have been sharing a lot of needle felting projects currently on my blog, a lot of times with video so you can put a picture with the words that I’m sharing with you.
So, supplies. Needle felting supplies, they aren’t necessarily cheap. Just know that this craft is probably going to run you about 50 bucks just to get yourself started. My most favorite tools and I’ve tried several different needle felting tools. I’m going to share with you the ones that I absolutely love.
My favorite needle felting tool is created by the brand called Clover and it is a pink needle felting tool. It looks like a pen or a marker. It’s about the size of a marker and that’s how you hold it in your hand, and that’s why I like it so much because it’s not too big. It’s just the right size. In this particular needle felting tool by Clover, there are three needle felting needles.
Now, let’s chat about that. When you are needle felting, you are not using a sewing needle. You are using a very specific needle that’s designed just for needle felting. So, if you can picture this in your mind, it is a razor-sharp-at-the-end needle and it’s also barbed. If you accidentally hit your flesh as you’re needle felting, I promise you it’s going to hurt, number one, and number two, there will be blood. Therefore, no sharing of needles, my friends.
It is a slightly dangerous craft so why not live life a little bit dangerously. Anyway, just so you know, that’s the kind of needles that I’m talking about. If you’re needle felting and you’re using that Clover tool, it comes with three very thin and fine needles inside the tool. However, those tiny little needles, they’re very brittle and I have found that they break easily.
If you’re shopping for your needle felting supplies, you might want to invest in backup needles because they do break and you can actually get a good size pack of maybe 15 needle felting needles which is great for plus size from anywhere online and those needles are a little bit thicker. They create a bigger puncture hole when you’re needle felting but trust me, in the end, it’s not going to make a difference. Those needles are the ones that I actually use in my Clover pen tool.
So, that’s a little bit about the first supply that you have to have which are those very specific needle felting needles. Now, let’s talk about the cushion that you’re going to have underneath what it is you’re needle felting. You have to have a cushion underneath what it is you’re needle felting because if you don’t, when you stab the surface of the fabric on a hard surface like a table, you’re going to break your needles. That cushion makes so that you won’t break your needles.
There is a wide variety of cushions that you can get from like foam blocks, upholstery foam works pretty good, my favorite thing. Now, these are supplies that I buy personally. I’m going to share with you what would be good student grade supplies and therefore, a lot cheaper. But me personally, it’s another supply by Clover brand and it looks like a bristle brush, something you might scrub your tub out with if you’re a person that does that. I’m not.
Anyway, so, it looks like a scrub brush and it sits underneath the surface. And as you are stabbing with your needle felting tool, those little fibers of the scrub brush, they tend to wiggle and move out of the way so that you can easily puncture the surface but also have a cushion so you don’t break your needles. If you’re going to buy that cushion, go for the bigger ones, splurge. Don’t be like me and get the teeny-tiny one especially if you want to needle felt something large like a dress or a coat, so you’re not having to constantly move around that tiny little cushion.
Now, the last thing you’re going to have to buy which is probably the most expensive is wool roving. When you are needle felting, remember, you can needle felt on any surface. It doesn’t have to be wool. That was my biggest misconception. I, for the longest time, was only needle felting on wool sweaters. Not so. I have forgotten what my British friend had told me. “You can needle felt on anything.”
The surface itself, that does not matter, but the roving must be wool. Don’t confuse the look of this stuff with cotton batting which isn’t going to do the trick. Wool roving can be purchased online. If you buy it at the craft stores, you are not going to get the best grade of wool roving for needle felting. It’s going to feel a little bit more coarse and more wiry, that’s because it’s cheaper and because it’s probably better for something like wet felting.
For needle felting, you want a roving that feels almost slick and smooth. If I were you, I would look into buying it locally. If you aren’t sure how to find somebody that’s selling it locally, try reaching out to a local fibers guild. Do a little Googling, see if there’s a fibers guild in your neck of the woods. Contact the fibers guild and they can probably put you in touch with a local supplier.
However, if you’re like me and there is no fibers guild in your town like what, maybe we need to start one, people, then you can reach out to a couple of my favorite suppliers. Sue at Back to Back Fiber has beautiful wool roving as does Natasha at Esther’s Place. Those are a couple of my favorite resources to pick up roving.
Now, last but not least, another thing you can also needle felt is yarn. I also thought that it was only to be wool yarn but you can actually needle felt any kind of yarn. I have found that wool does needle felt a little bit easier. All right, once you have all of your supplies, let’s chat about what you can create.
If I were you, I would start small. I lead a lot of needle felting workshops and at these workshops, I always do the exact same project, so I’m going to walk you through it. I give everybody a small 4′ x 6′ wood color piece of felt and I’m talking craft store-grade felt. On that piece of felt, everybody gets a stick of chalk and they draw out or trace the templates that I bring the shape of a palette. I absolutely love using chalk to draw on fabric because you can easily just brush it off. I like the white chalk and I like the cheap junky stuff.
If you use a really good chalk, it won’t come out of the fabric as much. I have everybody sketch out a little palette and use the wool roving to create little blobs of paint on the palette and commence stabbing. Let’s chat about that.
When I teach this workshop, the first thing that everybody has to learn is how to pull roving from the skin, we’ll call it, of roving. You never ever want to take a pair of scissors and cut the roving. You always want to pull roving off as if it is tufts of cotton candy. It’s going to look like cotton candy, pull it gently. I have noticed that the harder you pull on the roving, the fibers tend to lock into place. Pull very gently and know that with needle felting, less is more which is actually the opposite of wet felting.
Pull it very gently to get your small tufts for your little blobs of paint on your palette. Lay them in place and another tool that’s really helpful is a dull pencil or a skewer stick. Use that dull pencil or skewer stick to gently press or tack down the roving, then use your needle felting tool to stab or puncture the surface.
The reason you want to use your stick to hold the roving is because you don’t want your fingers to get in the way. Remember, there will be blood. So, use the stick and when you hold your needle felting tool, you will want to hold it perfectly vertical. The reason being is that you want those needles to stay straight up and down. They’re very thin. The moment that you kind of twist your wrist or twist your hand or hold the needle felting tool at a diagonal, those needles will snap, which isn’t a problem if you have a bunch of backup needles, but you don’t want to continuously change out the needles in your tool. So, holding it perfectly vertical is the way to go.
By the way, if you don’t have that needle felting tool, it’s just a matter of convenience anyway, simply hold one of the needles in your hand. I don’t love doing that because it makes my hand tired and it takes a little bit longer because you only have one needle as opposed to three, but if you just want to give it a shot, then go for it. You don’t have to have that tool.
As you’re holding your needle felting tool, you’re going to make sure your cushion is underneath your surface and you’re going to use that needle in an up and down vertical motion, stabbing, stabbing, stabbing. It’s going to sound like somebody is chewing a bowl of Captain Crunch. It’s very crunch, crunch, crunch.
You’ll know that you’re finished when you peel your palette or whatever it is you are creating off of the cushion and you can see a fuzzy version of your roving on the back. Also, when you flip it back to the front, whatever you have needle felted should not be a lump. It should not be three-dimensional unless you’re going for that look. It should be nice and smooth and when you push it gently with your finger, it should not be able to peel right up.
So, in my workshop, when people are doing their blobs of paint on their palette, that doesn’t take any time at all and to further set the felt, you can iron it but the wool roving felt onto the craft store felt, I should say. However, let’s talk about the difference. That craft store felt is made out of an acrylic material, and if you flip your palette over and iron it as I would recommend to help further felt the wool roving and make it nice and flat, if you have your iron turned up too high, it could cause the craft store felt to burn. And, I learned this the hard way when doing a project with my students, so just a little FYI.
That’s something basic that you can create. Once we’re finished needle felting those palettes, we cut them out. We attach them to a piece of tag board that is also the same shape and size as the palette. Add a little alligator clip to the back, and it’s a great hair piece for your hair, gentleman. You could also clip it onto your apron. I also like to hot glue one of those inexpensive craft store Dollar Tree paintbrushes to the palette just to give it a little bit of flair. That’s a really basic get-your-foot-in-the-door project.
If you want to go a little bit bigger, then you might consider heading to a thrift store, getting a plain sweater or even like I’ve done, a coat. Coats are really a big endeavor, so you might want to start small and consider needle felting on that. The beauty of that is, is if you mess it up, who cares?
The sweater that I started on was one that I found in my closet that had tiny little moth holes in it and I thought, “You know what? I’m just going to needle felt Kandinsky-esk circles onto the sweater wherever there’s a whole.” It turns out there was one million, trillion holes in the sweater and I was needle felting quite a bit. But that was my first needle felting adventure. I was inspired by that sweater Anthropologie, which had a very similar pattern. I just laid my sweater down and I needle felted a circle, and then I needle felted a smaller one on that, and then I needle felted a smaller one on that. It was that easy.
When you’re needle felting, I like to think of needle felting as having two methods that you can go about approaching it. Needle felting can lend itself beautifully to kind of an impressionistic look, and needle felting can also create like a paint-by-numbers flat cartoon look. I’ve done with the impressionist look. I’ve done a Monet dress. I have done a Munch’s The Scream, and I’ve also done Vincent van Gogh’s Starry Night because roving has that look of chalk. When you’re finished, it looks very painterly. It lends itself beautifully to doing that kind of flat work.
If you wanted to do something that was more cartoon-like or paint by number, it’s also great for that. When I did a portrait of my cat on my sweater, I drew out my cat in a very graphic and flat style, and then I pinned it to my sweater and then I used yarn. Remember, I mentioned yarn, to outline my cat. I took the template off and then I filled in my cat paint by number style. I cut apart my template where my cat’s muzzle was, pinned that to the sweater, outlined that in yarn and then removed it and filled in that space. I just approached that kind of style by layering the roving and outlining and filling it in. That’s why I call it the paint-by-number style.
The biggest question I get when it comes to needle felting, I get a couple and one of the biggest ones is this: How do you finish it? Whenever I’m finished needle felting, remember I mentioned flipping it over and ironing it? I always do that. Flip whatever garment that you’re creating on inside out. If it is not an acrylic like a craft store felt, then crank your iron up to a steam setting and steam iron your garment. And like I said, that will further felt it. Felting happens when there is moisture and agitation. You’ve already agitated the daylights out of this garment by stabbing it so much, so when you iron it with that steam, it will further felt it. It will also flatten it.
The other big question I get is, how do you wash it? Great question. You don’t essentially … I’m just kidding. You have to hand wash it. It’s like having a 100% wool sweater. I learned back in college when I started doing my own laundry, that if you throw a 100% wool sweater into the wash machine where there’s water and agitation, it is going to shrink. If you throw something that you have needle felted into your wash, it is going to shrink.
For example, I needle felted a button-down shirt with a pencil and a crayon sticking out of the pocket. I needle felted those things popping out of the pocket. I forgot about it, threw it in the wash machine. And what happened was, is that part of my shirt shrunk and got wrinkled and weird. And the rest of the shirt looked fine, meaning, that part felted itself and the rest of the shirt did not. Needless to say, I can no longer wear that top. Hand washing or dry cleaning is what you would want to do.
Whoa! I feel like I just gave you a Needle Felting 101. I hope you have some ideas for things you can make. I hope you’re inspired. Obviously, this is something I’m very passionate about, so please keep me posted. If you give this a shot or if there’s something that you create, I would love to see it. Thank you so much for letting me share my most favorite craft with you all today.
Tim Bogatz: Hello. I hope you’re enjoying this episode of Everyday Art Room. If you’re looking for even more in-depth learning about needle felting and fibers in general, I want to recommend the Art of Ed Studio: Fibers online graduate course. Cassie’s videos and teaching play a role in your learning in the course, and I think it’s something you will really love.
In this course, you can experiment with a wide variety of 2D and 3D weaving, felting and embroidery techniques. You will create resources, tools and hands-on fiber art examples to use directly in your classroom, and you can even put your own personal practice to the next level while revamping your fiber art curriculum.
Studio: Fibers is a three-credit-hour course that runs for eight weeks. New sections start on the first of every month. You can see more about the class or register at the artofed.com/courses. Now, let’s see what Cassie has to say as she dips into the mailbag and goes on with the rest of the show.
Cassie: All right, you all, let’s take a little dip into the mailbag. This question is all about felting, what do you know? It may or may not inspired our chat today. It comes from Lynn. She says, “Hey, Cassie. I do have a few questions regarding felting. Every time I felt on something, the felting just peels off like a Band-Aid. How do you get yours to stay on? Also, washing. Do you still wash acrylic sweaters in the machine or do you hand wash them since it’s wool or use the wool setting on the machine?” There’s a wool setting on the machine?
Anyway, let’s first address that first question about peeling off like a Band-Aid. I have a feeling that Lynn could possibly be using too much roving because I’m imagining that it’s a little bit 3D sitting on the surface, and that’s why it easily plucks off.
As you are laying the roving on something that you’re needle felting and you’re pulling out those tufts of roving and laying it on the surface, you want to do something called shingling. Shingling means you’re just laying a small tuft, imagine it like a tuft of cotton candy, onto your surface and then overlapping another. Those are like shingles on your roof. If you’re bunching the roving up or rolling it into a bowl before laying it on your surface, then it’s going to create that three-dimensional lump.
Now, if she does want to make something that’s round and she’s laid those shingled tuft pieces of roving on her surface, what she can do is as she’s stabbing with her needle felting tool, she can gently … This is what I do … Scrape the surface of the roving inward to create the shape that she wants to and then stabby, stabby, stabby, gently come to create the shape and then stab with the tool. What that will do is make it so the edge is not raised in three-dimensional and doesn’t get picked at or flick off easily.
Remember what I said, when you’re needle felting, less is actually more. And you can always add more. But if you use too much, then you’re going to end up having to peel it off. And once you’ve peeled it off and it’s already been felted a little bit, you’d probably not going to want to use it again, which means you want to throw it away and that’s kind of a waste.
Let’s address that question about washing it. Just like I mentioned before, you probably … For me, I always err on the safe side. If you’ve spent hours working on something, a needle felt a sweater or a coat or anything that you cherish, I would recommend then hand washing just to make sure that all of your hard work doesn’t go down the drain, like literally. See what I did there? I would make sure to always hand wash or dry clean.
Thanks for the question, Lynn. Perfect timing. If you have a question for me, please feel free to send it my way. You can email me at everydayartroom@theartofed.com.
Oh, my word. I’ve talked so much about needle felting that I realized I never addressed how to do needle felting with kids. So, sorry, but guess what we’ll be talking about next week – needle felting in the Art Room! You got it kiddos. Let’s chat about that next week. As you can see, there’s a lot to go into when it comes to needle felting, and it’s a whole another bowl of wax when it comes to working with the kiddos with needle felting. We will be chatting about that next week. Thank you so much, guys, and have a wonderful week.
Magazine articles and podcasts are opinions of professional education contributors and do not necessarily represent the position of the Art of Education University (AOEU) or its academic offerings. Contributors use terms in the way they are most often talked about in the scope of their educational experiences.
