Teaching art from a cart presents many unique challenges. Limited space, the lack of sinks, the bumpy cart, and other issues complicate nearly every task. So, when I learned I was going to be teaching art from a cart, I thought my days of using natural clay with my students were over. Teaching clay just seemed to be out of reach.
However, my art standards required several of my classes complete at least one natural clay project each year. So, regardless of the challenges, I had to figure out a way to make it work. Through a great deal of trial and error, I was able to develop a system to teach clay. This system actually made teaching clay easier than teaching many other art mediums!
These 6 survival tips will help you teach clay from a cart with ease.
1. Keep it simple.
When teaching from a cart you must simplify everything. When working with clay, I recommend keeping projects small and using minimal materials. For example, avoid lessons that require rolling pins. They are large and difficult to transport.
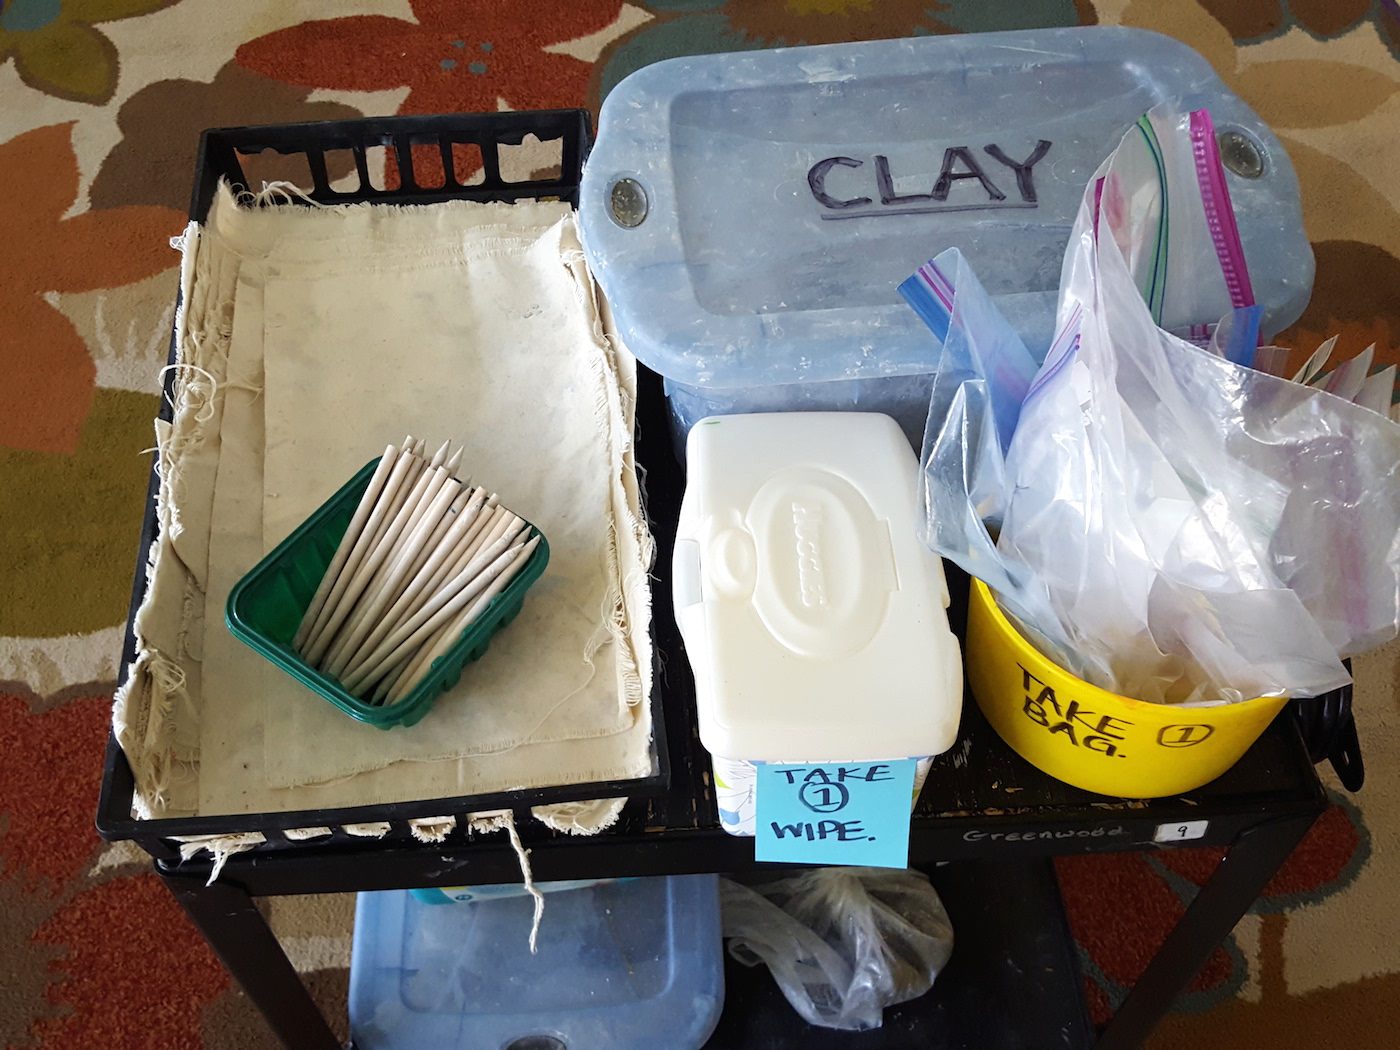
2. Set up your cart so students can gather and return their own materials.

Allow students to gather their own materials. This simplifies the cumbersome process of handing out supplies. Make sure to label everything and give clear directions. Then, you can call students individually or by small groups to get what they need from the cart. This works in a wide variety of different classroom configurations.
3. Use stylus sticks.
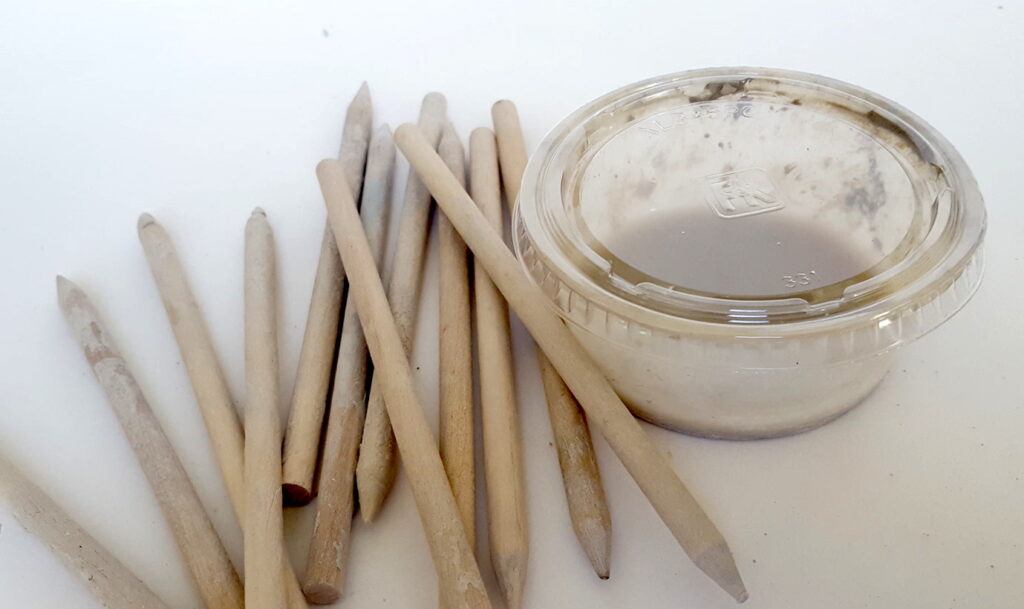
Instead of providing students with a variety of clay tools, I find it easiest to provide only stylus sticks. These sticks are the most versatile clay tool around and are small and easy to transport. They work great for most elementary clay projects. Students can use the pointed end to write their names on the bottom of projects, draw in designs, and even cut through clay as you would with a needle tool. They can also hold the sticks in a variety of ways to stamp in different designs such as dots and lines.
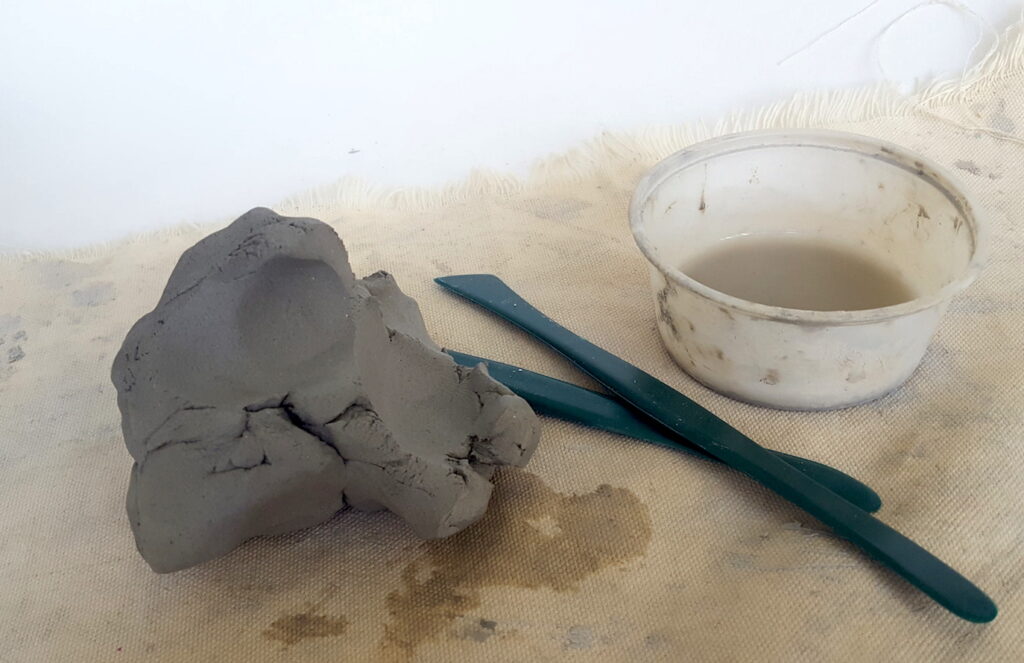
4. Use condiment cups for slip.
Condiment cups, the small plastic cups used at restaurants to serve sauces, can be purchased with corresponding lids from most art supply catalogs. They are essential when teaching from a cart. They are small, easy to transport, inexpensive, and will help you avoid spills. When using clay, they are perfect for slip. Prepare a cup for each student.
5. Store work in plastic sandwich bags.
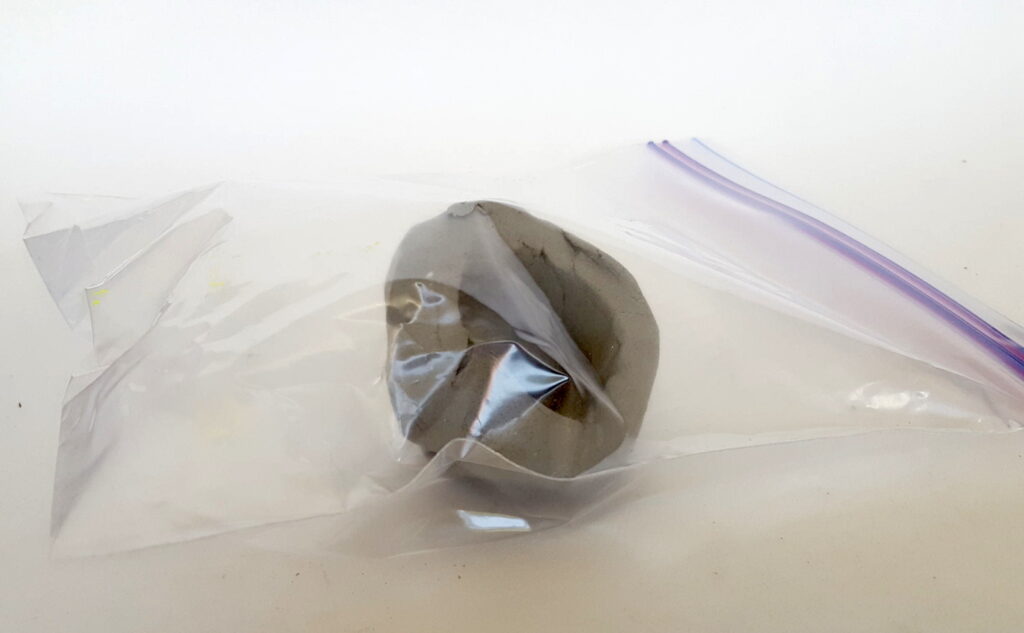
I use this tip even when teaching in a standard classroom. Sandwich bags will keep work moist between classes. I have students use Sharpie markers to write their names on the bags. I store the projects in a large plastic bin for easy transport.
6. Baby wipes are great for cleanup.
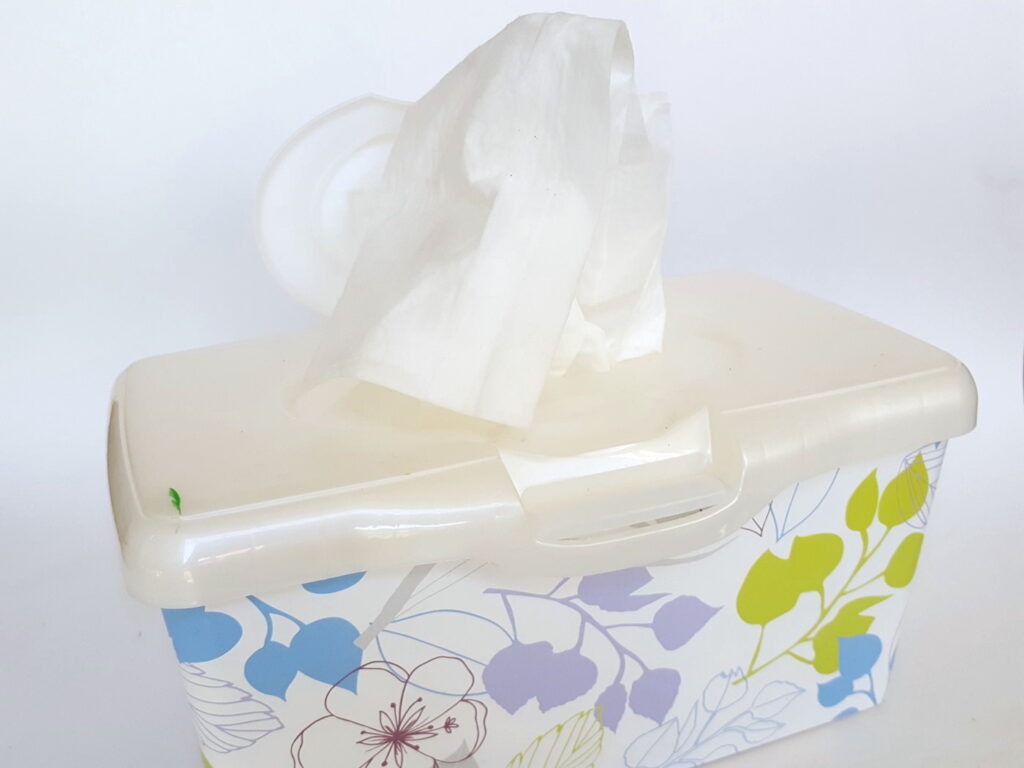
When teaching from a cart, cleanup is one of the biggest challenges. Without sinks, how can you get 25 kids cleaned up quickly? Baby wipes are a great solution. Give each student a wipe after they have returned their supplies. These can be used to clean both their hands and their table.
So there you have it – six essential tips to make teaching clay from a cart possible. These tips helped me provide my students with quality clay instruction for many years, even though I was teaching from a cart.
What tips do you have for teaching clay from a cart?
What are your favorite clay lessons to teach from a cart?
Magazine articles and podcasts are opinions of professional education contributors and do not necessarily represent the position of the Art of Education University (AOEU) or its academic offerings. Contributors use terms in the way they are most often talked about in the scope of their educational experiences.