It seems as though there are always questions swirling about air dry clay, with many teachers wondering if they should even bother with it at all.
With the cost so high, is it worth it?
 That was the question I set out to answer when I recently sat down with Cassie Stephens. You may know Cassie from her well-loved blog, busy Facebook page, or lively presentations at the AOE Art Ed Now Conferences. But what you may not know is that Cassie just finished writing a book all about non-earthenware clay. This means clay that is air-dry or clay that cannot be fired in a kiln.
Clay Lab for Kids: 52 Projects to Make, Model, and Mold with Air-Dry, Polymer, and Homemade Clay is FULL of ideas of different ways to use non-earthenware clays. The projects are sure to teach your students basic modeling techniques. And, as a bonus, the majority of the activities in the book can also be done with kiln fired clay as well!
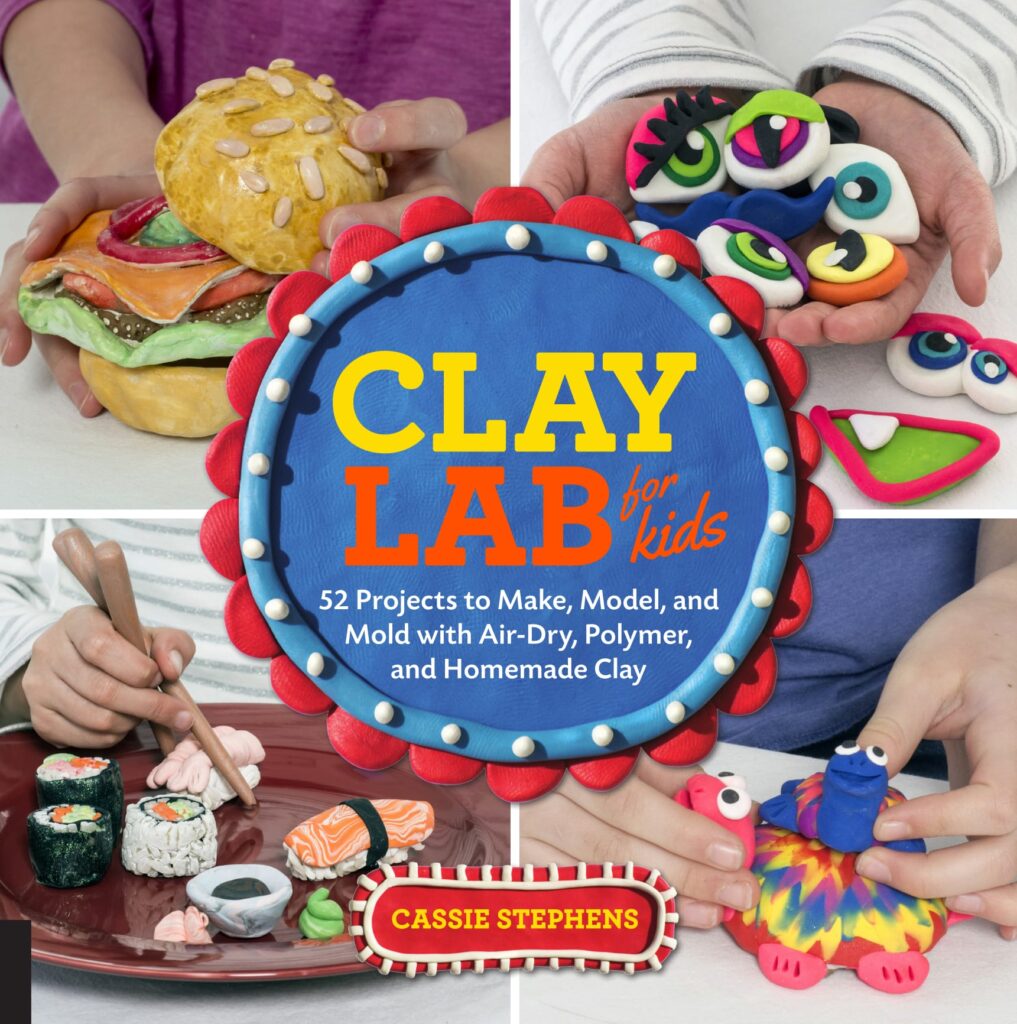
Not only did Cassie author the book, she also provided all of the photos. This meant she actually had to make and test all 52 projects. With that much time spent creating with different air dry clays, I knew she’d be the perfect person to talk to.
However, before we dive in, I want to mention that Cassie said that if you have a kiln, you should use it. Nothing will replace the experience students have with actual earthenware clay.
That said, not all art teachers have a kiln. Even if you do, you may have a situation where you need to use air dry clay. Working with a short time frame, catching up a student who was absent, or having a student re-do something that blew up in the kiln are all times when air-dry clay could be your friend.
So without further ado, here are 5 things you need to know.
On the differences between air dry and earthenware clay:
I asked Cassie about the biggest differences between earthenware clay and air-dry clay. Her answer, “It’s funny, but they’re not as big as you’d expect.” She went on to say, “Many of the air dry clays I tried had a similar look and feel as kiln fire clay. You can even use the slip and score method to attach pieces.”
Of course, it never gets as hard as something fired in a kiln. But Cassie did say that adding a coat of Mod Podge or acrylic paint can help make items stronger. She recommends sending finished pieces home the same way you do earthenware clay, wrapped up to protect them!
On figuring out which brand to purchase:
We all know that air dry clay can be expensive and that there are a lot of brands on the market. That’s why Cassie suggests buying a small quantity of a few brands and testing it out yourself. “This way,” she told me, “you can foresee any problems your students might encounter with the clay.”
After buying almost EVERY kind of air dry clay on the market for book research, Cassie recommends the following three brands:

On the flip side, Cassie said if you truly want to approximate a ceramic experience for your students, steer clear of Model Magic, other “cloud clays,” and paper clays. They just don’t have the same properties as the other air dry clays mentioned.
Finally, Cassie shared this tip with me, “I have been sent air dry clay that is rock hard before. Don’t be afraid to send clay back to the supplier if that ever happens to you!”
On the required drying time:
One of the most important things to think about with air dry clay is if it’s going to actually dry. In Cassie’s book, she has a great recipe for an air-dry salt dough that you can make yourself. However, she cautioned that things can get moldy, especially if you don’t flip them. For that reason, she said, “I would recommend putting finished projects in front of a fan to speed up the drying process.”
On keeping things pliable:
While Cassie made all of her projects in one sitting, she said wrapping everything tightly in plastic wrap should keep things moist if you need your students to work on them over multiple class periods.
On adding color:
I asked Cassie about adding color to air dry clay. She told me, “Acrylic, tempera, and gouache cover air dry clay projects well. I would not recommend watercolor as that tends to rejuvenate the clay making everything really sticky.”
Once the color is added, you can add a coat of Mod Podge or clear spray varnish to make the pieces a little tougher and add a bit of sheen.
The bottom line?
According to Cassie, “If you don’t have a kiln, the biggest pro to air dry clay is that it will give your students a very similar experience. Not having a kiln does not mean your students won’t have the opportunity to create with a modeling medium.”
Give it a try!
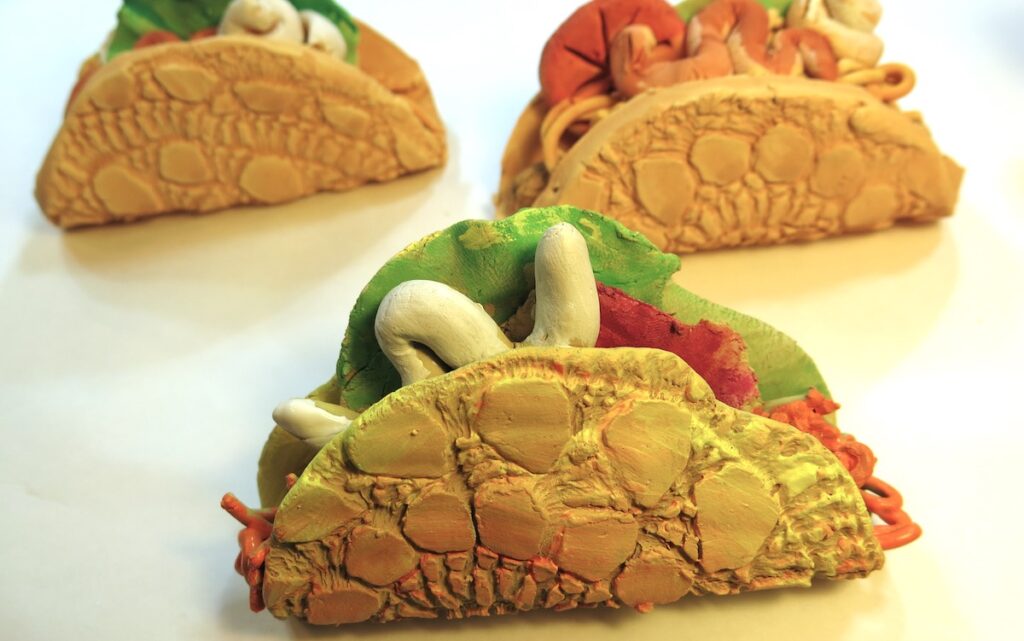
If you’re looking to test out air dry clay in your classroom, consider the fun clay taco lesson below. It’s a delicious way for you or your students to dig into air dry clay. It also gives your students the chance to practice basic skills like scoring, slipping, achieving the right thickness and more. Let’s have Cassie walk us through it!
Clay Tacos
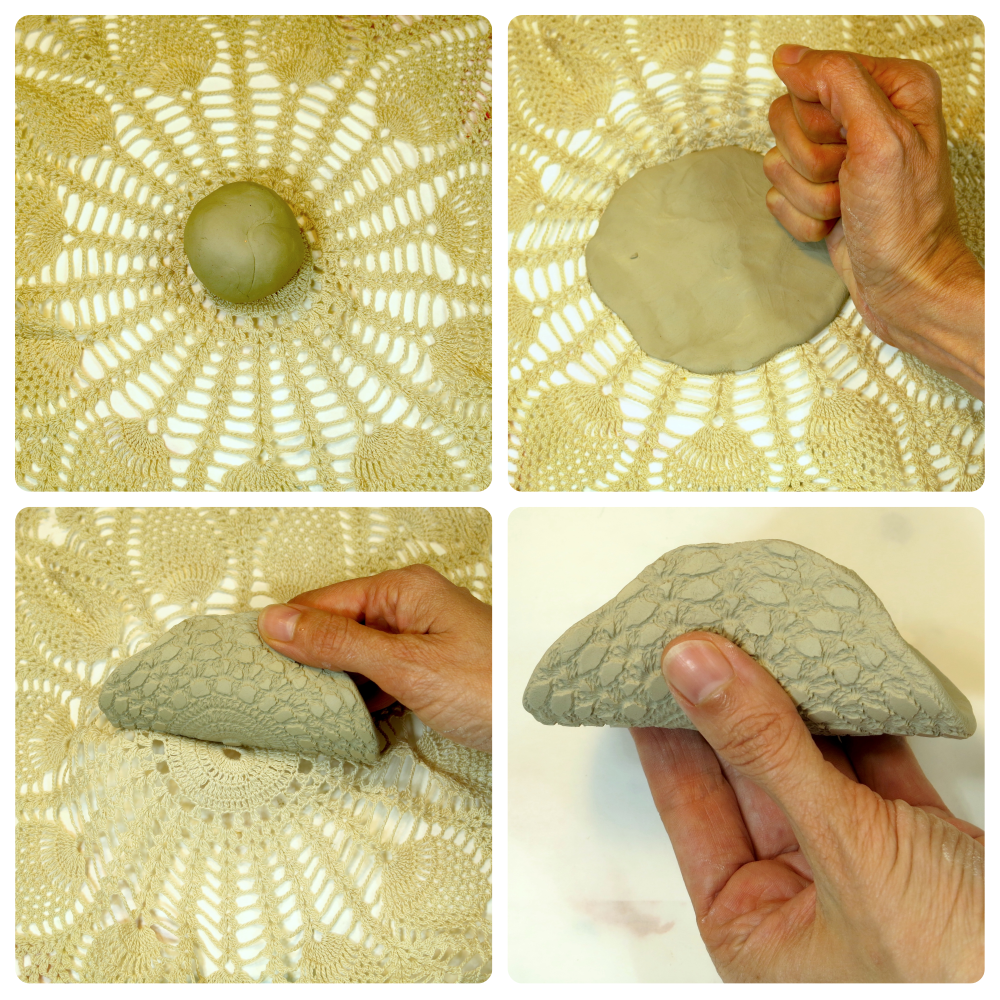
1. Start with a piece of clay the size of a tangerine. Place it on a surface that has a texture. Doilies, burlap, and lace work great! Just don’t use grandma’s heirlooms.
2. Pound the clay with your fist until it is as thick as a cookie. Peel the clay off the textured surface and admire the amazing textured imprint!
3. Fold your flattened disk into the shape of a taco shell and set aside.
4. Use a garlic press or other small extruder to create some cheese.
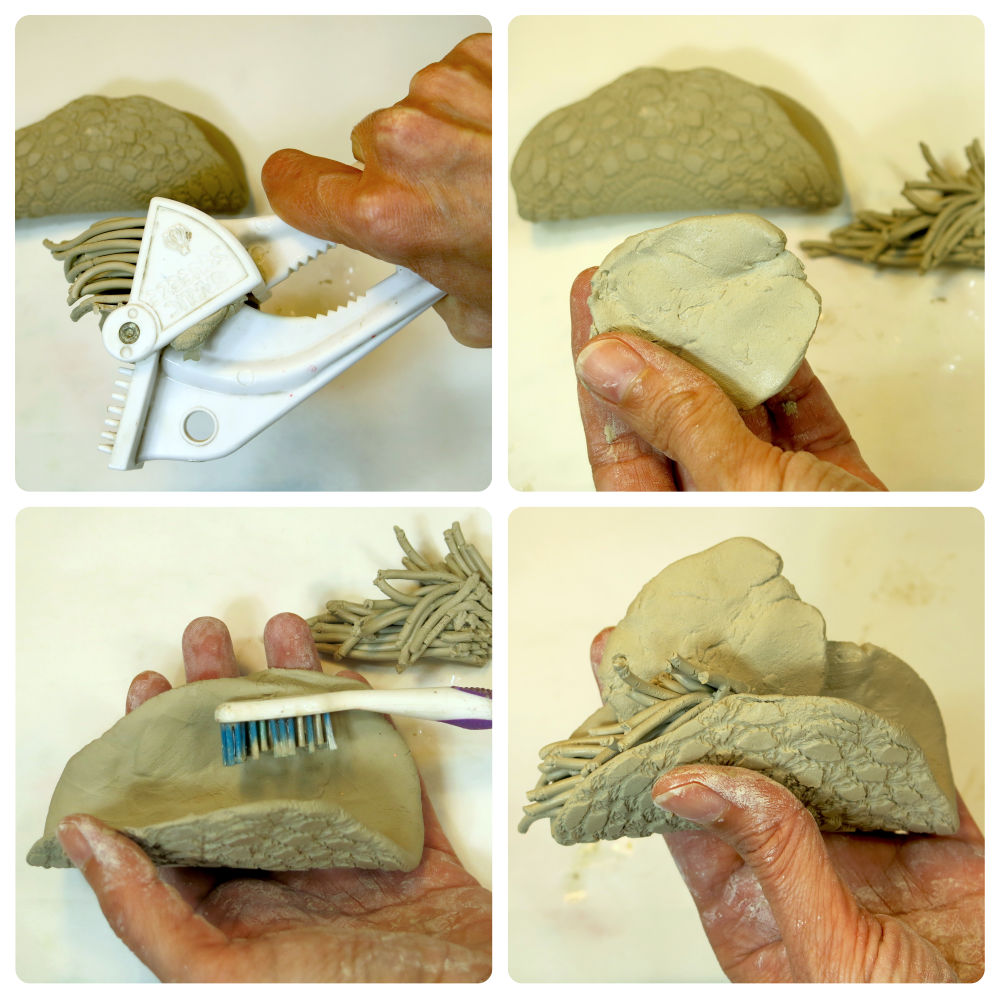
5. Flatten a small piece of clay to create lettuce. Create tomato slices, a coil for hot sauce and/or sour cream. Use your imagination to add whatever you like on your taco!
6. To attach everything, use a damp toothbrush to slip and score. Using your own toothbrush is not advisable but anyone else’s is fair play.
7. Give everything the “Taco Upside Down Test.” If nothing falls out, you’re good! Allow your taco to dry for 24 hours or more. The dry time will be faster if the project is placed in front of a fan.
8. Finally, paint with acrylic, tempera, or tempera cakes when dry. Then, seal it with Mod Podge.
Air dry clay will never replace the real thing, but it can come pretty darn close. So if you don’t have a kiln, or want some clay on hand for those special circumstances where earthenware just won’t do, give it a try!
If you’re looking for even more great info about air dry clay, join Cassie at the Summer 2017 Art Ed Now Conference where she’ll be presenting “How to Teach Clay Without a Kiln” where she’ll be talking even more in depth about everything you can do with earthenware clay alternatives. Don’t miss it!
Do you use air dry clay in your classroom? What’s your favorite brand?
What questions do you still have about air dry clay?
Magazine articles and podcasts are opinions of professional education contributors and do not necessarily represent the position of the Art of Education University (AOEU) or its academic offerings. Contributors use terms in the way they are most often talked about in the scope of their educational experiences.