Working in three-dimensions is a tough skill to master. Often, students in lower grades are given much more experience with two-dimensional work, making art on the flat plane of the paper. Being able to visualize how an object they’re creating might look from various angles is a skill that hasn’t been nurtured in the same way.
But with the right scaffolding, students can build up to the process of thinking three-dimensionally.
Take it from Michelangelo…
“Every block of stone has a statue inside it, and it is the task of the sculptor to discover it.”
At first glance, this quote attributed to Michelangelo might seem an oversimplification. A quick reading seems to ignore the skill, training, and technique that goes into stone carving. But I think the deeper meaning is the journey an artist takes to shape a statue in their own unique way by envisioning the work in the material.
The process of subtractive sculpture gives artists the ability to strip away, rather than continually adding layers, to create work. It’s one of the oldest forms of sculpture, and it can be among the more difficult to master. The artist needs to be able to envision the final form in the material and work with a plan as they remove the layers to develop shape and form.
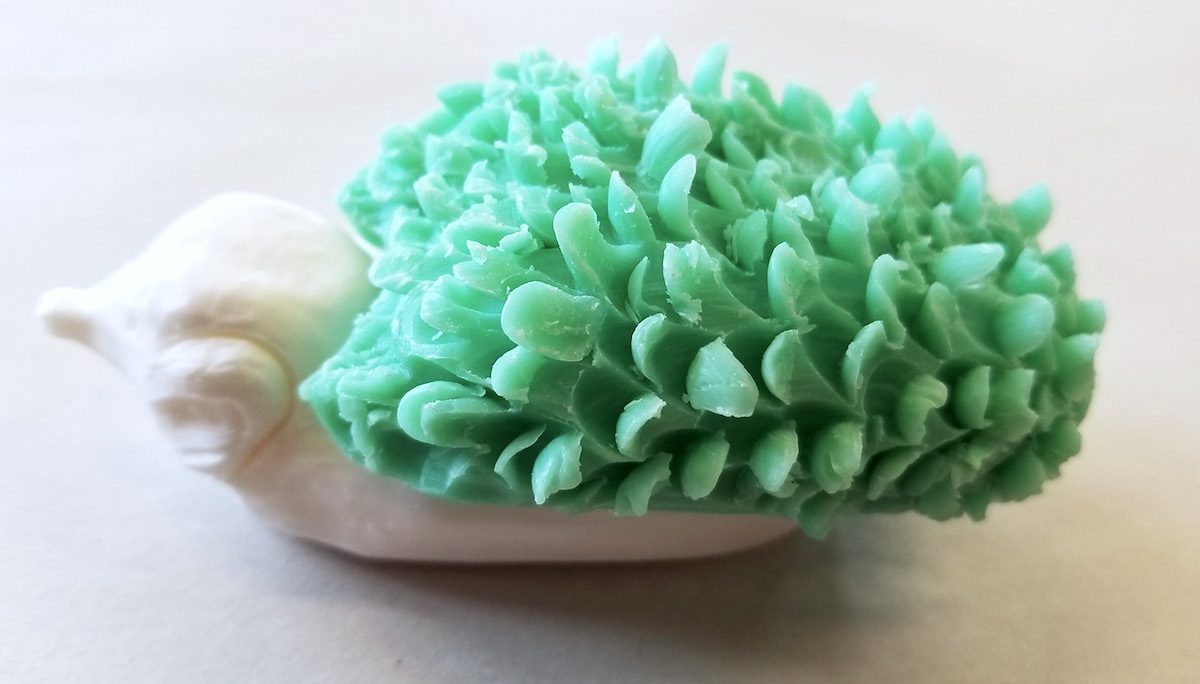
One great way to allow students to experience this technique is through soap carving.
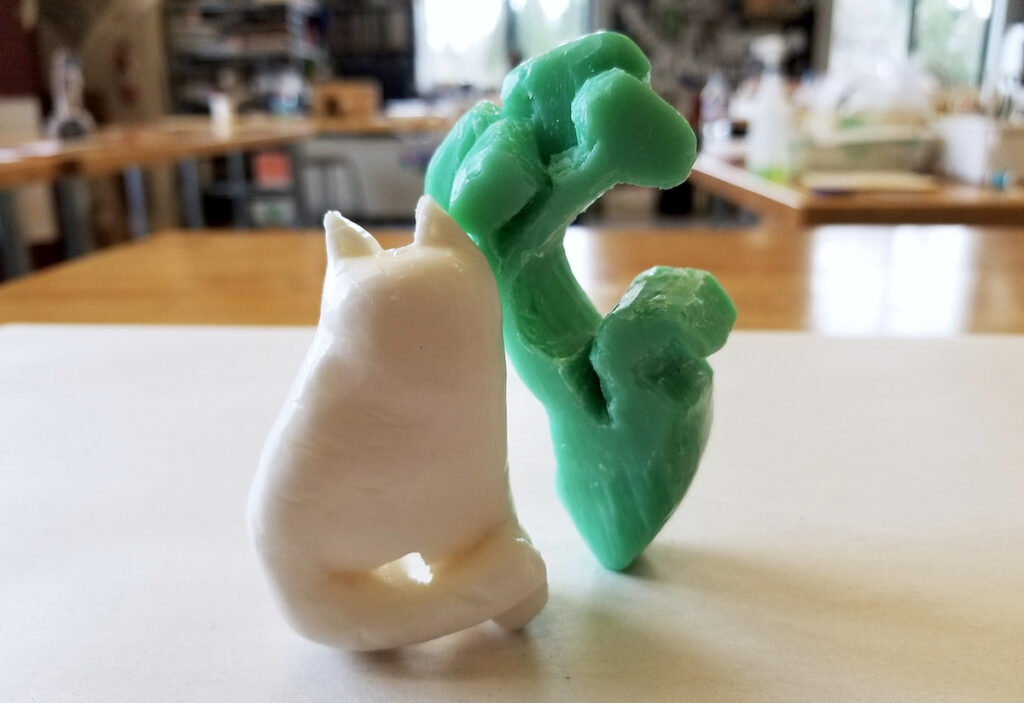
This project is great for both students and teachers alike.
Many subtractive sculptures involve working in wood or stone. These aren’t easy materials to manipulate and can be cost-prohibitive. Soap is relatively cheap and easy to work with. It also allows students a fair amount of leeway in terms of subject matter and carving detail.
Finding Inspiration
The sculptures in soap are often inspired visually by traditional Inuit sculptures. The Inuit are the native people in the Arctic regions of Canada, Alaska, and Greenland. They would create sculptures from ivory, bone, and soapstone – a relatively easy to work with stone they could shape.Their sculptures often represented local wildlife, and according to some stories about their origins, were originally conceived of as children’s toys before visitors took an interest in them. The sculptures were traded with visiting fur-traders and trappers as curiosities. Our soap carvings take a cue from these traditional carvings and focus on individual student personalities for their inspiration.
Using the Right Tools
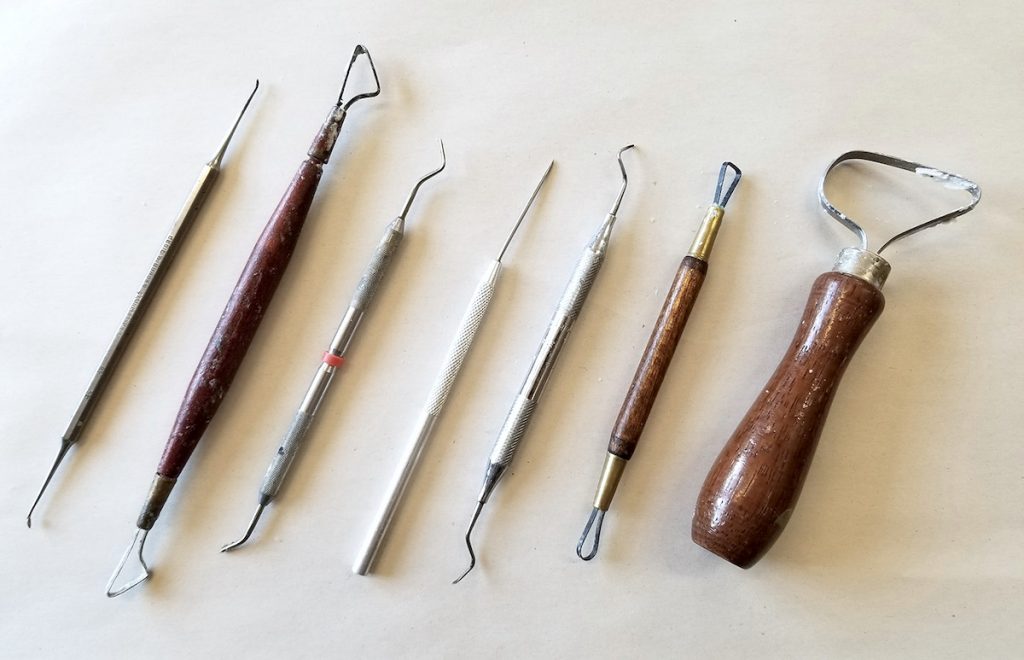
Having the right tools to actually create the carvings is essential. Any kind of small sharp tools can work. I’ve found a combination of clay tools and dental tools to be most effective. The fine points and gouging edges are perfect for the slow and precise removal of layers of soap.
Project Steps
For this project, you will ask students to create a thematic carving of an object representative of an aspect of their personality. Working in a similar vein to that of the Inuit sculptures, students might choose symbolic representations of character traits like animals or objects.
Step 1: Research
First, students will research their animals/objects and locate multiple images to use for reference. They should locate various views to help with the three-dimensional aspect of the project.
Step 2: Sketch
After they’ve completed their brainstorming, it’s time to sketch! Students will be required to create a plan utilizing at least three views of the sculpture. A top view, bottom view, and side view. This step pushes them to think about their work in the round, rather than in a two-dimensional sense. It also helps them to plan out what parts and spaces of the soap to carve.
Step 3: Carve
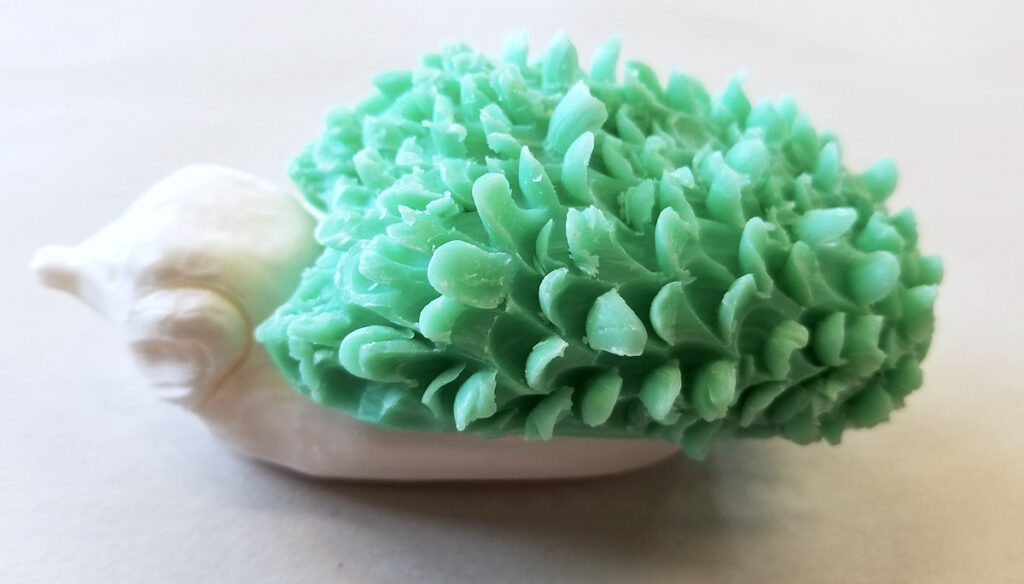
A great strategy to start with is to lightly trace an outline of their sculpture on the soap surface. Students can begin to roughly carve out the shape of their sculpture with larger tools, before going back in to work on details with more delicate tools.
6 Carving Tips
Use the tips below to set your students up for success.
- Choose your soap wisely.
While any type of soap can work, consider color and texture when choosing for your students. Also, fragranced soaps can become overpowering after a while. I’ve also found rectangular shapes tend to work better than curved bars. - Set up a designated workspace.
Lay down newsprint or other paper to gather shavings as students work to make cleanup more efficient. - Take measures to keep the soap workable.
Keep the in-progress sculptures in plastic bags to preserve the moisture of the soap and keep it from drying out and becoming brittle. - Encourage students to work slowly and be conservative as they carve.
It’s always possible to carve more away, but very hard to add material back. - Save some shavings.
Students can make limited repairs with water and soap shavings, which is why it’s helpful to keep some of the shavings! - Keep warm water on-hand.
Dipping cutting tools in warm water helps keep breakage to a minimum.
After your students have finished their work, a short reflection on the process helps them consider how challenging it is to slowly strip away material (and in many cases overwork the sculpture). Students take particular pride in the small sculptures they’ve created as the process becomes very individualized and almost meditative. Plus, your room now smells fresher and cleaner than it has at any other point in the school year!
How do you teach subtractive sculpture in the classroom?
As an art teacher, what are your favorite materials to work with in sculpture?
Magazine articles and podcasts are opinions of professional education contributors and do not necessarily represent the position of the Art of Education University (AOEU) or its academic offerings. Contributors use terms in the way they are most often talked about in the scope of their educational experiences.

