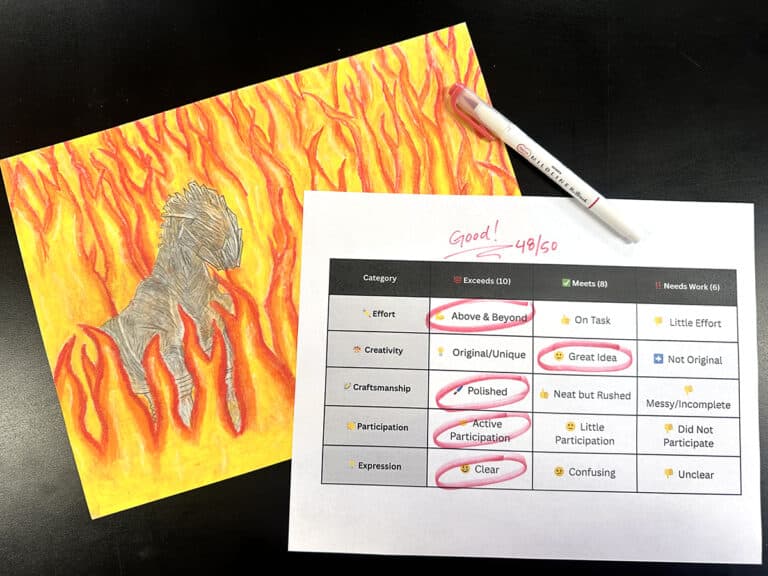
So much of our professional practice inadvertently emphasizes product over process. Bulletin boards, art shows, and even social media posts usually focus our students’ attention on WHAT they made. It is easy to see why our art students may accidentally get the message that their products matter most.
If you’re interested in helping your students refocus on their process, I have a solution for you: Process Portfolios.
Process portfolios are exactly what they sound like. Instead of only documenting their finished work, students also document their process. This is done through digital photography, and everything is housed in one platform. Today I’ll walk you through how to get started by providing specific steps to follow, challenges you may run into, and how to overcome them.
Step 1: Introduce the shift.
The Challenge
Changing a long-embedded classroom philosophy can be daunting and conceptually tricky for our students. Moving the focus from product to process can be confusing.
The Solution
Be purposeful about your explanation. I introduced the concept to my youngest students with a sorting activity. I gave them pictures of products (cookies, a snowman, a finished painting). Then, I asked them to match them to the associated process photos (baking, playing in the snow, and the act of painting). Finally, we had some meaningful and concrete conversations about the similarities and differences between the two groups of photos.
Even my youngest students were able to identify a more significant connection to the act of making something rather than the result. From there, it was a logical jump to ask students to start recording their process during class.
Step 2: Choose a user-friendly platform to organize your students.
Art teachers are already masters of the portfolio process, and many are already using a variety of digital versions to showcase final work.
Here are 4 options to explore.
The Challenge
Sometimes, students discover a single photograph is not enough to demonstrate an entire process. The may need a series of photos or an audio/text explanation. The challenge arises if your current digital portfolio system isn’t compatible with this new way of thinking.
The Solution
If you are planning a shift toward process portfolios, consider using a platform that provides multiple options for students to document their learning. In my classroom, the ability to take photos, record audio, and film brief video clips made Seesaw the right choice for my 1st-4th graders. With all of the easy options, students could intuitively pick which media method would help them share a new idea with the class.
Step 3: Tackle HOW your students take photos for their portfolio.
The Challenge
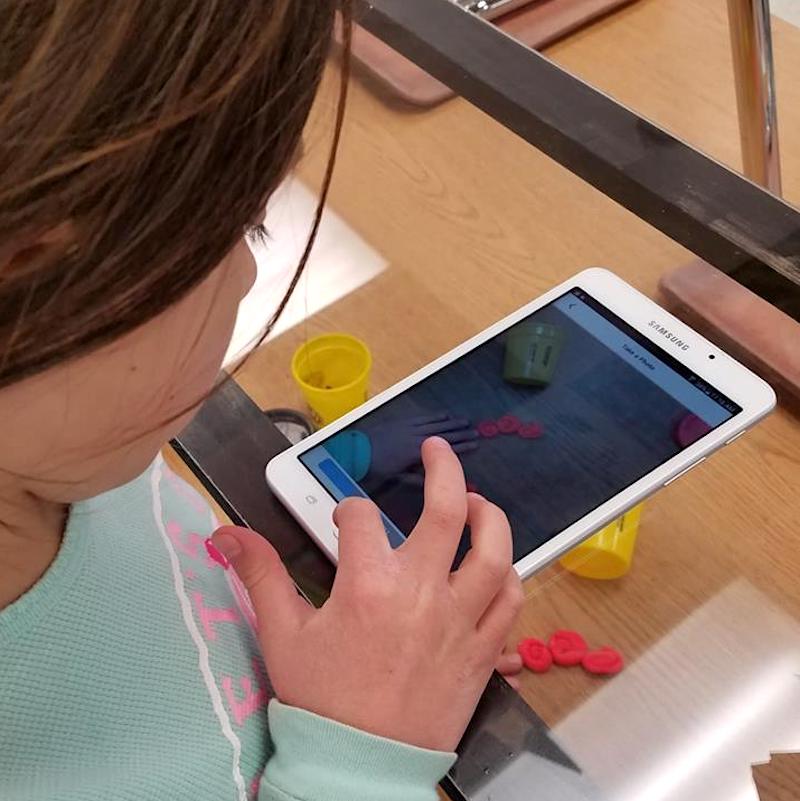
In a traditional digital portfolio setup, students take completed pieces of work to a station at the side of the room and photograph it using a tripod and backdrop. But, in a process-oriented setup, there are additional photography challenges. Students who photograph their process are working with messy materials, like clay or paint, and can’t safely move their wet or fragile artwork to a secondary station. Even worse, a digital camera or tablet can’t be moved to their tables, for risk of getting wet or damaged.
The Solution
In my classroom, the answer came from a photo I saw on Nic Hahn’s blog, Mini Matisse. Nic was using a homemade platform and a glass shelf as an iPad stand for a stop-motion activity.
I shared her idea with a teacher on special assignment in my district, Nate Campbell. Together, Nate and I adapted the setup from Nic to accommodate my students’ needs for regular process documentation. Using milk crates, plexiglass, and some Velcro straps, we built clear platforms that are raised approximately fourteen inches off my art tables.
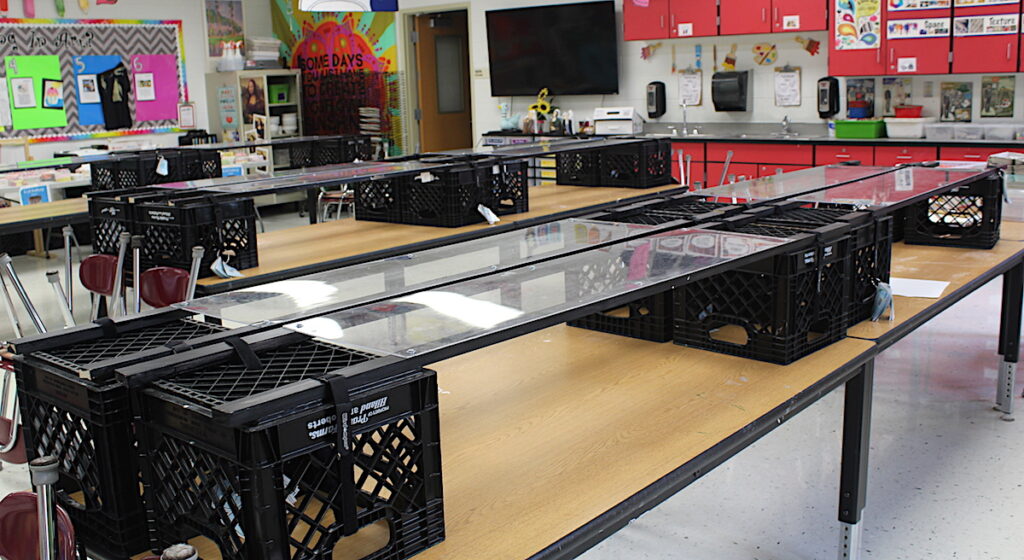
Students leave the tablet or device on the plexiglass and get as messy as they want on the table underneath. When they are ready to do some process documentation, they clean their hands with a baby wipe and simply stand up. They shoot their photo or video clip and post it to their portfolio. All of this documentation happens without breaking their workflow.
Step 4: Revise your lessons to support process learning.
The Challenge
The shift to process documentation can sometimes reveal the lack of rigor or choice in an existing lesson. For example, I had a second-grade printmaking lesson I was sure would provide an excellent opportunity for my students to practice their new process documentation. But, after the initial lesson intro, it fell flat. My artists had nothing to document! When I reflected, I realized I was presenting all the techniques and processes. Nothing was left for my students to discover for themselves.
The Solution
Sometimes, over a career of teaching art, we can accidentally and unknowingly become entrenched in an “old way” of doing things. It can feel uncomfortable to realize what and how you are teaching may not be what is best for your students. The solution is to remain open-minded and be willing to give up a little bit of classroom control.
In the case of the second-grade printmaking project, I ended up restarting the project with a day of found object printmaking. Students were able to search the classroom, finding objects to print in an exploratory way. They were deeply engaged in creating and sharing their own ideas for printing flowers from markers, glue bottles, and broken puzzle pieces. Suddenly, there was more than enough to document!
Step 5: Ramp up your emphasis on student-directed learning.
The Challenge
Students are documenting their discoveries, processes, and ideas for artmaking. The act of looking for things to record often makes them more mindful of their own process. But, how do you capitalize on this new energy to move toward student-directed artmaking?
The Solution
In my experience, focusing on and sharing their processes leads my students to more original ideas. In addition, they have become much more confident in sharing what they’re doing with each other. Where traditional critiques can feel daunting and comparative, process critiques allow students to share their ideas regardless of skill level.
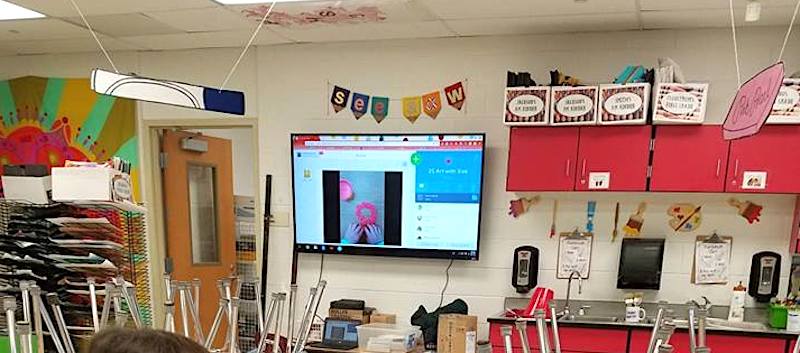
In my room, I run a stream of student process photos on a TV at the back of my room. But there are many less expensive options to get students talking and sharing!
Here are 4 ideas.
- Ask students to share and comment on one another’s process as a bell ringer activity.
- Periodically feature an unusual or unique solution or idea on your projector during class.
- Invite students to provide ninety-second guest demonstrations during class.
- Write an art challenge on the board. Ask students to record potential solutions underneath as they discover them. Request they sign their name so other students can ask the “expert” for advice.
Nothing holds a reflective mirror up to your instruction quite like process documentation. As you shift toward this new mindset, expect a few growing pains. But, rest assured you no longer are the only source for the answers. Your students will help you discover a process that works for your classroom!
What is the focus of your classroom philosophy – product or process? Why?
What tips and tricks do you use to help your students create digital portfolios?
Magazine articles and podcasts are opinions of professional education contributors and do not necessarily represent the position of the Art of Education University (AOEU) or its academic offerings. Contributors use terms in the way they are most often talked about in the scope of their educational experiences.