Science and art are two disciplines that actively celebrate failure. From Bob Ross’ famous “happy accidents” to “the scientific method [that] demands that you try, fail, and try again,” both fields acknowledge the importance of risk-taking during problem-solving. After all, that’s where genuine innovation comes from. Because of this shared understanding, it’s no wonder these two subjects dovetail together so well.
While there is now an academic divide between art and science, this has not always been the case. Leonardo da Vinci is known for his artwork as well as his work as an inventor and scientist. Pigments are carefully studied, used, and combined to create different media. The development of any photograph is a careful mix of chemistry and composition. The entire field of art conservation and restoration requires a massive knowledge of chemistry and artistic principles. (Plus, it provides some satisfying YouTube content.) And that doesn’t even include field notes, scientific illustrations, drawn medical instructions, and more. It’s important to celebrate art and science as two parts of a whole rather than two entirely separate fields.
Read on for four engaging one-day activities to bring art and science together!
1. The Science of Color
Students of all ages are generally familiar with the traditional color wheel. However, they may not be familiar with additive and subtractive color theory.
Any type of paint will work for this lesson. Gather the following paint colors:
- Red
- Yellow
- Blue
If available, also bring in the following paint colors:
- Cyan
- Magenta
- Black
Gather at least three flashlights, some clear or white plastic bags, and red, green, and blue permanent markers. Color parts of each bag with each permanent marker, creating three different colored “lenses” that can be wrapped around the flashlight’s glow. If you have students with smartphones, they can use their phone flashlights and make their own lenses.
Now is where the experimentation begins! Show how blending colors together in paint makes darker, muddier colors. Then, turn off the lights, cover each flashlight with a different color lens, and reveal how shining the different colors of light over one another makes a lighter, brighter color. Describe the difference between additive and subtractive colors. Give students a color mixing challenge to tackle, and have them demonstrate both additive and subtractive color theories.
2. The Science of Observation and Documentation
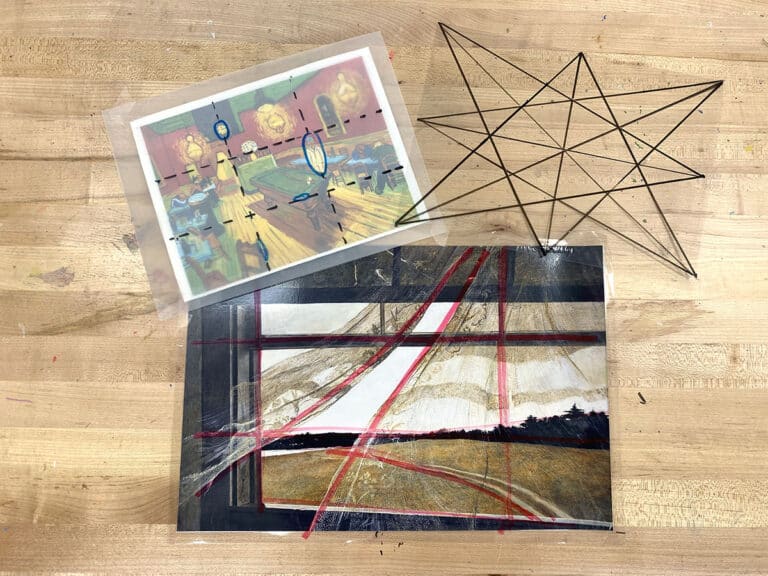
Field notes are a common and popular way to blend art and science in an academic setting. With so many historical resources, why wouldn’t they be? And with the current popularity of botanical illustrations, your students are likely already familiar with this type of observational drawing.
Push your students to the next level by creating field notes for imaginary creatures that live in your classroom. What if the paintbrushes are actually insects or the teacher’s computer is a loud, ornery frog? Maybe there’s a goblin that likes to eat dried paint off of dirty paint palettes. Share different field notes and botanical illustrations with your students, along with Salvador Dali’s Gardens of the Mind series. Challenge them to create notes to document their imaginative addition to the art room. Post the different sketches and descriptions near where these creatures “live” for a fun way to display the work in your classroom.
3. The Science of Ceramics
Between the makeup of clay itself, the firing processes, and the chemical reactions of glazes, there are infinite ways to investigate ceramics through a scientific lens. One quick way to do this is with a microwave raku firing. Raku is a low-fire glazing process that is unpredictable but results in stunning finishes. Since the raku process is quite involved, students in K–12 ceramics programs are usually not exposed to it. But, with microwave kilns, they can be! You can learn more about raku in the Nontraditional Firing Methods Pack in PRO Learning.
Have small bisqueware pieces, like test tiles or student-made pendants, ready. You also need access to a microwave and a microwave kiln. While you may want to invest in a couple of raku glazes, this is unnecessary. Take time to research how to use a microwave kiln to do a raku firing and practice with a batch yourself.
Once you feel confident with the process, run a firing for your students! Since raku is difficult to predict, have students write down or draw educated guesses about what each small piece will look like when completed.
If this is something you want to make a permanent part of your ceramics program, Andy Williams of Blacktooth Pottery recommends having at least two microwaves and two microwave kilns for efficiency.
4. The Science of Photography
Cyanotypes have been considered a type of photography since they were developed in 1842 by John Herschel. A year later, Anna Atkins debuted the use of the cyanotype as a way to artistically document the flora around her. Following in Anna Atkins’ footsteps, guide your students through gathering natural materials. Do this on a short walk around your campus so students can come in prepared with the help of their classroom teacher.
Use this handy download to guide the cyanotype process or reference the steps below. For more resources and lessons connecting art and science, check out the Connecting Science and Art Collection. You can find these lessons and more in FLEX Curriculum.
Follow these simple steps to create cyanotypes:
- Have a tub of water and a place for papers to dry.
- Provide students with prepared cyanotype paper, or guide your older students through preparing their own.
- Students practice arranging their compositions on the ground. Wait until the last moment to take the paper out; it will begin to turn blue once exposed to light.
- When they are satisfied with their compositions, students quickly transfer their designs onto the paper.
- Leave the pieces to develop in the sunlight.
- Use the water tub as a stop bath, then carefully lay out the cyanotypes to dry.
For many students, this will be the first time they have developed a photograph. It is a cause for celebration!
Art can sometimes be an afterthought for other disciplines. After all, it was “STEM” before it was “STEAM.” But rather than pitting these subjects against one another, it’s important to realize just how intertwined all disciplines truly are! By bringing another facet of art to your students, you can provide well-rounded and inclusive art education. The next time you want to add a twist to your art lesson, consider how focusing on science can enrich your students’ learning.
Are you looking for more resources? Check out these FLEX Collections below:
- Nature With Mixed Media Collection
- 3D Engineering Collection
- Creating With Nature Collection
- Under the Sea Collection
- Sustainability Collection
Find all of these lessons from beginner to advanced in FLEX Curriculum.
What is your approach to cross-curricular instruction in the art room?
How will you thoughtfully bring a scientific lens into your lessons?
What is your favorite way art meets science?
Magazine articles and podcasts are opinions of professional education contributors and do not necessarily represent the position of the Art of Education University (AOEU) or its academic offerings. Contributors use terms in the way they are most often talked about in the scope of their educational experiences.