This article is part two of a two-part series on using color theory to deconstruct race. Click here to read part one.
Deconstructing race using color theory is a profound experience. As discussed in part one, racial categories for human beings have been constructed into five colors: black, white, red, yellow, and brown. By defining white and black and doing a simple comparative analysis, the colors used to categorize race are easily debunked. The skin color of every human being is on a spectrum of different hues and values of brown. After discussing this concept in class, we now want to take color theory to the next level: matching student skin colors with paint.
Skin Colors Have Formulas
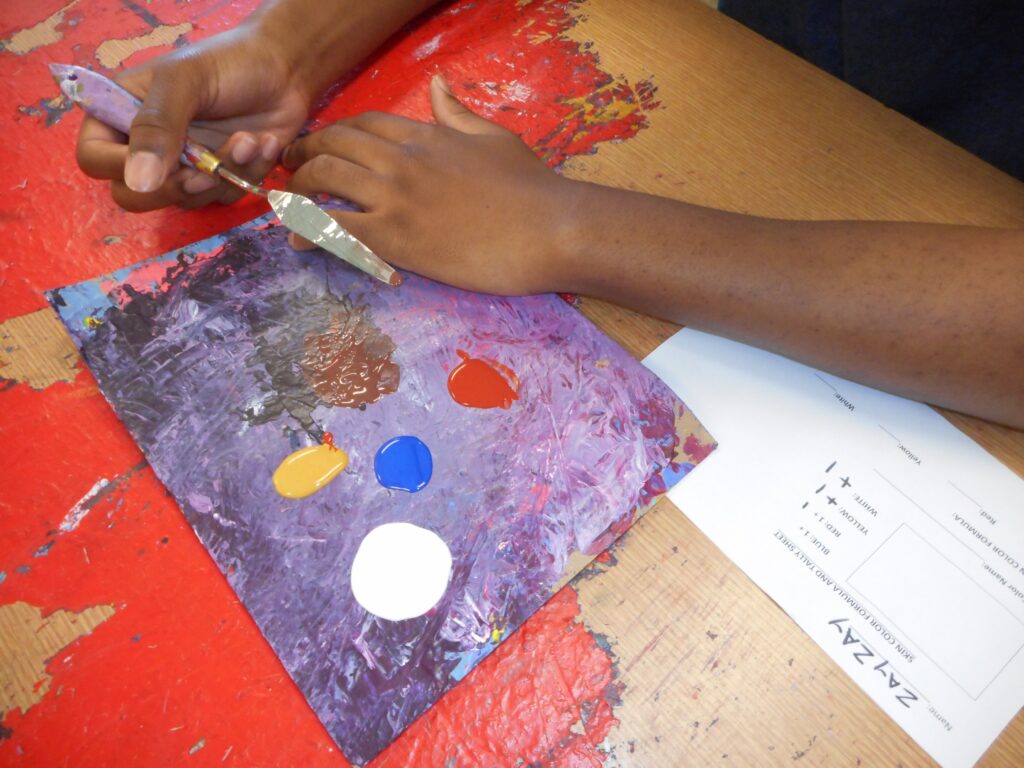
Every skin color can be made by mixing paint. Blue, red, yellow, and white paint can make virtually any human skin color. Every skin color is essentially a different ratio of the primary colors and white. Of course, there are variations of each primary color that would work too, such as red oxide or yellow oxide. Regardless of the pigment variations, by using those four general paint colors students can match their own skin colors. Students can even keep track of their skin color formulas in order to remake them in paint.
The Formula Tally Sheet
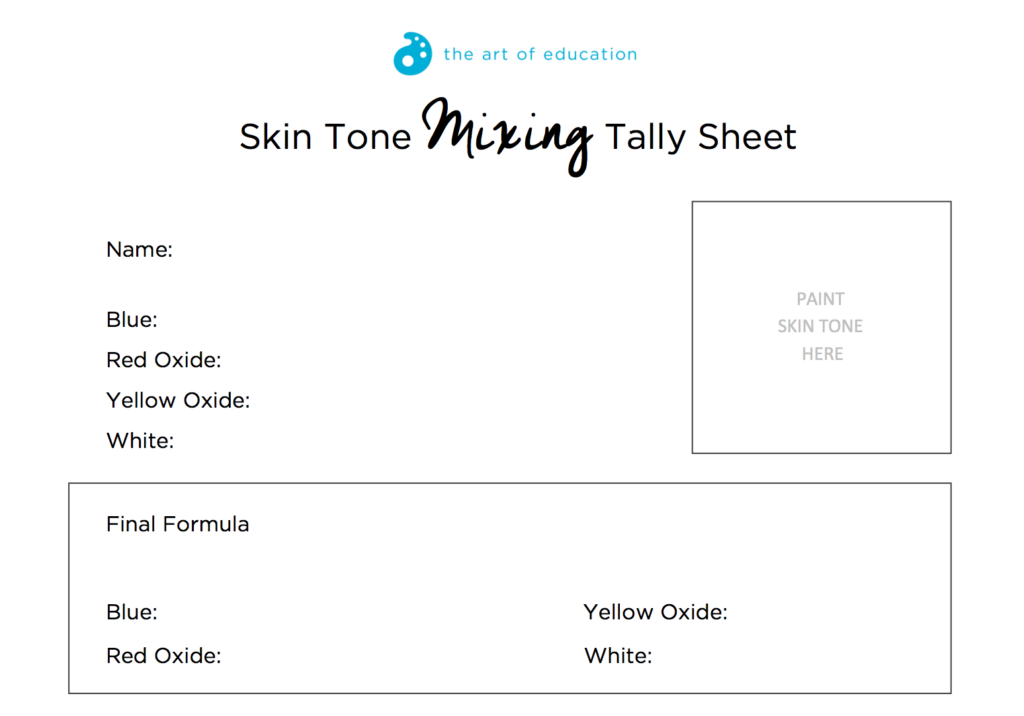
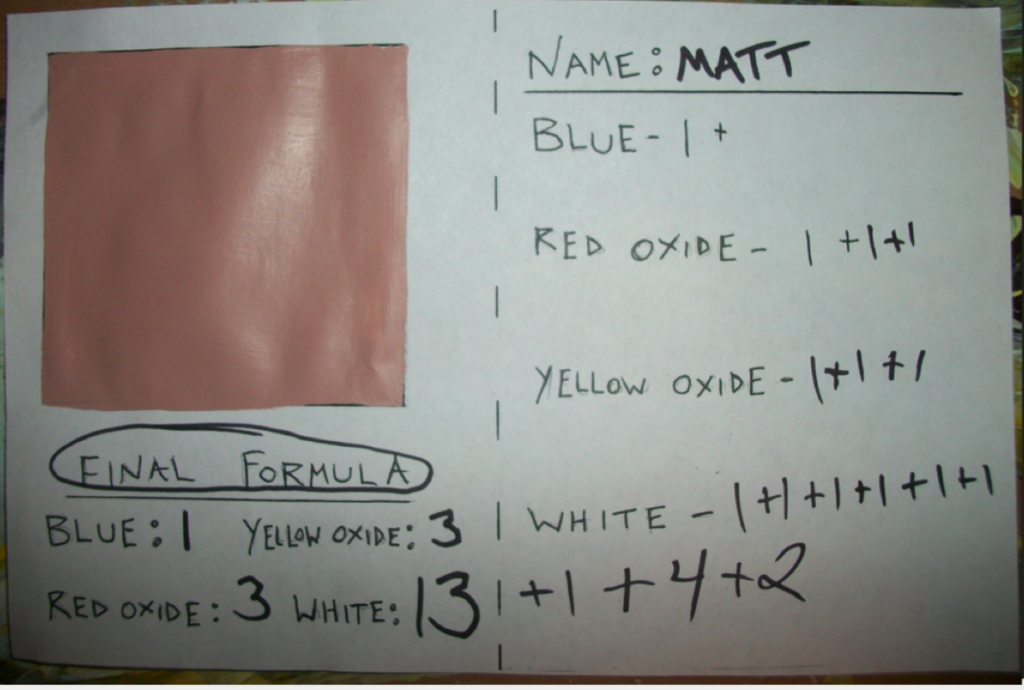
A simple worksheet can keep track of the ratio of colors that create each individual skin color. The formula sheet has the names of the four colors on it so students can make a tally mark each time they add increments of colors to their paint mix. The formula sheet also has an empty box for students to fill in once they have successfully matched their skin color. I like for students to name their color using the word “brown” in the title, such as “Matt Brown.” Here is a basic formula tally sheet that can be used for students to calculate their final skin color formula.
Download Now!
The Step-By-Step Slideshow
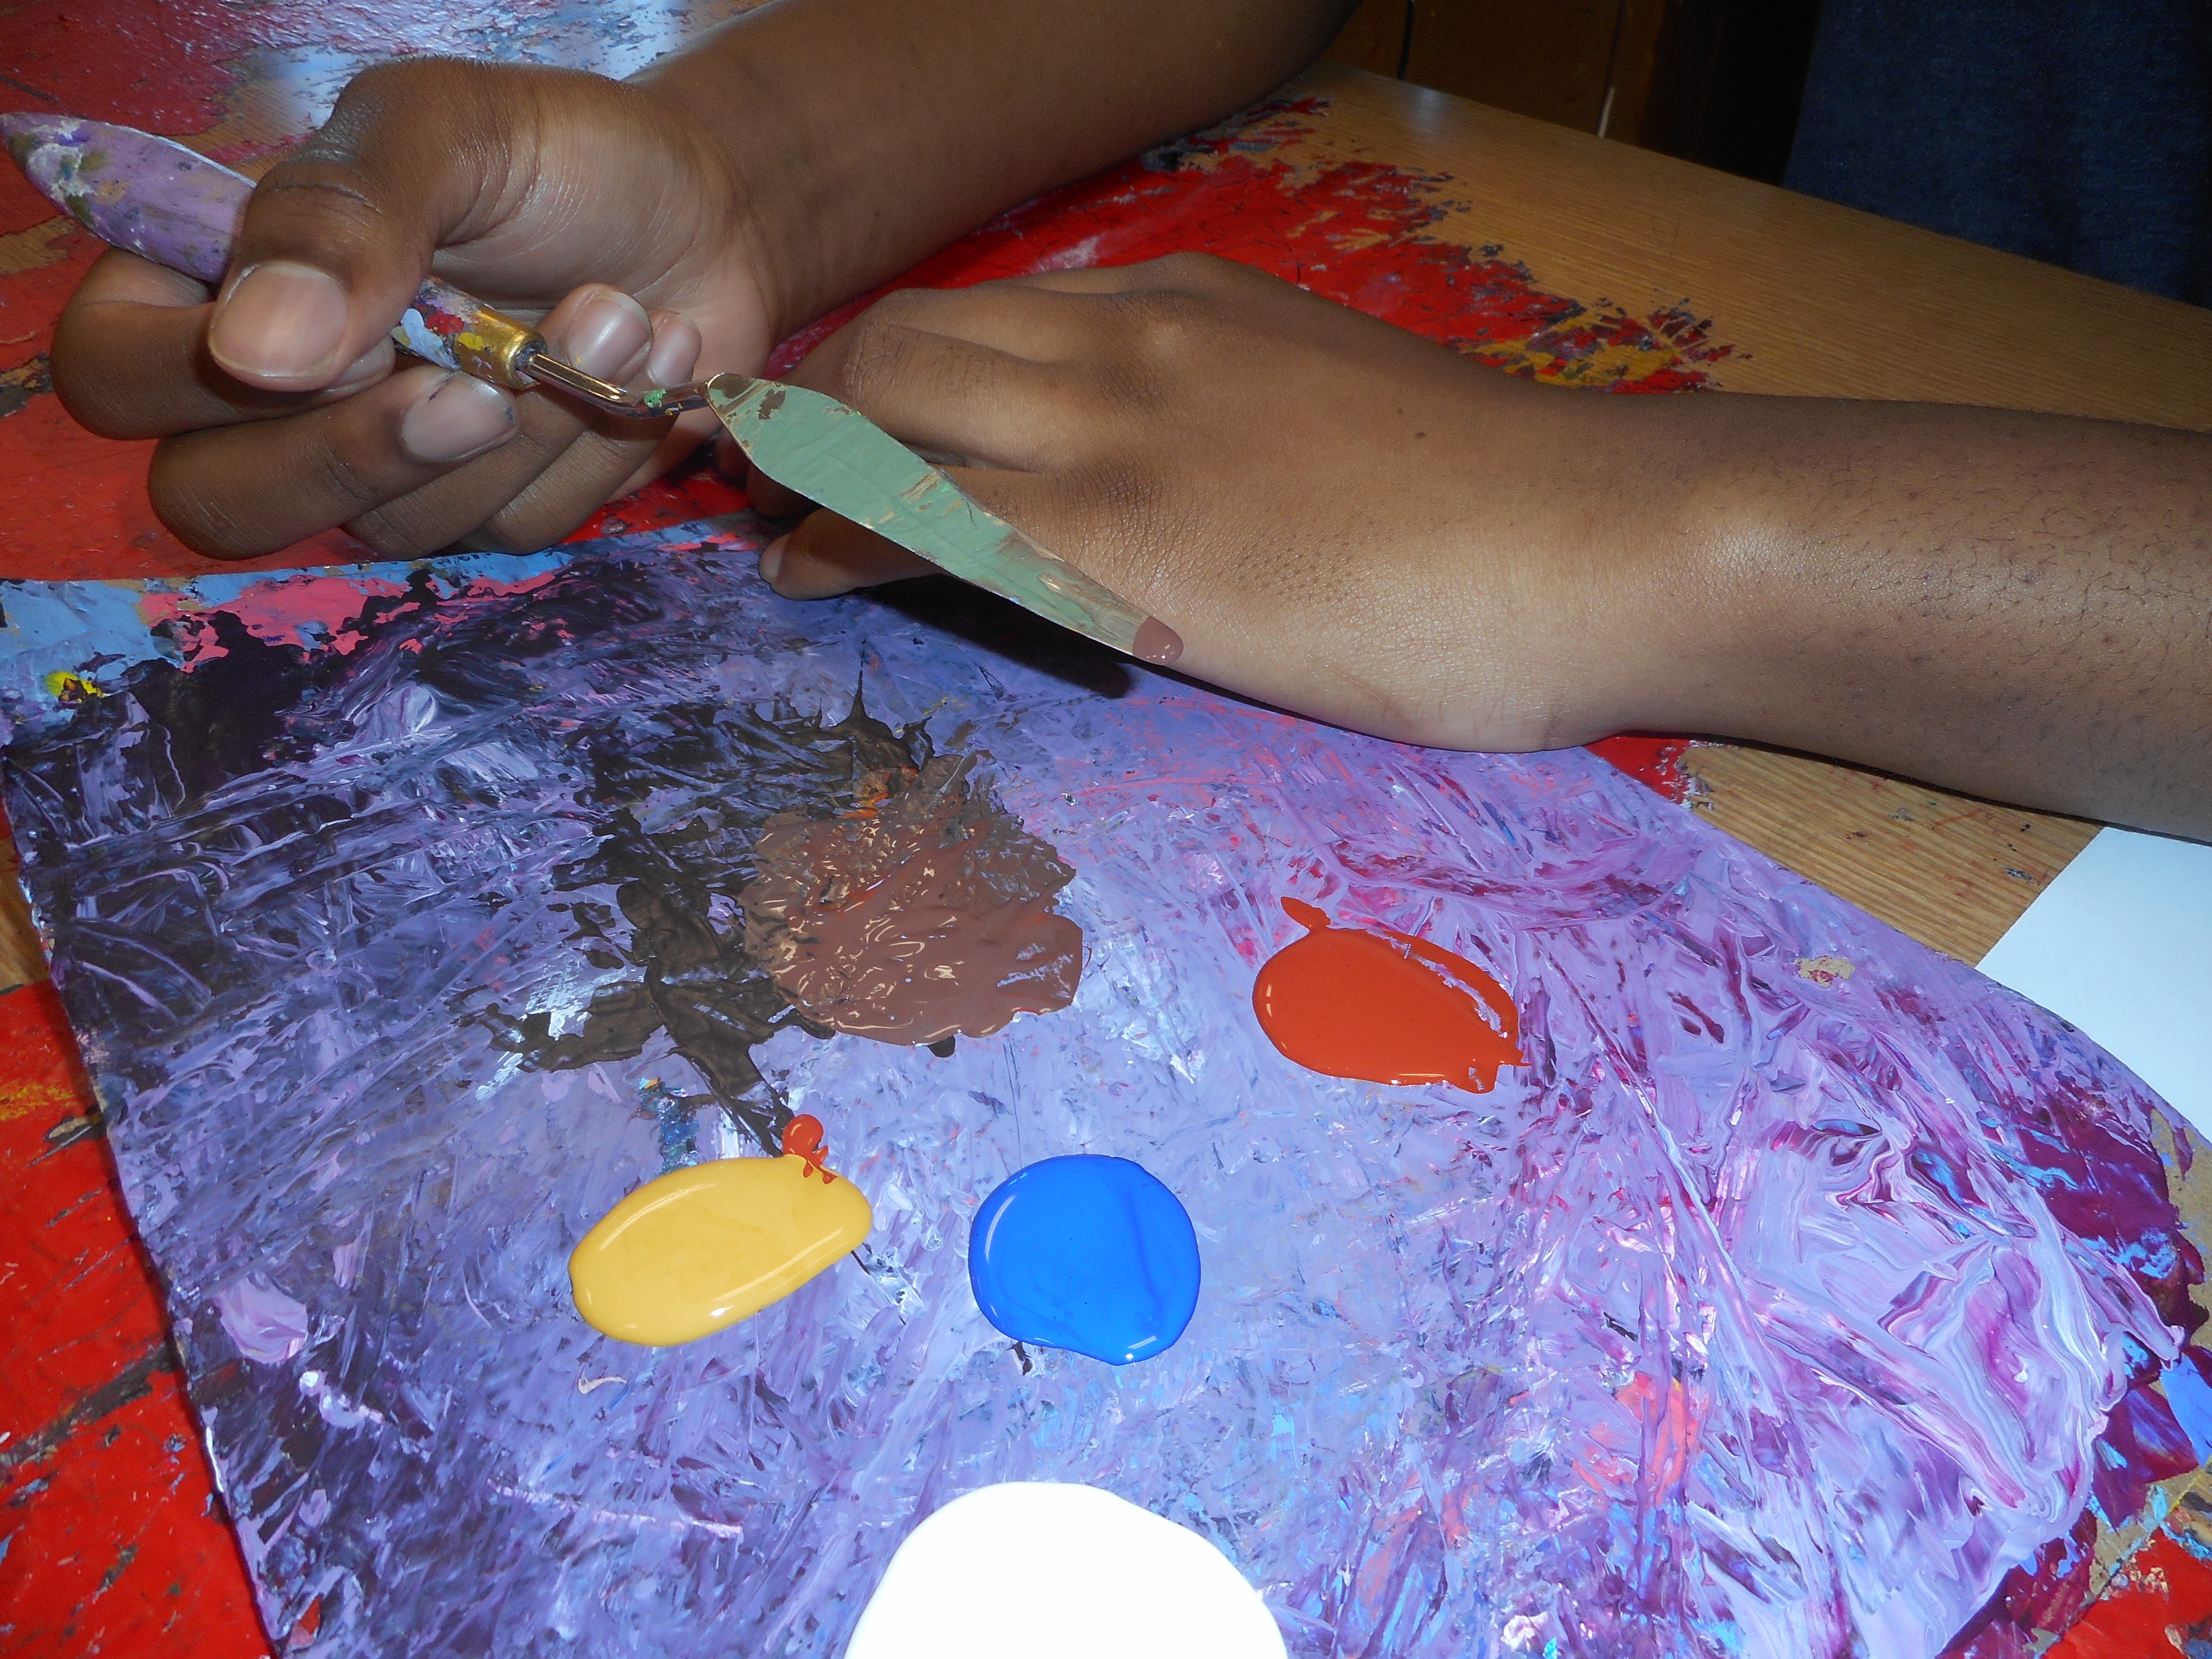
A great way to begin is to match your own skin color and document each step along the way in a slideshow. Showing students each step as you discuss them is paramount. The first step before you begin is to calibrate your increments. If you are using squeeze bottles of paint, establish the amount of what one drop of any given color consists of. Another method is to place small puddles of each color on a palette and scoop one drop of each color with a palette knife as it is being added. The important part is knowing what amount is considered “one” as you tally up the different amounts of paint your skin color consists of.
Matching Your Skin Color to Demonstrate
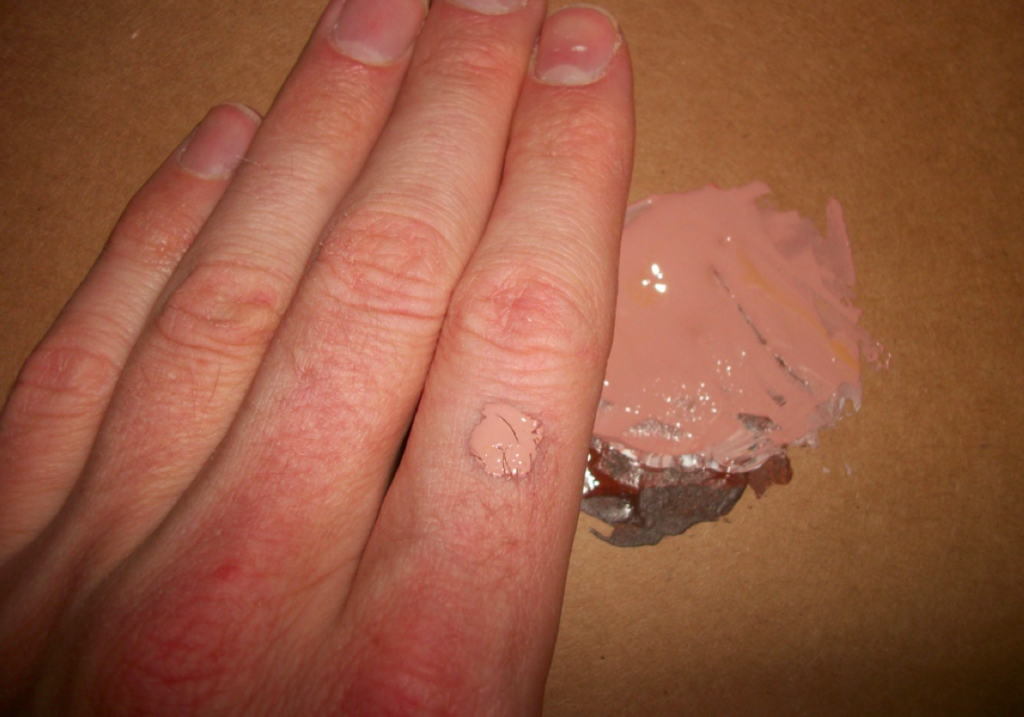
Once students receive their formula sheet, have them flip it over. Have students write the four color names down and do a walk through together. It is essential to do a demonstration with a slideshow that illustrates each step. This will give students a chance to practice tallying up the color increments and predict what the next steps will be. Begin by mixing one drop of blue, red, and yellow. Depending on the paint pigment variations being used, the color should result in a dark purple, gray, or brown.
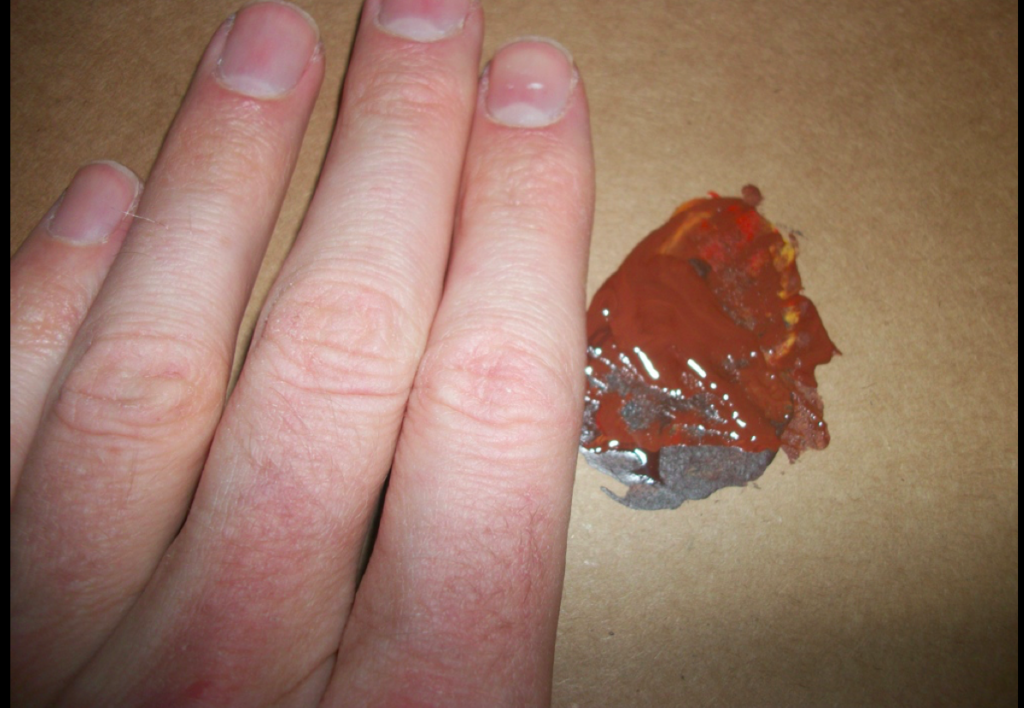
Each time a color is mixed, hold it up to the skin color being matched and ask the following questions:
- Is the paint color too light or too dark?
- What color hues do we need to add?
Both of these questions ask students to think in terms of art vocabulary. When deciding if the paint color is too light or too dark, students are investigating value. When deciding what colors to add, they are experimenting with the concept of hue.
Making the Demonstration Interactive
For the slideshow to be engaging and interactive, provide images of each step. For example, the first image should show one drop of blue and one drop of red. The second image should then show the tally sheet recording one drop of each. The third image can then show the new color after it is mixed together. That is the routine of the process: apply the amount of color being added, tally it up on the sheet, and then mix the new color. Constantly call on students to predict the next step. When you ask students if a color is too dark or too light, they can call out their responses. Ask your students about the hue, and what they think should be added next. After getting their responses and predictions, you show them the next slide to see how closely their guesses compare to your own process. After each time you add increments to the formula, have students keep track of them on the back of their formula sheets with along with you.
Match and Release
Once you come up with the color that closely matches your skin color, add up the tally marks. Write down the official formula for your own personal brown. You can then ask students to remake that color to see what they get or release them to begin matching their own skin colors. Students should all start with the same formula. By starting from the same common pigments, the connection between human skin color becomes much more integrated and obvious.
The final skin color formula for “Matt Brown” was:
Blue-1
Red Oxide-3
Yellow Oxide-3
White-13
Anticipate Student Questions
Once you release students to match their own skin colors, there will be struggle and confusion at first. The original color made will be dark. Students often will want to be told what to add. Resist the temptation to tell them. Continue to ask questions about the hue and value to allow them to experiment or form their own conclusions. One tip is that colors lighten easily, but it is much tougher to darken them. Go easy when adding white…
Closure
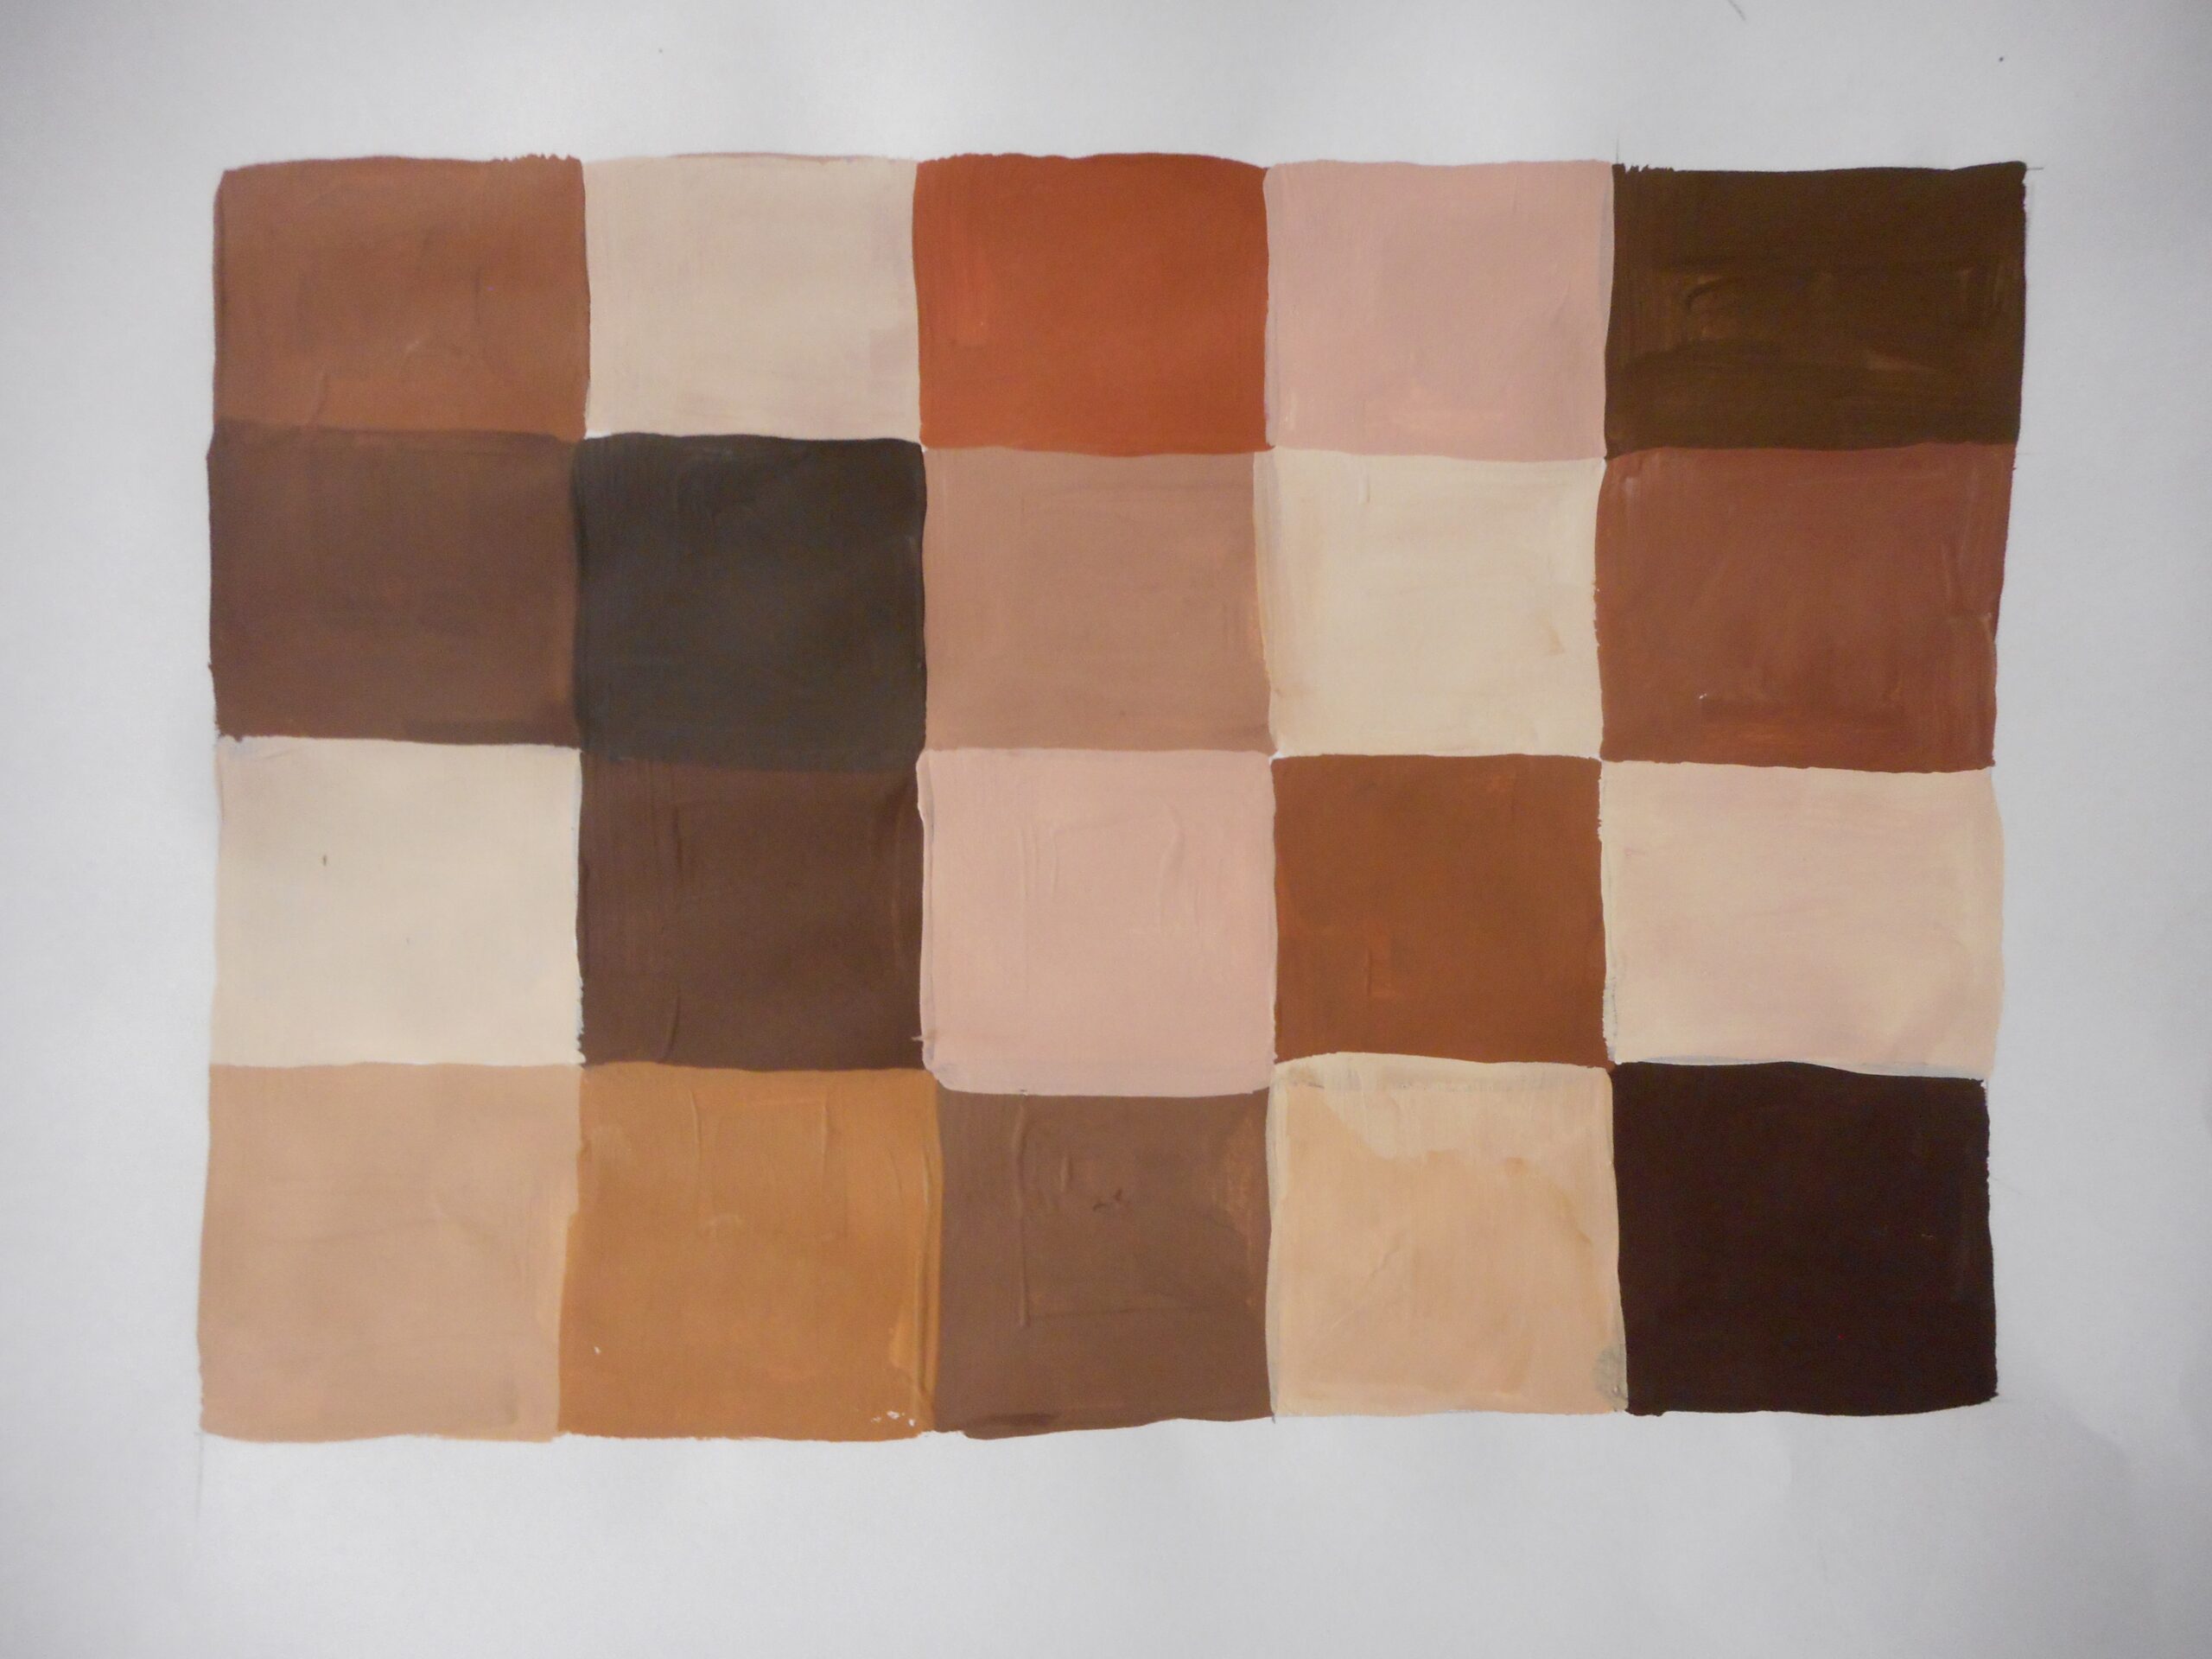
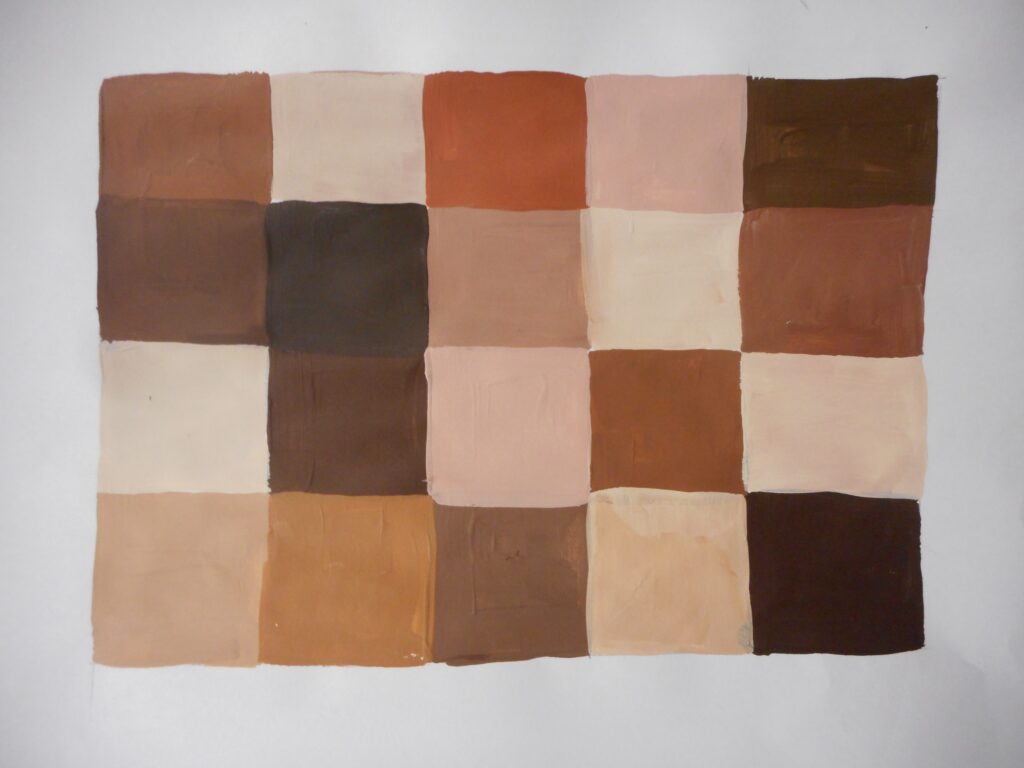
Once students get a color that feels like a strong skin match, have them tally up their formulas. Students should try to remake the formula from scratch to see if they get the same skin color brown. Once everyone is finished, have some butcher paper on the wall with a square grid drawn on it. Have each student paint in their skin color in one square. You could take it a step further and have them write their formulas up as well. When each square is finished you will have a quilt displaying your students’ different skin colors. When looking at the variety of colors it becomes quite clear: every skin color belongs on the spectrum of brown.
What questions come up for you as read this article?
What do you think of doing this type of work?
Magazine articles and podcasts are opinions of professional education contributors and do not necessarily represent the position of the Art of Education University (AOEU) or its academic offerings. Contributors use terms in the way they are most often talked about in the scope of their educational experiences.
