There is no hiding from it, technology is everywhere, and it has made its way into many classrooms around the globe. While technology in the art room may be frowned upon by some, I find it necessary to incorporate. It is one of our duties as art teachers to make sure we are doing our part to help foster our students’ 21st-century learning skills. Integrating technology doesn’t have to be overwhelming to you or your curriculum. In fact, it can elevate your art program.
Recently, I was introduced to an amazing tool which incorporates technology and promotes a social learning community called Flipgrid. I have found it to be a great addition to my art room and I use it in a variety of ways. Better yet, it is fun for students, simple to use, and easy to share with others.

What is Flipgrid?
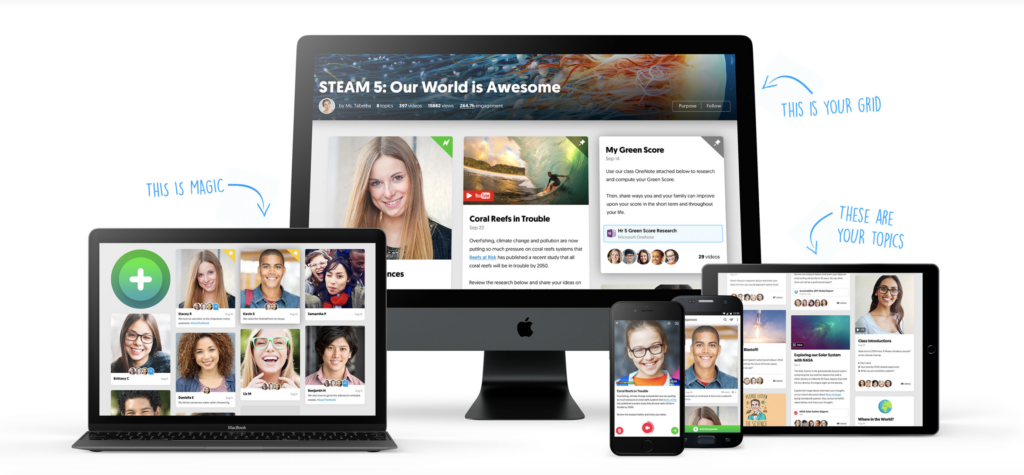
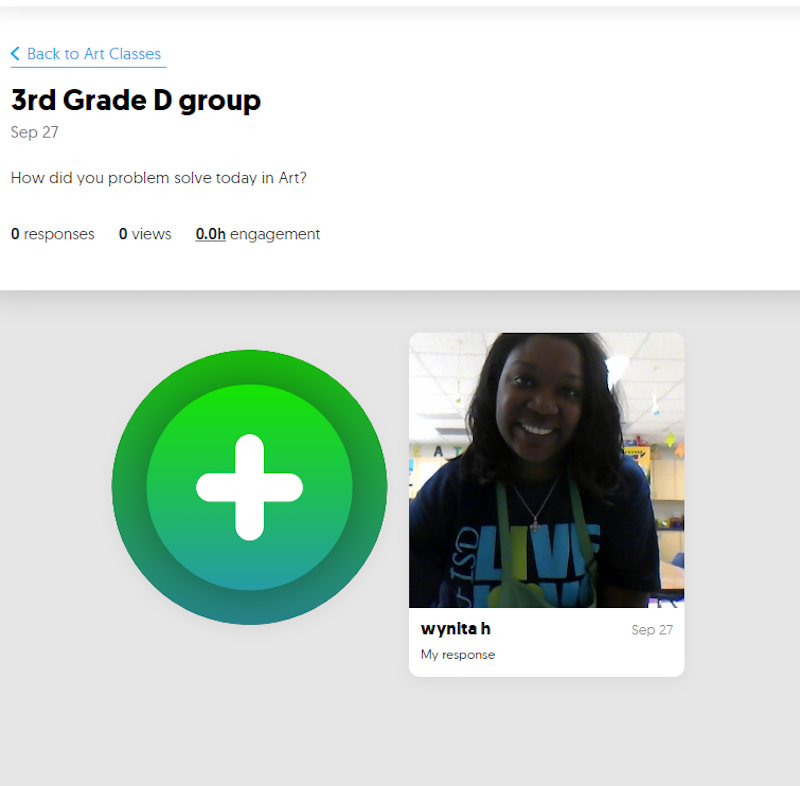
Flipgrid is a digital tool that allows users to take short videos and compile them in one area called a “grid.” The grid allows teachers to post a video or question to spark learning. Only those with the grid code can join the chat and respond by recording response videos. This website is user-friendly and works on iPads, Chromebooks, all browsers, and IOS/Android devices.
It is important to make sure the device you and your students use has a camera to record video and sound. Once your students have responded, you can watch all the videos; they play back to back as if the students were taking turns talking to you one by one.
Setting Up a Free Account
Flipgrid offers a free account as well as an account with a one-time yearly fee. I am using the free account because it works perfectly for my needs and I believe it would work well for you, too.
The Flipgrid website lays out the differences between the two types of accounts. In the free account, you can set up one grid with unlimited topics. A topic is a question or prompt you pose to students. So, you might ask students to tell you how they used line, chose their media, or worked through a problem in a specific artwork.
Setting up a different topic for each of the classes you teach will keep responses organized.
Setting Up a Grid for Your Students to Use
Follow the simple steps below to get started.
- After setting up your account, you can log in and go to your dashboard.
- From there, you will be able to set up your grid.
Remember, you will have just one grid but will be able to separate your classes with topics. Go ahead and name your grid and give it a purpose when prompted. - Copy and save the link so you can access your grid anytime.
- Once your grid is created, add as many topics as you want.
When adding a title and description, consider including the name of the class, how long the students have to respond, and the question or prompt. This way, students will have all of the information they need right in Flipgrid. - Preview the link to see the student view.
- Use the large button with the plus sign to add a video of your own.
You could make an example or even pose your question via video right in Flipgrid.

- Give the link to your students to get your social learning community up and running!
Since you are sharing a link, students can use their own devices or school-provided technology. If your resources are limited, you could have a station with just one device set up with Flipgrid in your classroom where students could record themselves.
3 Ways to Use Flipgrid in the Art Room

1. To Promote Reflection
Reflection is such an integral part of the art room, and finding new ways to share is a great way to promote classroom engagement. To do so with Flipgrid, pose a question that asks students to reflect on their work or on the artmaking process. You can watch the videos on your own, or play a few for the class with student permission.
2. To Spark Class Discussions
Essential questions are a great way to get students thinking deeply about art-related topics. While not all students may feel comfortable sharing during a live group discussion, they may feel comfortable sharing a response to a prompt via video. Write a question for your students to respond to in Flipgrid. Then, play a few of them for the class to get a discussion rolling. In this way, everyone can be engaged!
3. To Assess
Teachers are constantly looking for ways to assess students efficiently and effectively. Use Flipgrid to ask a question assessing a particular objective. For example, you could ask students to name the primary colors and explain how to make the secondaries. In this way, you can watch the videos whenever you have time to check for understanding.
Flipgrid is a great tool for any art teacher to have. Use it to promote reflection, spark discussion, and make assessment a quick and painless process. Try out the free version and see what you think!
Have you used Flipgrid in your class, if so how have you used it?
What types of technology do you use in your class to promote 21st-century skills?
Magazine articles and podcasts are opinions of professional education contributors and do not necessarily represent the position of the Art of Education University (AOEU) or its academic offerings. Contributors use terms in the way they are most often talked about in the scope of their educational experiences.