There are so many reasons to love the art of collage, from the freedom it allows to the powerful stories that can be told through it. In the classroom, I love the fact that students can mix personal items and traditional materials to create something new and uniquely meaningful. And the fact that students don’t feel intimidated when they are encouraged to collage? It’s priceless!
I use collage techniques in many of my lessons. But over the years, one lesson stands out as the most successful: Collage to Canvas.
This lesson not only has students experimenting with the art of collage, but it also has them thinking deeply about composition. It’s a great primer to get them experimenting with visual storytelling. Although I use this lesson with my secondary students, it could certainly be scaled down for elementary kiddos.
To Begin
I begin the lesson by discussing the art of collage. We discuss how collage means assembling different colors, textures, shapes, and materials to create a new concept.
Then, I share the various types of materials that can be used.
Here are just some of the items I like to provide and have students gather:
- Magazines
- Transparencies
- Tape Transfers
- Manipulated Paper
- Handmade Paper
- Drawings/Sketches
- Cardboard
- Fabric
- Photographs
- Stamps
- Personal Items
- Odds and Ends
It’s also a good idea to provide some examples by sharing master collage artists. Artists I’ve used in the past include Georges Braque, Picasso, Kurt Schwitters, Romare Bearden, Radcliffe Bailey, Richard Hamilton, and Robert Rauschenberg. These artists and their works lay the foundation for a wonderful class discussion. When students see this work, they become inspired to begin creating their own collages.
Here are the 7 remaining project steps.
Step 1: Set a Theme
There are many themes teachers can use when collaging with their students, but for this specific lesson, I stick with the theme of “self.” I tell students they will be creating a type of “self-portrait” collage. Instead of a traditional portrait, however, they will use colors, textures, magazine images, text, fabrics, photos, and maybe even a few special items from home. The only other parameter I give is that the final collage must be smaller than 6″ x 8.”
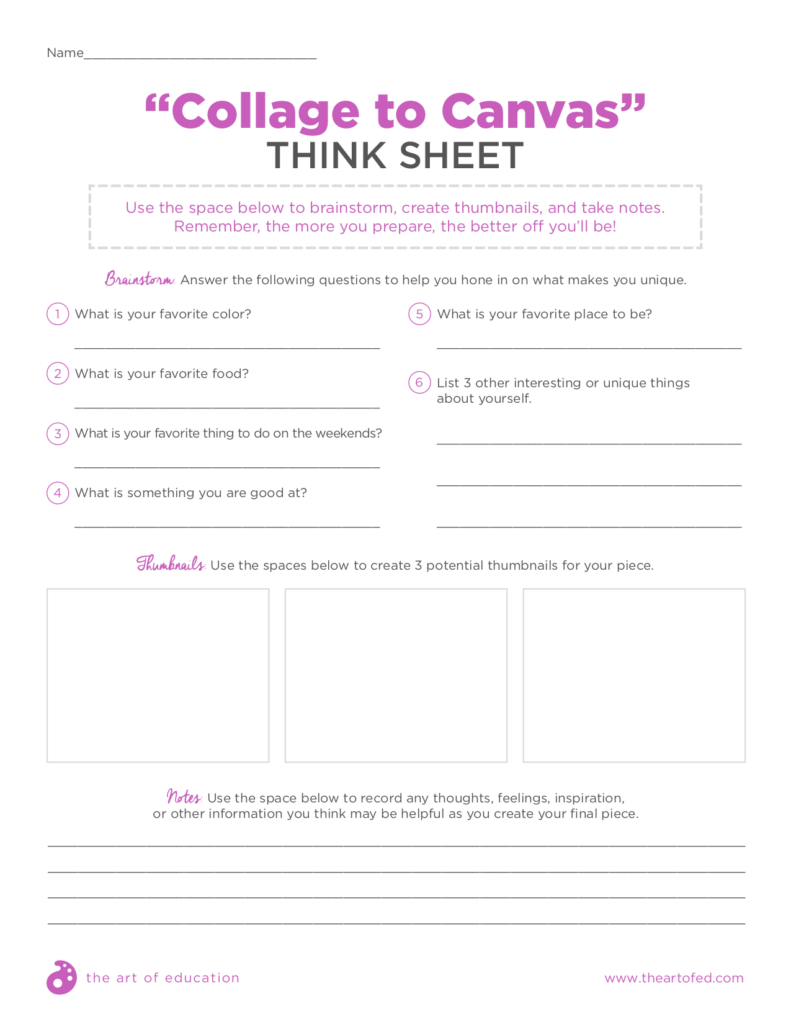
Step 2: Brainstorm
After the theme has been set, I give students a “think sheet” to help them dive deep into what makes them unique and help them brainstorm useful imagery to locate. This acts as a type of mental map for their art piece. You can grab a copy to use with your students below!
Step 3: Collect Imagery
I usually allow students a few days to search for imagery. They have so much fun with this step! Be sure you don’t limit your students to magazine imagery only. My students search for imagery and other items on the Internet, in old photo albums, at their homes, on nature walks, and in other unexpected places. They hold their items in an envelope until they have at least twenty-five things with which to experiment.
Step 4: Create Collage
After students have a variety of items to work with, it’s time to create their “self” collages! Many students choose to collage onto a flat surface, like posterboard or cardboard. However, I don’t limit them to these materials because often they find objects to collage on top of which adds to their visual stories. For example, one year a student collaged on her flip-flops, and another year a student collaged on a paper fan that belonged to her grandmother.
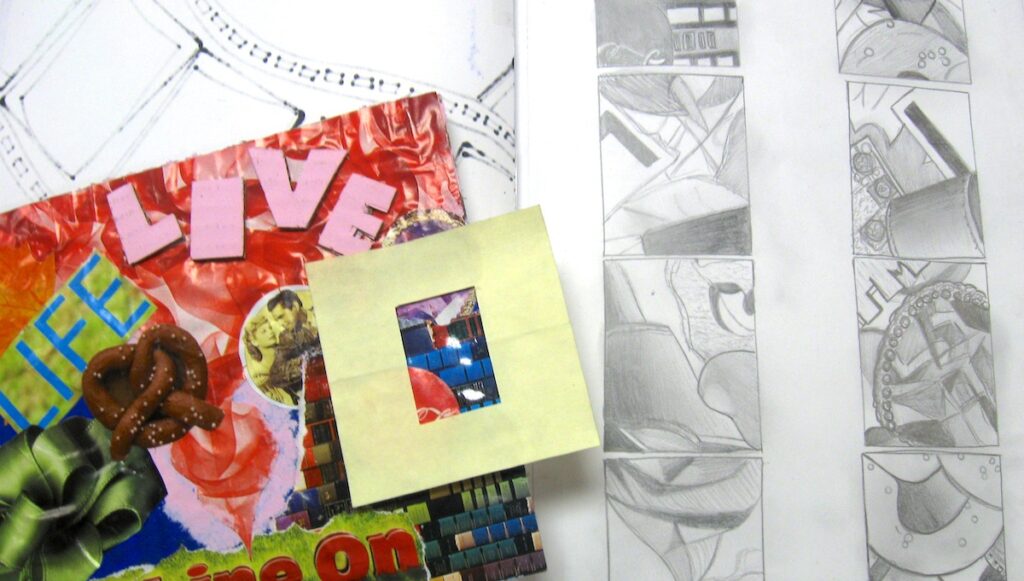
Step 5: Sketch
Once these awesome collages are complete, students take a 3” x 3” sticky note, fold it in half and cut a small viewfinder out of it. This viewfinder is then placed on top of the collage so students can find new compositions within their collage. Students move their viewfinders around, and I often have them sketch out a minimum of six new compositions.
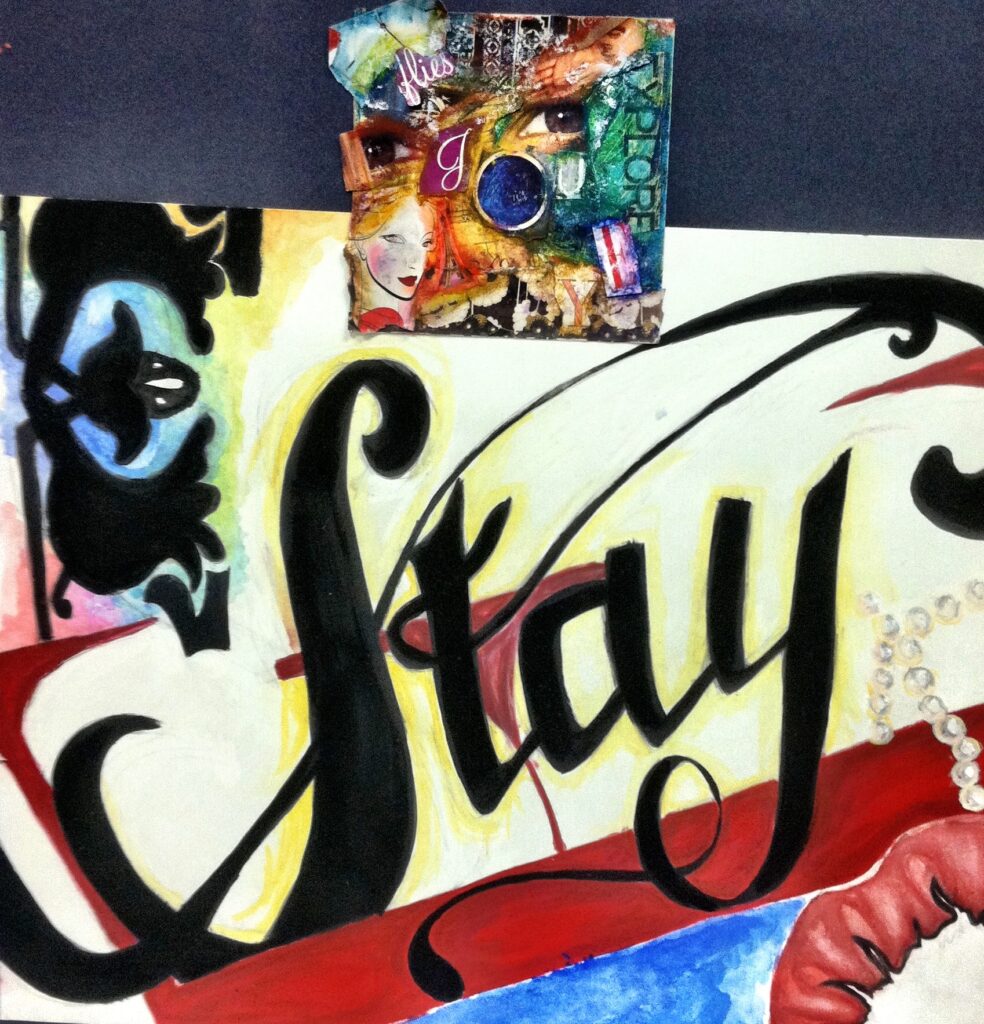
Step 6: Paint
Students are so excited to see these new compositions and find the gems of imagery that appear when they look closely. From this point, they can either choose one or several combined areas and recreate them on a large, 16” x 20” canvas board using acrylic paint.
Students have about a week to paint this new composition onto their canvas board, creating an exciting piece based on their collage work!
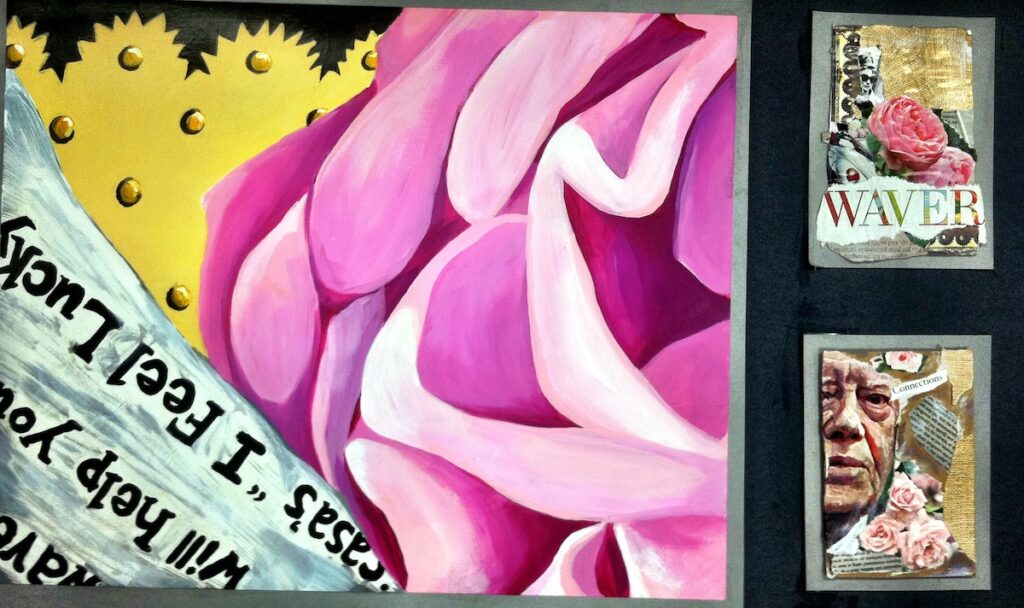
Step 7: Combine Work
As a final step, I have my students combine their collages and paintings into one display. My students mount their paintings onto poster board and consider how they want to add their collage. Some students decide to put the collage to the side while others will glue the collage onto the canvas, it’s completely up to them.
This is one of my students’ favorite projects because they have so much freedom to create an artwork with such personal meaning. From the simple task of collaging, many of these pieces end up being award-winning artworks!
How do you incorporate the art of collage into your curriculum?
Do you have your students create “self” art beyond the traditional self-portrait?
Magazine articles and podcasts are opinions of professional education contributors and do not necessarily represent the position of the Art of Education University (AOEU) or its academic offerings. Contributors use terms in the way they are most often talked about in the scope of their educational experiences.