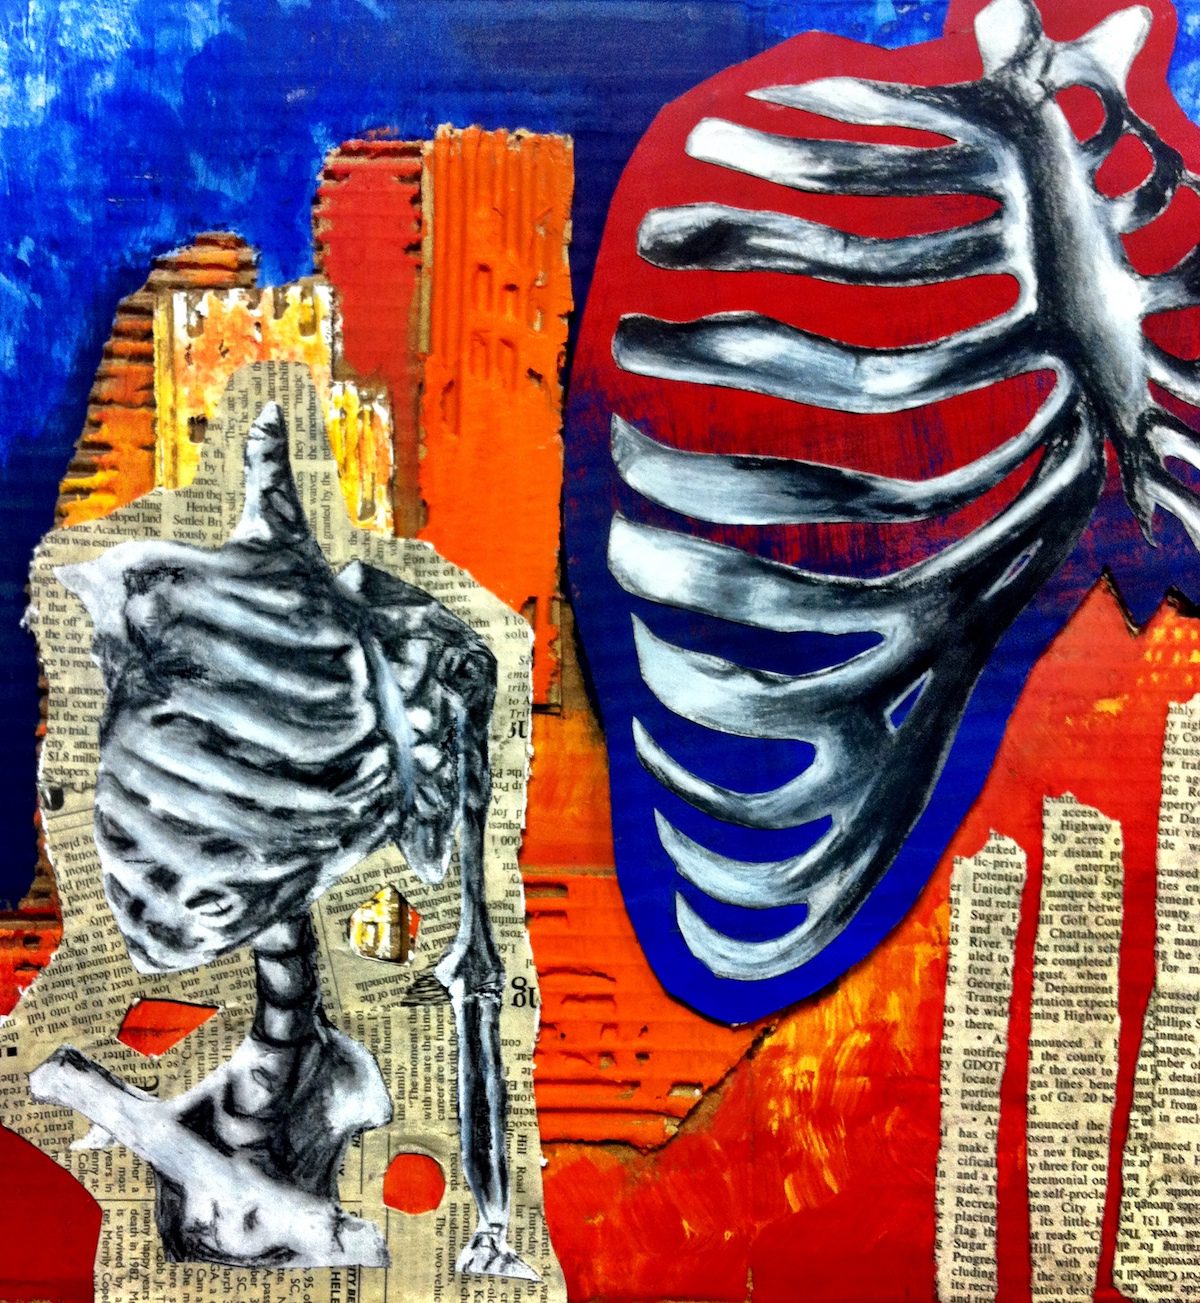
It’s no secret that when art and science meet, visual magic can occur. This Art of Anatomy lesson is the perfect mix of the two subjects, as students learn about the body and create amazing artwork at the same time.
I love this project because it teaches our students the importance of looking closely — a key ingredient to making successful art. As they work, they begin to realize they have to measure carefully to create a drawing that’s proportionately accurate. They also must look to find the subtle differences in the values of the bones.
Here are the step-by-step directions to teach your students how to make their own fabulous Art of Anatomy works.
1. Find a skeleton.
The key to this lesson is having a skeleton for your students to observe. In my case, I was able to use a plastic skeleton from my science department. Ask your co-workers if they have something you may be able to use. If not, it may be worth reaching out to other teachers in your district.
2. Set up the skeleton.
Begin by setting up the skeleton on a sturdy table in the middle of the art room. This set-up allows each student to observe the skeleton from all sides. It also allows each student to move their seat or easel and find a good place to work during the course of the project.
3. Discuss what you see.
Before beginning any drawing, discuss the skeleton with your students. Show how to use a common measuring point and to measure the bones against one another. This guidance will help them create a proportional drawing.
Remind students to look for the subtle value changes found throughout the skeleton. Then, discuss the negative space surrounding the skeleton.
4. Practice!
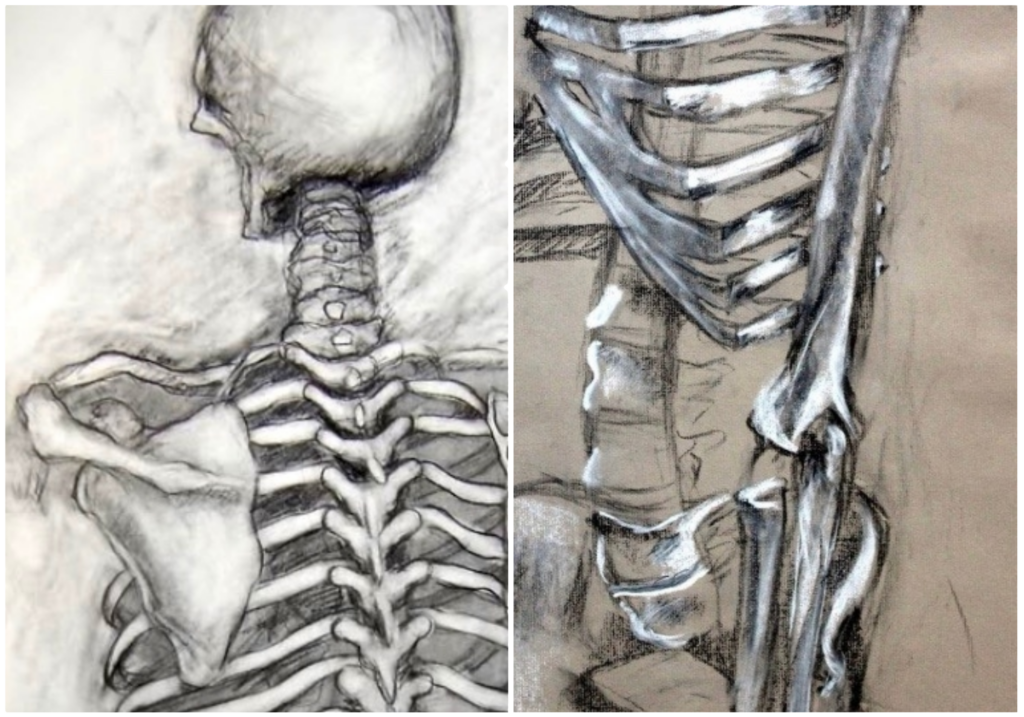
Have students draw a minimum of two full-length skeletons as practice using contour lines and simple shading. This extra practice time sets them up for success from the beginning.
5. Draw 3 areas.
Have students draw at least three areas of the skeleton as realistically as possible using graphite and blending stumps. (You’ll want to allow about a week for students to complete Steps 4 and 5.)
During this step, you’ll quickly begin to notice this lesson pushes your students’ skills to the next level. Often accustomed to working with a seven-tiered value scale, my students end up using up to nine or ten different values in these works!
If you’re looking for even more ways to teach drawing in creative ways, be sure to check out the Rethinking your Drawing Curriculum PRO Learning Pack. Among other things, you’ll explore new ways of generating ideas and planning to help students develop interesting and engaging work and how to vary the materials, surfaces, and sizes your students work with to take their drawing to the next level! Don’t miss it!
6. Mix up the media!
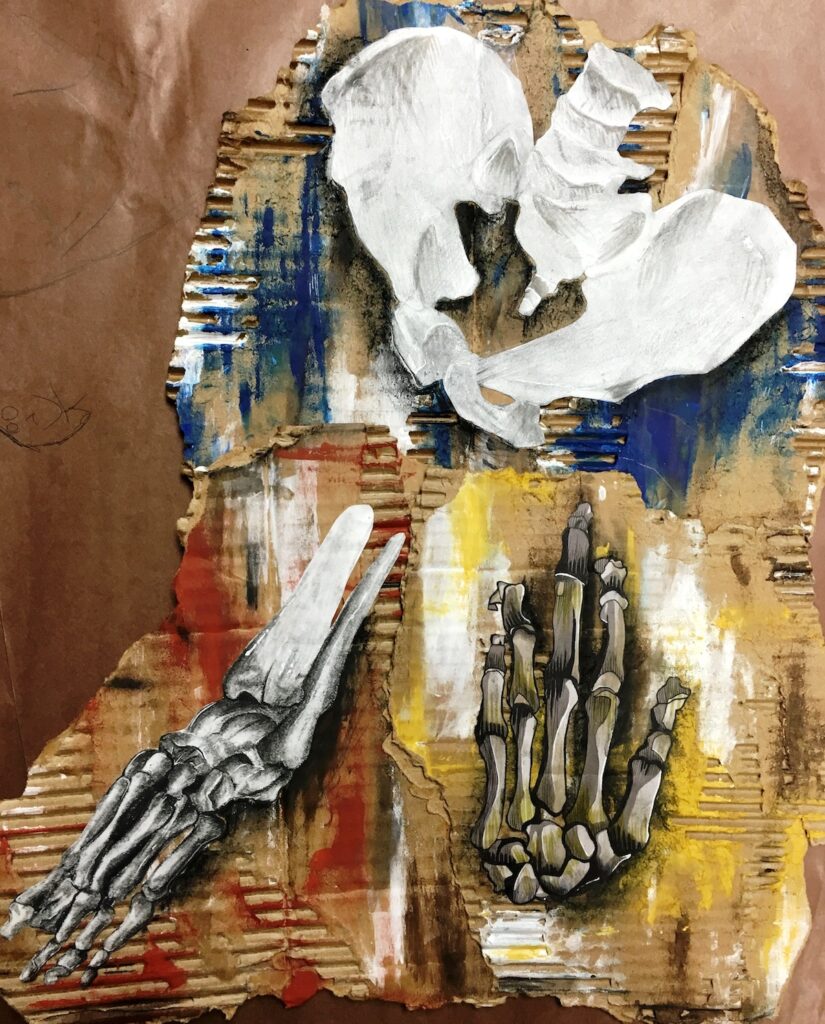
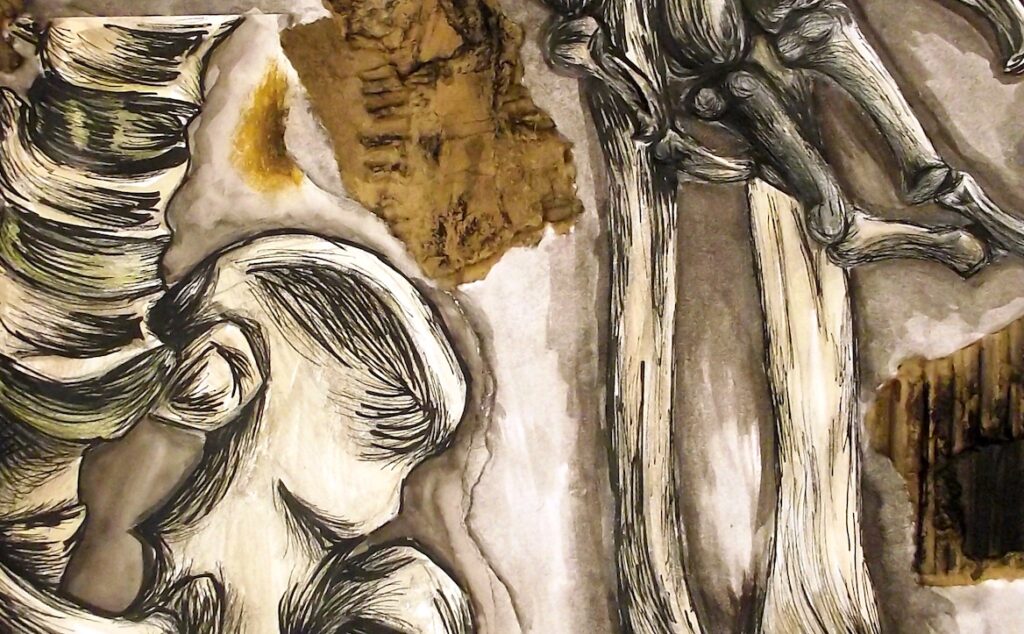
This lesson gets exciting when students have the opportunity to mix up the media and play with size variation! After the initial sketching and drawing, add a creative dimension by having students draw a bone using pen and ink and another using charcoal. If they would like to add more bones using various other media, they are free to get as creative as they like.
7. Create the final composition.
Once all of their drawings are done, students are required to cut or tear them out. Before students get to this step, you’ll want them to consider what their final compositions will look like and plan accordingly. Remind them playing with size can make things more interesting. For example, drawing a phalange (finger bone) very large or the pelvic bone very small can create an engaging final artwork.
8. Add a background.
Once students have their final drawings cut or torn out, encourage them to create a background to emphasize the drawings. I encourage my students to use cardboard or other non-conventional materials.
Give your students the freedom to complete their work creatively. I don’t have any exact size or surface requirements. In addition, they can adhere their drawings to their background in any way they’d like. This artistic choice is why their final pieces often become award-winning works of art!
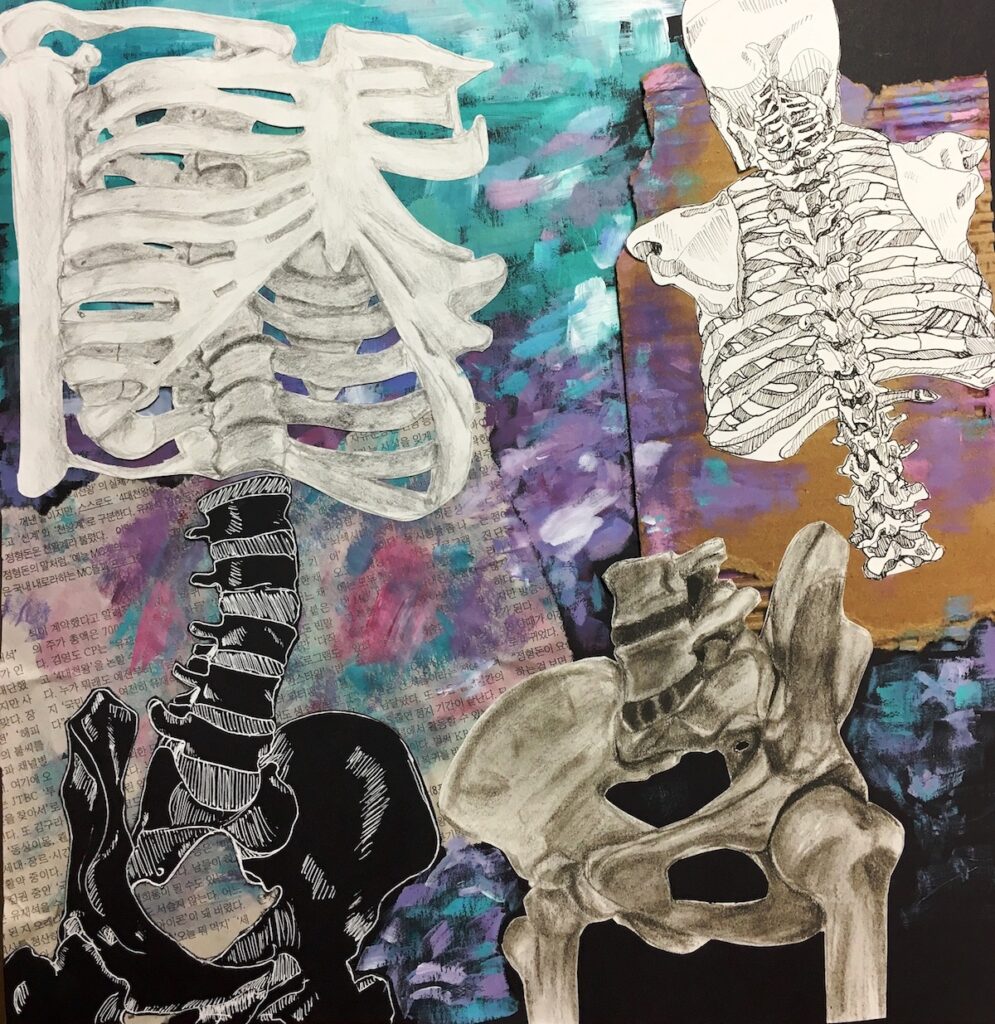
I love watching my students become the divergent thinkers I know they all are!
When students are allowed this type of freedom, they will come up with incredible work. Mixing technical and creative skills will push your students to the next level and prepare them to create more professional portfolios.
From glue and tape to staples and stitchery, from cardboard and fabric to paste paper and relief sculpture, these works truly become originals. For this reason, this lesson always becomes one of my students’ favorites!
You won’t regret giving this lesson a try. You can even create a school-wide teaching tool by displaying the work alongside the scientific names of the bones! I can’t wait to see how you and your students springboard off the Art of Anatomy!
How do you merge creative art and science lessons for your students?
How do you incorporate direct observation drawings with creative thinking?
Magazine articles and podcasts are opinions of professional education contributors and do not necessarily represent the position of the Art of Education University (AOEU) or its academic offerings. Contributors use terms in the way they are most often talked about in the scope of their educational experiences.
