Critiquing in the classroom is an essential piece of art education. Not only does it provide opportunities for students to receive instant feedback on their work, but it is also a great opportunity for students to practice using their art vocabulary, connect with your classroom community, and it provides a safe space for students to share and present their works in a small group.
In a remote or online learning setting, how do you continue to foster constructive critiques?
The good news is that remote critiques actually take a lot of pressure off students who don’t like to speak out in class. Critiquing through the screen comes with a wall of “disguise” even if the students know each other in person. Sometimes students feel vulnerable sharing their work in front of a classroom, but, when offered the opportunity to write about their work, display more confidence.
While online critiquing is doable, it is important to set your students up for success with structured instruction and expectations. Just as in the classroom, you want to ensure all students feel respected. We all know how sometimes emails we send might be misconstrued because the tone of voice isn’t apparent through typing. Setting up structures to critique respectfully through text, and how to receive written critique will help students feel more comfortable to share in the remote setting.
Be ready for anything: Take Teaching K-12 Art Online.
STEP 1: Decide on the content of the critique.
What do you want your students to focus on in terms of feedback? Should they focus on one specific concept, overall use of media, or the connection between all of this to create meaning? Is this an in-progress or final critique? Is this a formal critique where you will be assessing both the artist and the audience’s feedback, or simply a quick check and revision?
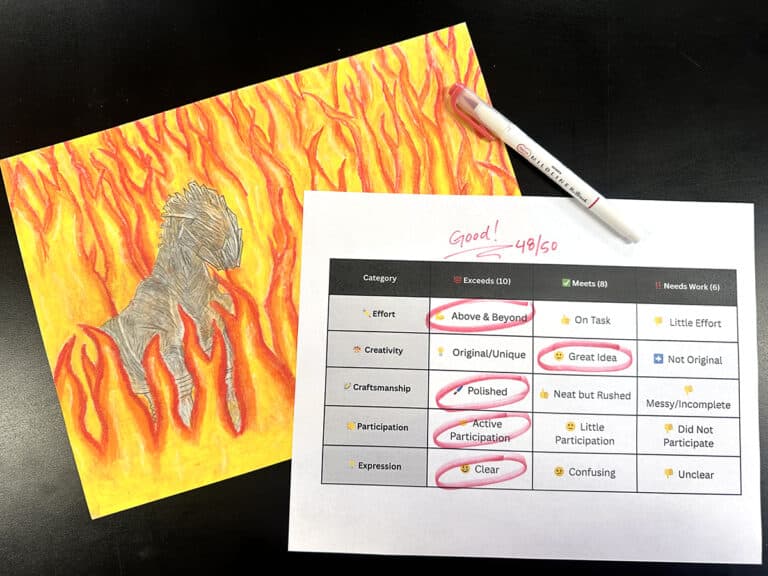
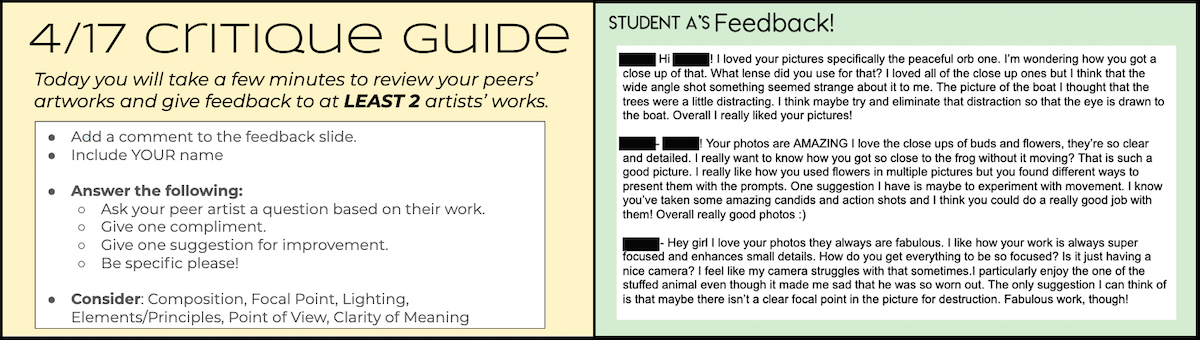
When it comes to strategies for critiquing, there are a variety of options. For example, a lot of teachers think about the “sandwich” critique, where you start with a compliment, give some constructive criticism, and then end with a compliment. For your next critique, you should try TAG.
TAG stands for:
- T – Tell the artist something you like.
- A – Ask the artist a question.
- G – Give the artist a suggestion.
Get students thinking beyond the “I like it!” phrases by using this TAG approach. While we think of this strategy as a quick sticky note or half sheet used in the classroom, it’s easy to integrate digitally, too.
Create digital stickers.
Another option to consider is to identify and celebrate the best examples of specific concepts. Using Google Slides, create shapes with text students can copy and paste onto different slides to cast their vote for “clearest focal point” or the “best use of texture to tell a story.” Depending on your platform, you can create digital stickers, like art teacher Marie Weston created to attract her students’ attention.
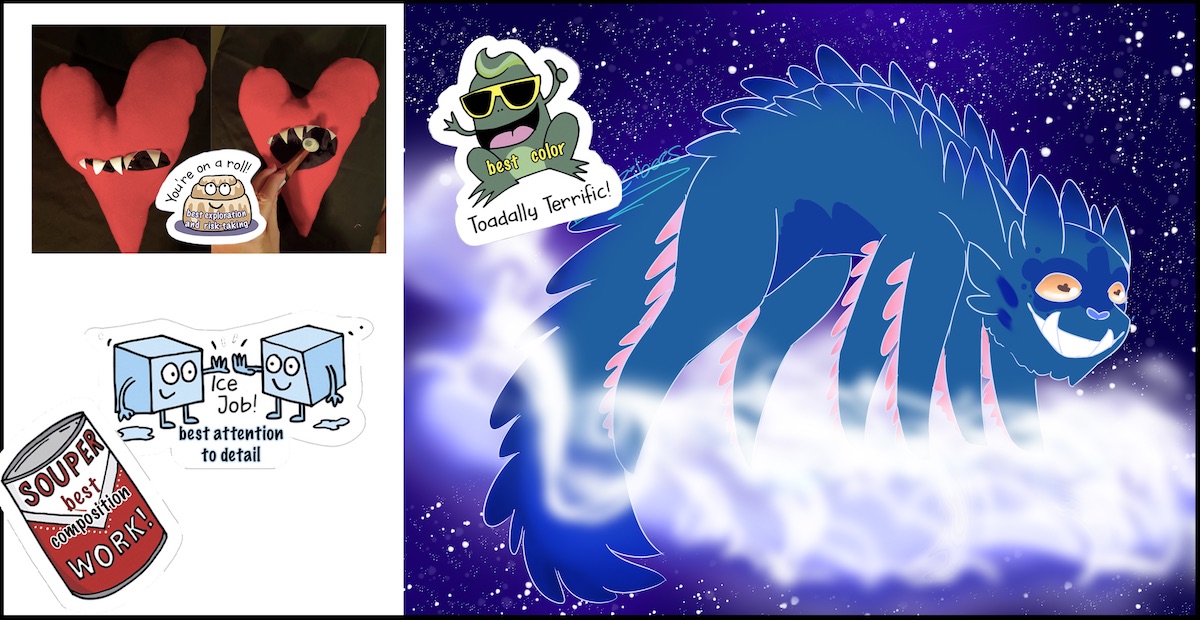
Start your critique with a fun art exercise! Having your students create their own digital stickers to use for future critiques builds opportunities for ownership over the critique process. Using digital stickers to critique is a fun way to not only discuss the highlights of what made students vote for particular images but a super easy and fun way to check for understanding.
No matter what content structure you use for your digital critiques, keep it simple and pointed at first to allow students time to peruse each other’s work and get used to this new way of critique.

STEP 2: Choose your platform.
Google Slides
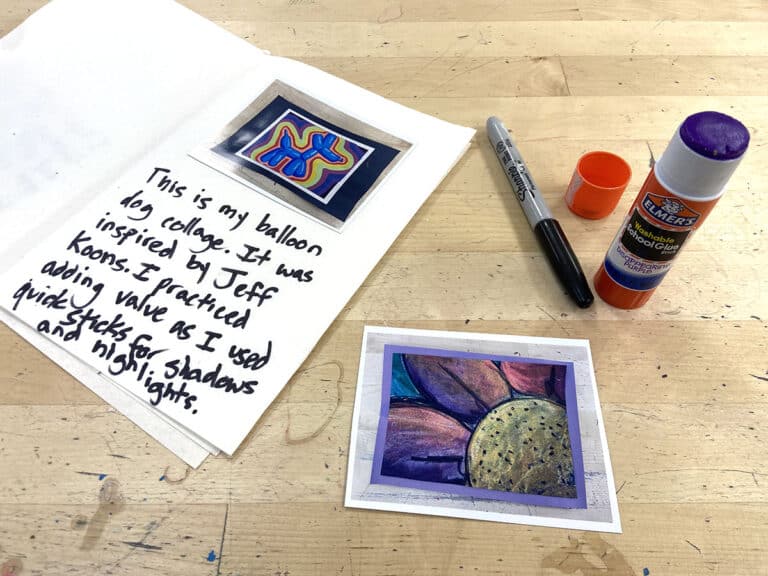
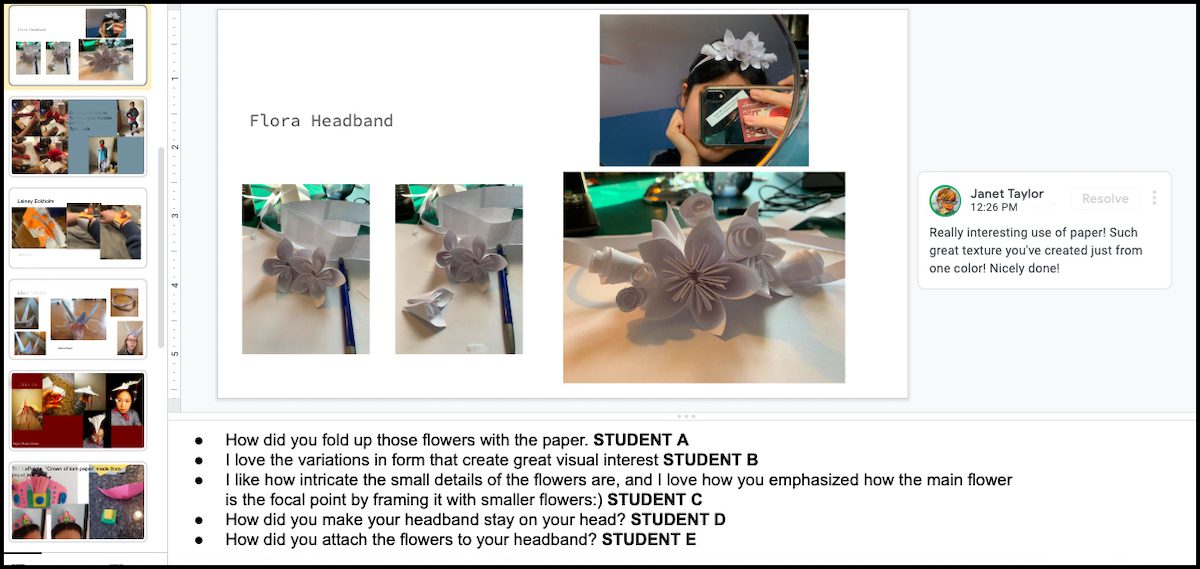
In-progress critiques are not as easy as walking around during studio time and tossing a few comments to peers. Creating a class slide deck in preparation for critiquing is a great way to get the whole class involved in viewing what others have been working on in a remote setting. Provide a template slide for students to copy and paste to add their work to the larger slides so they know the content expectations. Then, ask students to comment on three other students’ artworks.

Here are some tips to set you up for success:
- Create a separate Google Slide deck specifically for the class to share. Making this editable by all does come with some classroom expectations.
- On the first slide, include an image of your prompt, links to the assignment, and deadlines for responses.
- Create a slide grouping students to make sure all students are giving and receiving feedback, holding everyone accountable.
- Choose specific questions to address to ensure all students are receiving targeted feedback.
- In your template, include a place for the student’s name, date or dates of progress, and questions the artist has for their peers.
- Create an example slide using one of your own artworks (or a past student’s). This way, you can easily model your expectations.
- Students can also annotate their own or peer images using arrows, lines, circles, and other shapes.
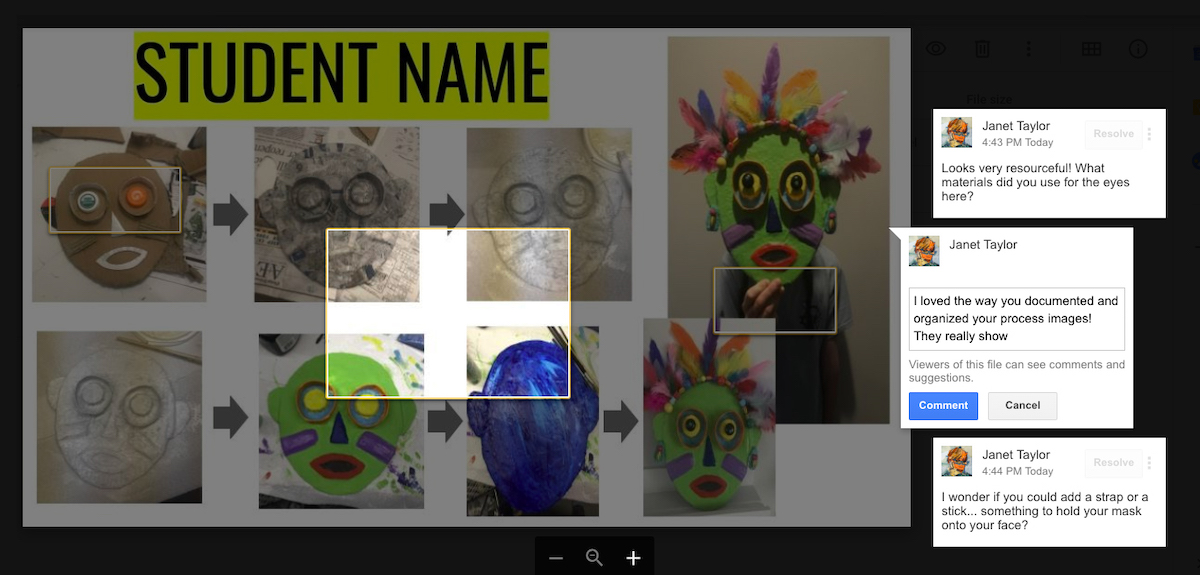
Google Images with Comments
If you have students submit their work into a Google folder, you can critique their work through comment annotations. Clicking and dragging allow you to “highlight” a section of the image and make comments. This is a great way to give feedback to students on specific areas of their work. The comments are time-stamped to help keep track of your back-and-forth conversations. Peers can reply and add comments to also extend their feedback
Digital Sticky Notes
If you haven’t tried Padlet, it’s a virtual sticky note board where students can post images, critique, and share in a discussion. Of course, there are other discussion board applications on whatever Learning Management System (LMS) your school might use that are also a great way to communicate, respond, and easily grade with feedback.
Video Critiques
Video chats are a great way to see your students’ faces and hear their voices. If a live video chat isn’t the best route, one way to share quick snippets and reinforce your connection with your students is to have a student create a video talking about their artwork. They can answer all the same questions you pose, point to their work in their hands, and not even show their faces. Sharing each other’s video and audio helps improve peer artwork as well as your community rapport. Set a short time limit to keep the pressure of speaking and presenting to a minimum. As students practice engaging in this type of digital presentation, they often find it easier and faster than typing out their ideas.
No matter how you decide to critique remotely, it’s important to create a consistent scaffolded approach. Don’t become dismayed if your first remote critique (or first few!) is a flop. It may take a bit of trial and error to find out what is the best way to communicate with your students and foster your online community. We know how essential critique is to our artmaking process; it just may take a little bit to figure out what will work best for your class when you can’t see them in person.
What are some ways you’ve been able to support critiques through remote learning?
How have you been able to support a sense of community through online critiquing?
What are your favorite strategies for critiquing?
Magazine articles and podcasts are opinions of professional education contributors and do not necessarily represent the position of the Art of Education University (AOEU) or its academic offerings. Contributors use terms in the way they are most often talked about in the scope of their educational experiences.