At the semester break, art teachers get a moment to stop, breathe, and rest. You have made it through so many stressors—including supply management. When you have as many students and materials as art teachers do, it can be hard to manage where everything goes or keep track of what you have on hand. As the first semester winds down and you look ahead to the second, now is the time to reassess and reorganize your supplies.
Let’s evaluate what you already have, find a way to organize it, and look ahead to creating more amazing art next semester!
1. Assess what you have.
Many art teachers love to hoard and collect. We hate parting with items because we definitely can use them one day! Knowing exactly what you have available for your students is important. And that means putting everything on the table. Literally. No matter how long you have been in your classroom, it’s likely there are supplies you have forgotten, lost, or weren’t aware of in the first place. So go through every cabinet, every drawer, and pull everything out.
As you look through what you have, consider each item:
- What could you use it for?
If you don’t have an exact purpose or lesson in mind for the item, recycle or toss it! - Do you need more of it?
Perhaps you started a collection of plastic bottle caps to make a mural, but you only collected one bag. Is it realistic to collect the amount you will need within a designated period of time? If not, recycle or toss it. Or, perhaps you have three shelves of plastic containers that your colleagues donated one year. Do you really need that many containers? If not, recycle or toss them. - Does it need to be tossed?
If the item is old, expired, empty, or just plain gross—recycle or toss it!
This can be overwhelming if you do it at once, so do it in spurts. Break the process down by location or type of supplies. It can also be less daunting to do it with your students! According to EdWeek, classroom jobs and helpful tasks give students ownership of the art room and build a sense of community. Students love to help with these special jobs because it tells them they are responsible, and they get secret supply closet access.
Take advantage of your early finishers and give them a simple and specific task to complete:
- Check colored and graphite pencils.
Go through the entire stash of colored pencils and graphite pencils. Throw away pencils that are shorter than their pinkie finger. - Test washable markers.
Test markers by scribbling lightly on scrap paper. Organize the good markers according to your existing system. Toss all the dried-up markers in a plastic bin to make liquid watercolors. If there is time, sort the spent makers by color and put them tip first into a container. - Inventory acrylic and tempera paint.
Provide a list of paints you keep in the classroom. Go through the paint shelves and mark the quantity and size of each color and bottle. Extra responsible and careful students can combine partial bottles of paint or refill empty ones. - Sort collage materials.
Go through the scrap box and throw away scraps smaller than their hand. Organize the supplies by type. One way to do this is by type of paper. For example, colored paper, painted paper, or magazine pages. Another way to do this is by color.
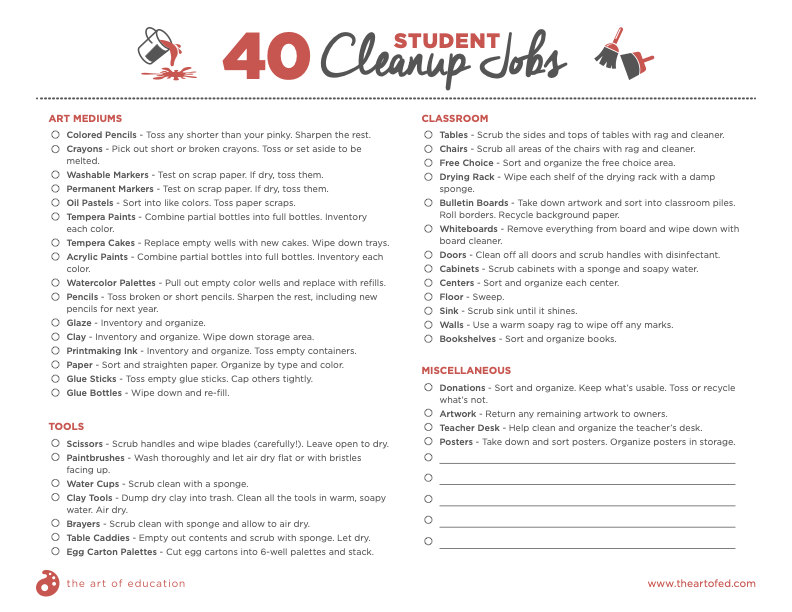
For more student jobs that will help you around the classroom, check out our 40 Student Cleanup Jobs that you can download and print today!
2. Organize what you have.
Once you know what you have, organize it, and put it away. Think about how you have stored your supplies until now—what worked and what didn’t?
Some other considerations as you organize supplies may include:
- What do students need to be able to access regularly?
- What supplies are barely used?
- What grade level or class will be using this item?
- What do students need supervision or permission for?
- What is unsafe for students to have access to?
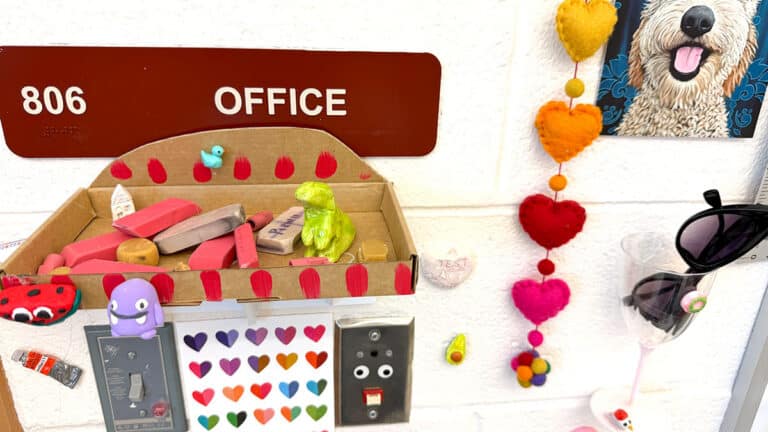
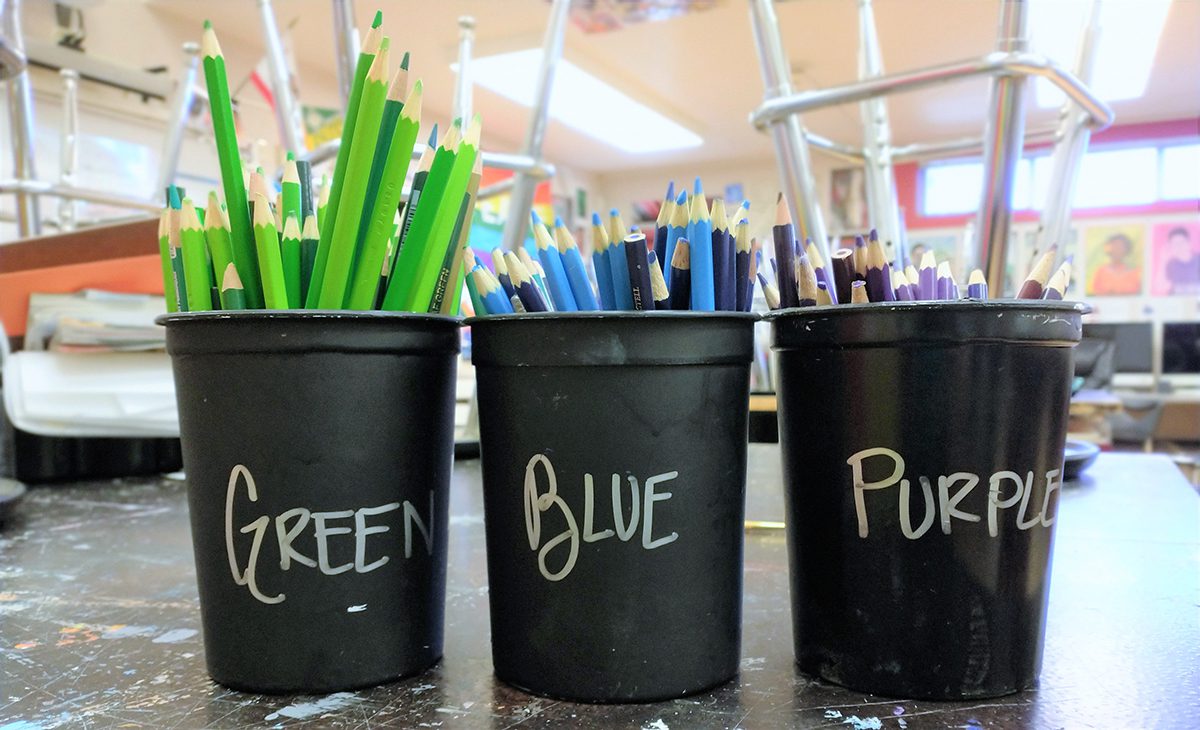
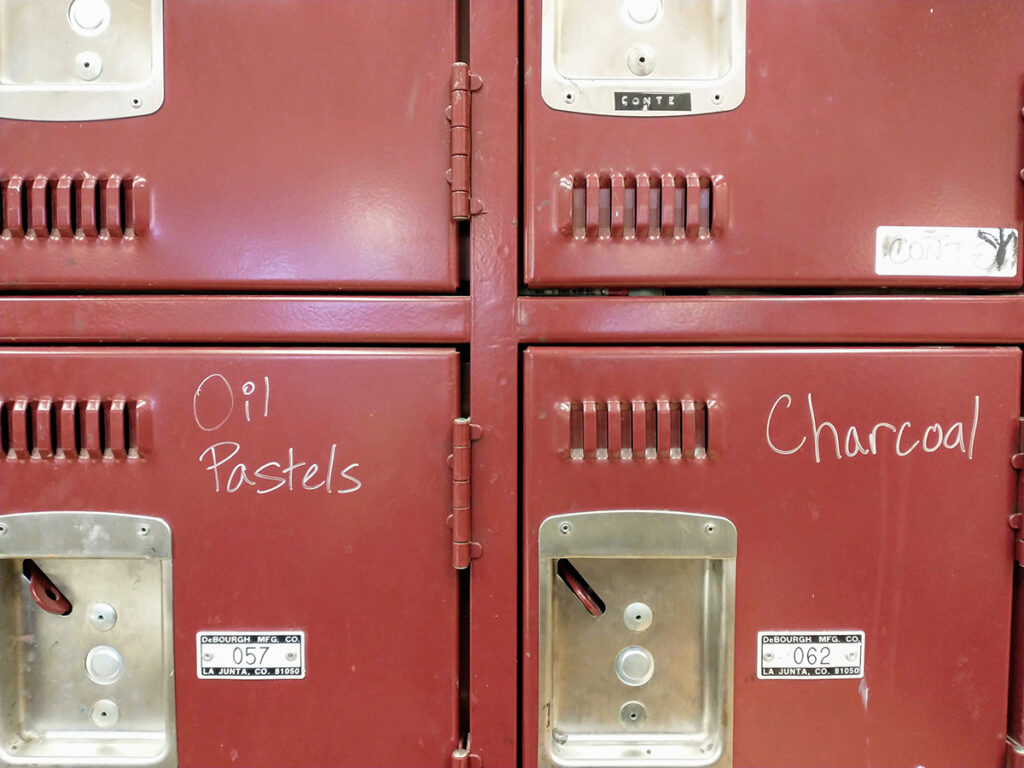
Find ways to use labels, pictures, and color-coding to make your supplies accessible for as many students as possible. Labeling supplies with images and words helps younger students and students who are English Language Learners. When it comes to sorting by color and seeing everything presented by color, even your oldest students will love it. Since color is eye-catching, students are more likely to recall information if it’s color coded.
Where do I get labels?
If you are looking for quick ways to get custom labels or hacks to make your own, there are tons of possibilities! Browse around and find something that will fit your needs and the needs of your classroom.
Here are three ideas:
- Quick and Easy
Blank stickers are your friend! Keep a bunch of these envelope labels stashed in your classroom. If you get a new supply, write it on two labels with a permanent marker. Place one label on the outside of where the supply is stored, such as a cabinet door. Place the second label on the storage container itself. - Aesthetically Pleasing
If you want to spend a couple of dollars to support another educator, check out Teachers Pay Teachers for some templates. A go-to store for simple designs is SuperHERO Teacher. - Make Your Own
There are lots of tutorials online to guide you through designing your own labels. A good place to start is this video by Early EDventures; you will learn how to harness your slideshow platform.
What are some ideas for color sorting?
We are all familiar with the art rooms decked out in rainbow order. Even if this is not your jam, there are still many ways to color sort that will make organization easier without compromising your classroom aesthetics.

Here are two suggestions:
- Embrace spray paint.
Use spray paint to make a collection of old containers look uniform. You can spray paint all of the containers one color. You can also spray paint groups of containers by color to designate categories or mediums. Label each container with the supply they will hold. - Sort by temperature.
Sometimes we don’t have enough containers to give each colored item its own place. Break the supplies up into warm, cool, and neutral for storage and distribution. Listen to this episode of Everyday Art Room to learn about sorting chalk pastels by temperature.
How can I organize supplies by table?
One option for this is table caddies. Many classrooms have one plastic tool caddy on each table to store daily necessities, including pencils, erasers, hand sharpeners, glue sticks, and a few dry erase boards and markers. The caddies are usually plastic, making them easy to wipe down and sanitize. These caddies help manage supplies because they eliminate some of the time it takes for supply distribution and cleanup.
Art-specific caddies can be expensive! Some other budget-friendly alternatives include:
- Dorm shower caddies
- Tackle boxes
- Toolboxes
- Condiment organizers
- Baking pans
In addition to organizing supplies in caddies by table, you can also organize by medium or project:
- By Medium
In a TAB classroom, you may choose to have each center contained to a caddy. You will be able to switch up the classroom layout quickly with a simple rearrangement of caddies. This also allows you to run centers in your room for a short period of time—just stack the caddies in your closet when you are done. Perhaps you are about to enter a fibers unit. Provide caddies for embroidery, sewing, weaving, macramé, and felting. Students can experiment at each center before deciding on their final approach. - By Project
Have caddies for each table prepped for specific projects. This does take more time upfront, but it does give you more time during the class period to create! For example, a macramé caddy may include a cord, scissors, sewing tape, printouts of basic patterns and knots, a checklist of the project requirements, and your rubric.
You do want to set the norm that these caddies are a place to store supplies—they are not a place to throw used paper towels or garbage! Consider including a laminated checklist of what belongs in each caddy and assign a responsible student to inspect the caddies at the end of each period.

3. Place a mid-year order and plan ahead.
Now that you know what supplies you have and have taken the time to organize them, it’s time to consider your mid-year order. Many teachers have a one-time budget. If this applies to you, you will need to stock up at the end of the school year or the beginning of next. It is still a good practice to keep a running list of what you need throughout the year. That way, it’s ready to go when you compile your final order.
If you have an opportunity for a mid-year order, your budget may be lower than at the beginning of the year. Consider what you really need for the upcoming semester. Plan how to use and reuse what you already have to make the most of your funds. What do you have a surplus of? How can you use that supply with at least two different levels you teach? As artists and art teachers, we are known for our resourcefulness. Our ability to reuse spent supplies is a big part of that!
Here are three resourceful ways to use what you have:
- DIY Ceramics Toolkit
This article from Ceramics Monthly details how to use household items to make custom clay tools. Spend a day guiding students through building a tool kit that is uniquely theirs. - Make Your Own Alcohol Inks
Follow Felt Magnet’s tutorial to create your own custom colors with markers and rubbing alcohol. Once students have their color, have them compose collaborative works that play with color theory and color mixing. - Collect Cardboard
Cardboard is a versatile material that makes a fantastic surface. Construct an abstract sculpture that focuses on texture and form, like Alex Uribe, or use it as a canvas, like Dag Weiser. For even more cardboard ideas, check out this episode of Everyday Art Room, this article, or this one!
If you want a deeper look into reusing spent supplies or non-traditional art supplies, check out the links below:
- 12 Ways to Be Environmentally Conscious in the Art Room
- 6 Art Activities That Require Minimal Supplies
- Creating With Unexpected Materials PRO Pack found in PRO Learning
The time to pause and breathe between semesters is something we all look forward to. As we enjoy this lull in the chaos that is teaching art, it is the perfect time to consider your students’ artmaking materials. Know what you already have and reconsider some organizational solutions that aren’t quite working for you and your students. Then, get excited for the next semester. Now is the time to slow down and reset, so both you and your supplies are refreshed and ready to finish the year strong!
What is one organizational hack that you think every art teacher should know about?
What is one supply storage problem you are going to tackle next semester?
Magazine articles and podcasts are opinions of professional education contributors and do not necessarily represent the position of the Art of Education University (AOEU) or its academic offerings. Contributors use terms in the way they are most often talked about in the scope of their educational experiences.