You know that feeling—you stare across the room at a piece of cardboard, and your brain starts considering all the possibilities. Others may see cardboard as something to throw out or recycle, but we see potential as art teachers. There are many reasons why art teachers use this plentiful material with students. These reasons can spark creativity and critical thinking that lead to a whole host of unique artmaking experiences.
Let’s explore the reasons to use cardboard with 12 specific uses below.
Why is cardboard such great material for the art room?
Have you stopped to consider why cardboard is such a popular material within the art room? An art teacher’s rationale for using cardboard with their students can be just as unique as their contexts, philosophies, and needs.
Here are some rationales for bringing cardboard into your art room:
- It is plentiful.
As our internet shopping increases and cardboard boxes fortify our front doors, cardboard is easy to come by. Mistakes made during the creative process do not need to feel as detrimental. Students can grab another box and try again. A simple request from colleagues can result in too much cardboard. But really, when is there ever too much cardboard? - It considers the environment.
Instead of ordering new supplies, repurpose the cardboard that already abounds. This act of repurposing teaches students to consider the artmaking materials they have available at home and their environmental impact. Just don’t forget to recycle the scraps left over from the creative process too. - It is financially frugal.
Art room budgets are tight. Cardboard offers a solution for art educators who are endlessly striving to inspire their students and make hard decisions about using their supply budget effectively. - It is aesthetically pleasing.
There is something so appealing about that soft, brown color, especially when consistently used in an entire sculpture or body of work.
What are some challenges that cardboard brings?
As joyful as creating with cardboard can be, there are some drawbacks to using this material. It is a good idea to be aware of these so you can address them during the planning process.
Consider the following challenges:
- It is non-archival.
Cardboard is produced for a utilitarian purpose and then recycled. No one ever said, “We need to ship these toothbrushes across the country. Let’s make sure the box is archival.” This may not be a big deal for your students, but it is something to note. - It varies in quality.
No two pieces of cardboard are of the same quality. Some cardboard is thick, some thin, some feel funny when touched, and some is, well, dirty. Our beloved material comes in different qualities and thicknesses, and it is okay to be picky. You want everyone involved to be successful. - It takes up space!
Storage is always a problem, and collecting this material can be overwhelming. Save only the good-quality cardboard you want. Flatten the boxes for more accessible storage or use the box itself to hold other items until it is time to break them down for artmaking. Don’t let the piles consume you and take the joy out of creating.
Are you ready to put those boxes to use? Here are 12 uses for cardboard in the art room:
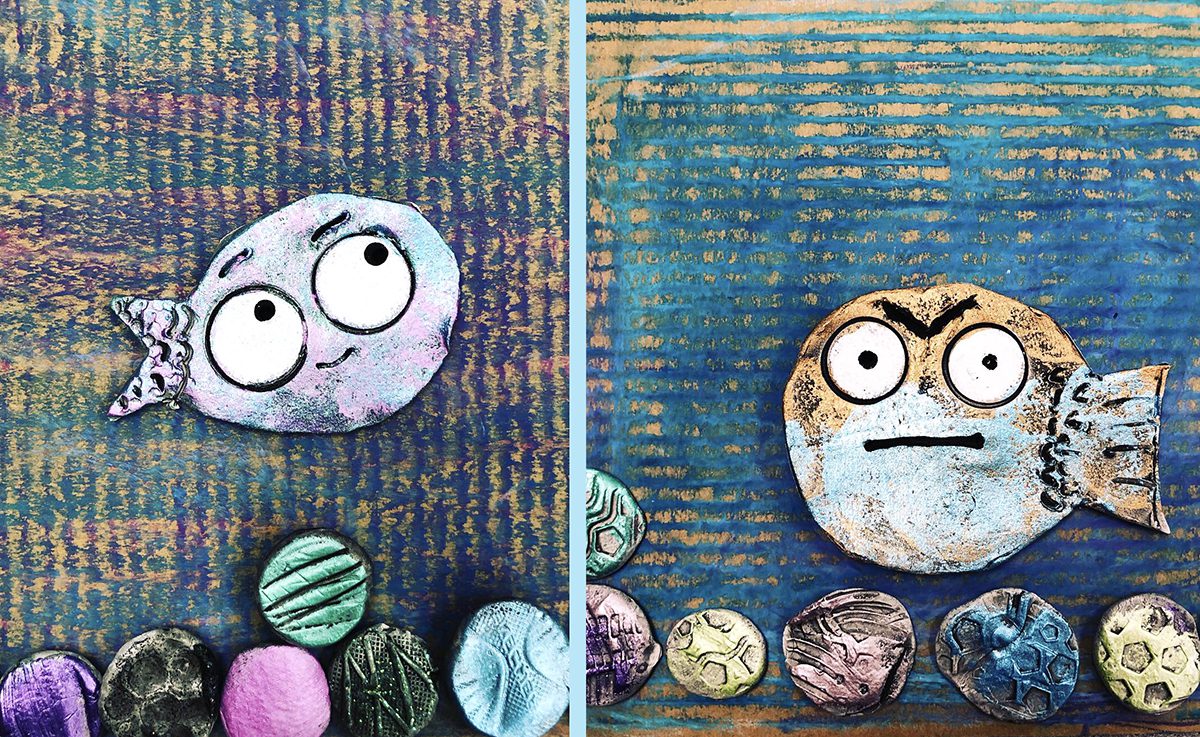
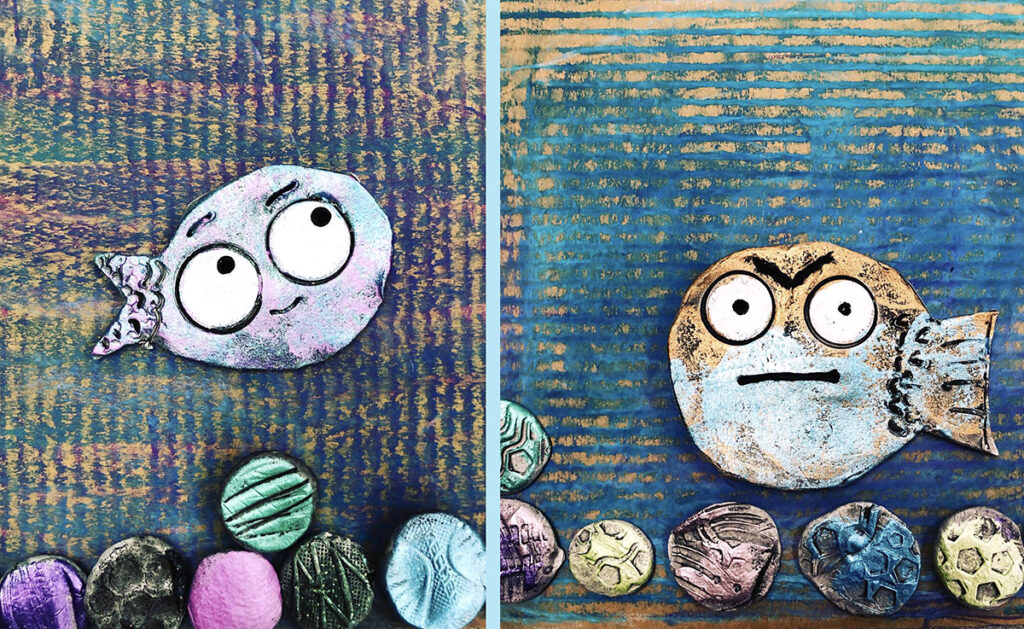
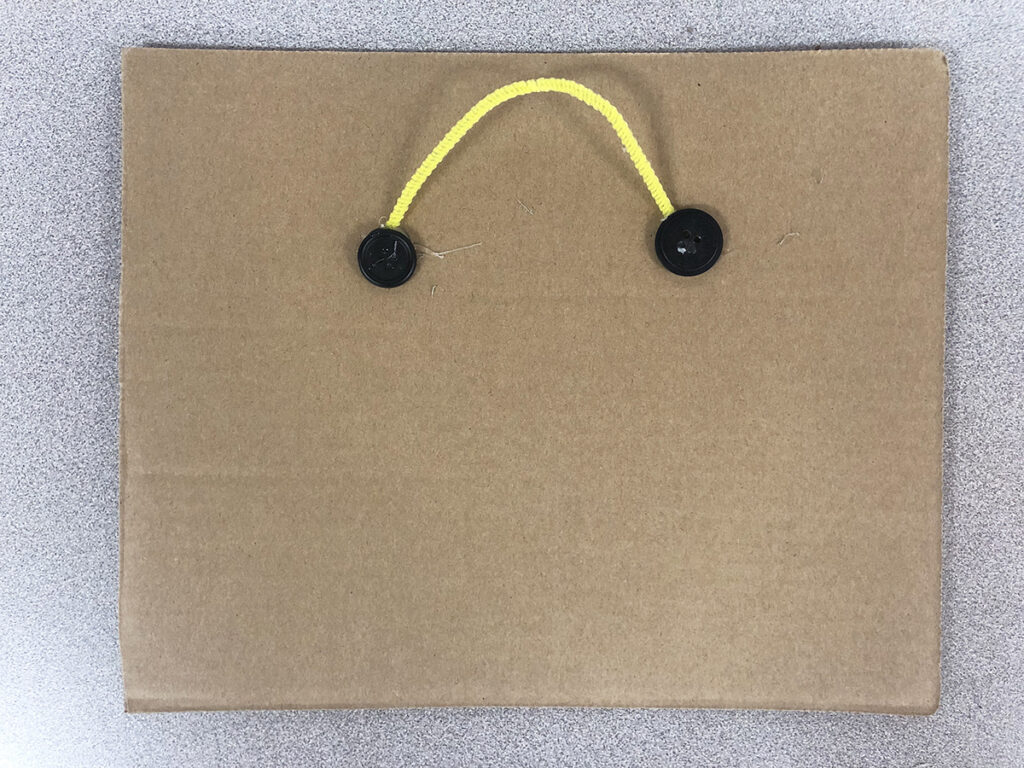
1. Mount artwork.
Students may create heavy mixed-media artworks that slump over and need support. Clay slab artworks can be tricky to display. Cardboard is an ideal and cost-effective solution for mounting and hanging work. Cut the board slightly larger than the artwork. Cover it with black paper or paint, then mount the art. This process will give the look of a matted piece without pulling out the mat cutter. Are you hanging art in the hallway? Use T-pins through the corners of the cardboard or use hot glue to adhere a pipe cleaner to the back. Dab glue on the two ends of the pipe cleaner and cover the glue with two large plastic buttons. The buttons help hold the hanging apparatus in place, especially as it dries.
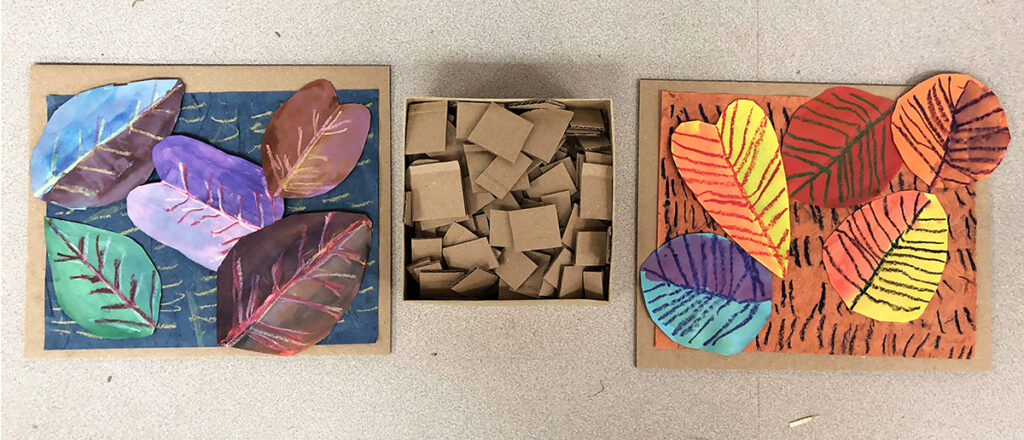
2. Create emphasis with pop-ups.
Glue tiny pieces of cardboard to the back of elements in the artwork to make a simple relief. Cut up a ton of small cardboard pieces ahead of time, so they are ready to go. With the artwork of assorted leaves below, glue pieces of cardboard behind a few of the leaves to create emphasis and depth.
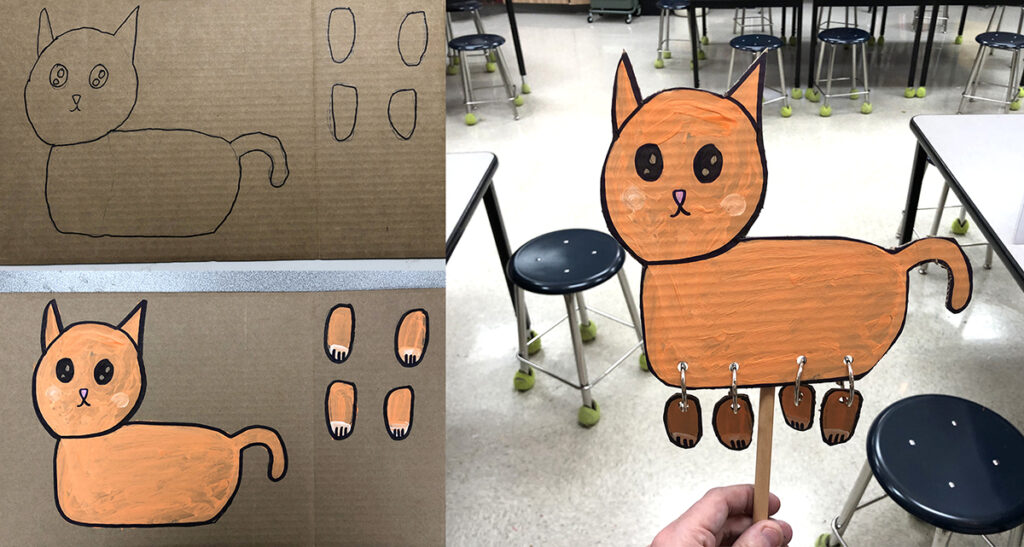
3. Construct articulated puppets.
Are you working with a music or drama teacher on a performance? Consider large, articulated puppets. Draw the “moveable” pieces, such as limbs, separate from the character’s body. Paint and then cut out the pieces. Use a hole puncher and binder rings at the points of connection. Binder rings make for an easy attachment method and allow the limbs to sway when put into action.
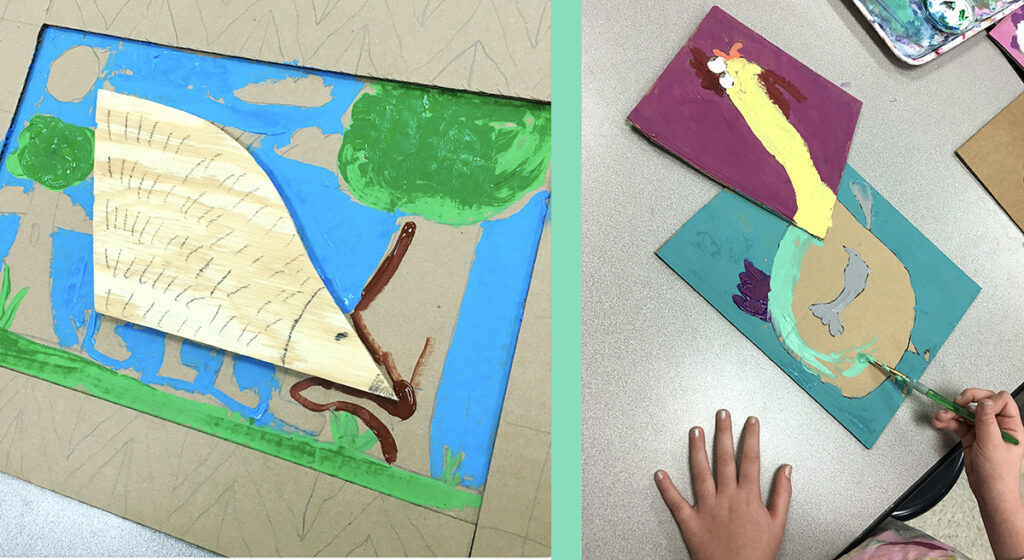
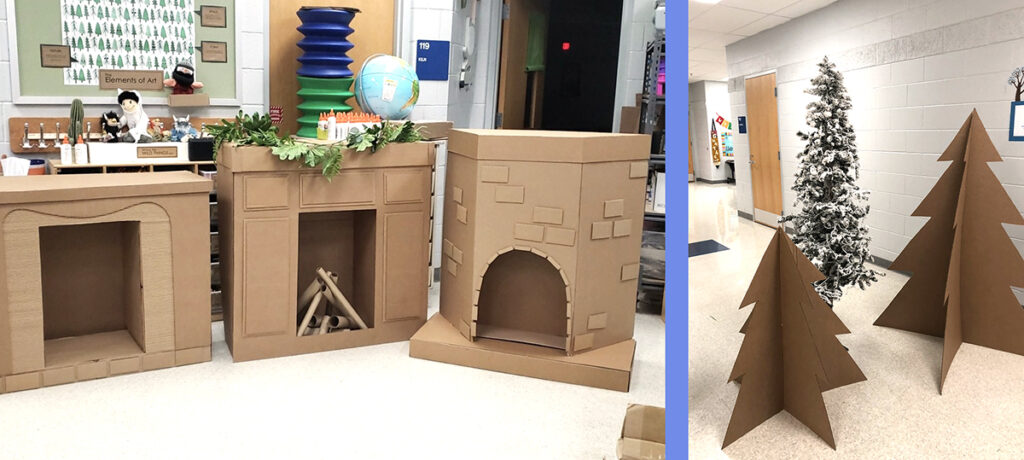
4. Design scenery or school decor.
While you’re at it, a performance may need a backdrop. This is what that giant piece of cardboard stashed behind the drying rack has been waiting for! Students can paint on the lightweight material for easy set changes or use black permanent marker lines on the plain cardboard for a consistent, bold aesthetic. Along the same lines, are you having a school-wide event? Use cardboard to make the decorations. An Ohio elementary school celebrates its own winter holiday called Winter Fest. They decorate the school with cardboard trees and life-sized fireplaces. The flat brown color paired with white snowflakes creates a relaxed, calm look.
5. Collaborate with murals.
The work of artist Elizabeth Murray is full of bright colors and forms and is drawn from cartoon imagery. She combines her painted elements in large wall pieces. Her work can inspire a collaborative artmaking experience using large pieces of cardboard. Each student paints and cuts out their own whimsical shape. Then, as a team, the students work together to assemble these forms into a piece of art that tells a story or is non-objective and just plain fun.
6. Draw blind contour portraits.
Blind contour portraits are created by observing another student and drawing them without looking at the paper. The results are beautifully awkward. How can we make this exercise feel more substantial and complete? Drawing the portraits with permanent markers on cardboard allows for countless recyclable iterations of the process. If a student is not pleased with their initial approaches, grab more cardboard pieces and try again. Use oil pastel to color in the portraits on top of the soft, brown surface. It mutes the pastel tones and softens the scribbled lines.
7. Store items consistently.
Are you starting to notice similar boxes appearing at your front door or from the supplies you ordered? Use these boxes for both aesthetically pleasing and repurposed storage. When one of the boxes gets messy, recycle it and move on instead of lamenting the lost storage receptacle. Are you an art teacher who thrives on color-coding in rainbow order? Use this opportunity to label the boxes with color coded paint swatches. You can also paint or cover the boxes to match your specific color scheme.
8. Stamp to teach line.
Painted papers have many uses like cardboard—students can collage them, use them as drawing surfaces, construct paper sculptures, and more. Create these textured papers with printed lines made from cardboard. Cut up smaller cardboard rectangles and dip the edges into tempera paint. Stamp them onto the painted surface. A similar technique can be used to teach vertical and horizontal lines to students. Dip the cardboard edge into black paint and then stamp the surface, creating a Piet Mondrian-esque work of art. Stamp grids to mirror the work of artist Agnes Martin.

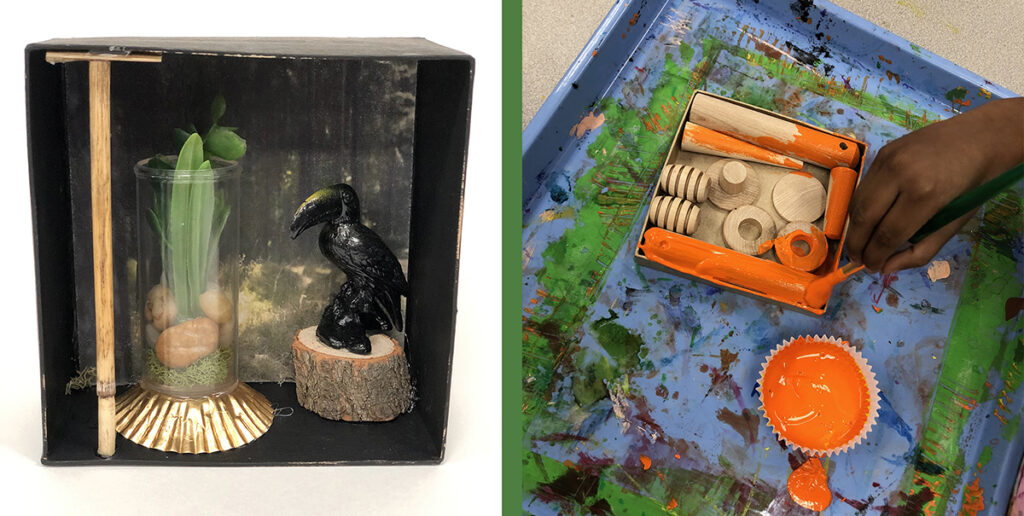
9. Collect for Cornell and Nevelson-inspired assemblages.
The age-old assemblage artmaking experience is a rite of passage in the art room. When students learn about artists who collect and combine objects, it can push them to see artmaking possibilities outside of drawing and painting. For a Louise Nevelson lesson, collect small boxes for students to glue wood shapes into, then monochromatically paint them. Discuss how one color unifies the various forms and shapes. To get your students started with this project, show them this complimentary artist bio: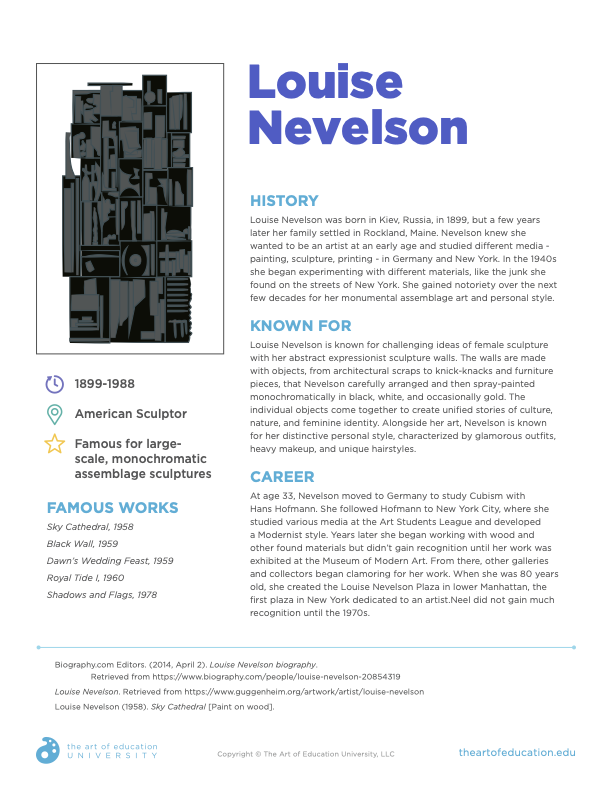
Alternatively, study Joseph Cornell’s work. Use plastic animals, sticks, dried moss, wood shapes, and those weird plastic shapes the math teacher was getting rid of last year. The cardboard box quietly provides an opportunity for other materials to shine instead of taking center stage.
10. Build structures.
You may see a stack of boxes and immediately dream of building a fort. Our minds automatically see architecture with so many possibilities. Use small cardboard boxes to build neighborhoods with students. Maybe, instead of an expensive play structure, kids at home will delight in a personal café or cottage built from cardboard. Mrs. Edington, an art teacher in Pittsburgh, Pennsylvania, creates house forms out of large pieces of cardboard for her adaptive art students to paint with bright colors. The planned matrix provides students an opportunity to be creative with constraints.

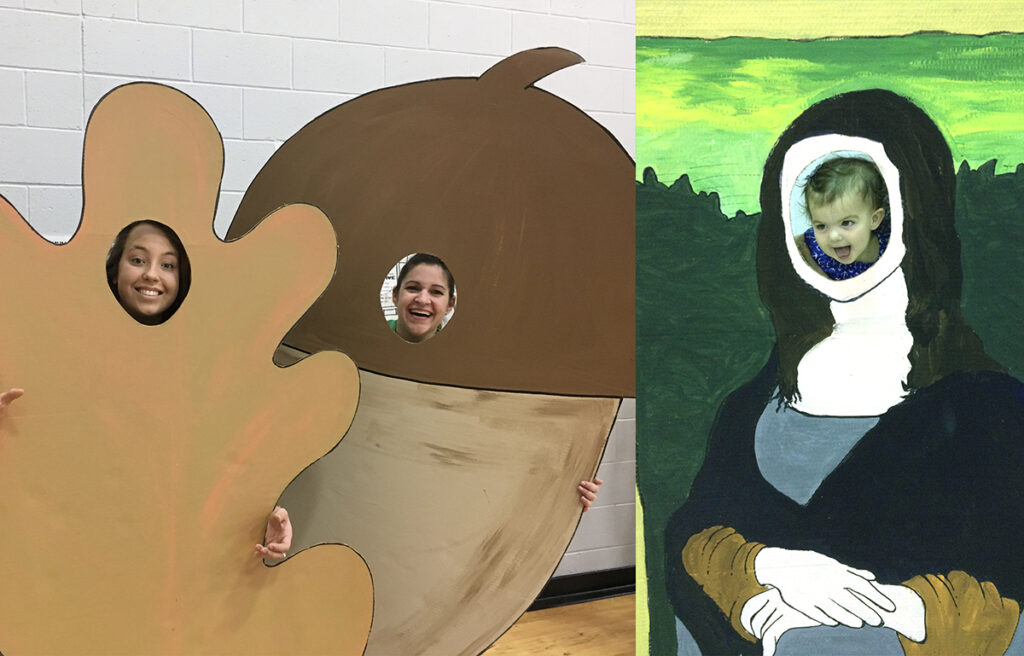
11. Transform into a photo booth.
Though you might not want to part with that giant piece of cardboard, it’s time. Work with students to create a photo booth scene with head cut-outs for a school function or art show. Map out your design before painting, and cut the hole at a height and size that your clientele can reach and peer through. Students paint the design to create a photo prop that can resurface for multiple events. As you plan, consider how the piece will be displayed. Will it be hung from a ceiling, attached to music stands, or does it need to be wide enough to be secured to a door frame?
12. Install hidden doors.
When a viewer finds hidden artwork, they are filled with wonder and delight. Using cardboard to create small doors hidden throughout the building can spark intrigue and imagination. Cut cardboard down to size. Use scraps and strips for students to make door frames, doorknobs, windows, and welcome mats. Paint each door with tempera paint to further solidify the unique personality of the imaginary owner. Attach the doors to the walls with a dab of hot glue. This is a great opportunity to use creative writing prompts about the imaginary inhabitants.
Do you need even more ideas for using cardboard in the art room? Check out the Flex Collection, Sculpting With Cardboard, in FLEX Curriculum, and listen to the Cardboard Creations podcast.
Regardless of the reason, there is a lot to be excited about when using cardboard in the art room. With some creative and critical thinking, a pile of boxes left on the front porch can lead to a wide array of artmaking experiences. This plentiful, recyclable, and cost-effective material should not be underestimated but valued for its potential. We hope you consider some of these practical, challenging, and fun ways to use cardboard the next time you snag a box!
What is your favorite way to use cardboard in your art context?
Do you have a great source for clean, quality cardboard? Share it with another art teacher!
What is your storage solution for collecting this often overwhelming material?
Magazine articles and podcasts are opinions of professional education contributors and do not necessarily represent the position of the Art of Education University (AOEU) or its academic offerings. Contributors use terms in the way they are most often talked about in the scope of their educational experiences.