We’ve all been there. You start your day with grand intentions for a stellar lesson. Still, your plans are interrupted for whatever reason, and you can’t quite pull it together. Maybe too many students are absent, you have less of an essential supply than you remembered, or a pep rally is cutting your class twenty minutes short. Don’t feel guilty! It happens to the most organized of us. Whether you need a lesson in a pinch or want to plan ahead to teach a quick technique, one-day lessons make great tools to fill your toolbox.
The right one-day lesson does more than just fill time. These quick activities can also be highly engaging! Creating a project from start to finish in one sitting provides immediate satisfaction for students while giving them an opportunity for valuable skill-building. One-day lessons can also introduce larger concepts in a simple way before jumping into a bigger unit. By selecting smaller paper sizes, simplifying materials, and using basic art tools, you will be well on your way to implementing one-day lessons in no time!
The best one-day lessons have built-in potential for success.
Highly successful lessons are enjoyable and engaging. A few other things they have in common include:
- Clear and limited steps.
- Completion in one class period.
- Student autonomy (in material choice, design, color, etc.).
- Scaffolding for future skills and techniques.
- Easy clean-up.
Here are five simple, one-day art lessons that will keep your middle schoolers engaged.
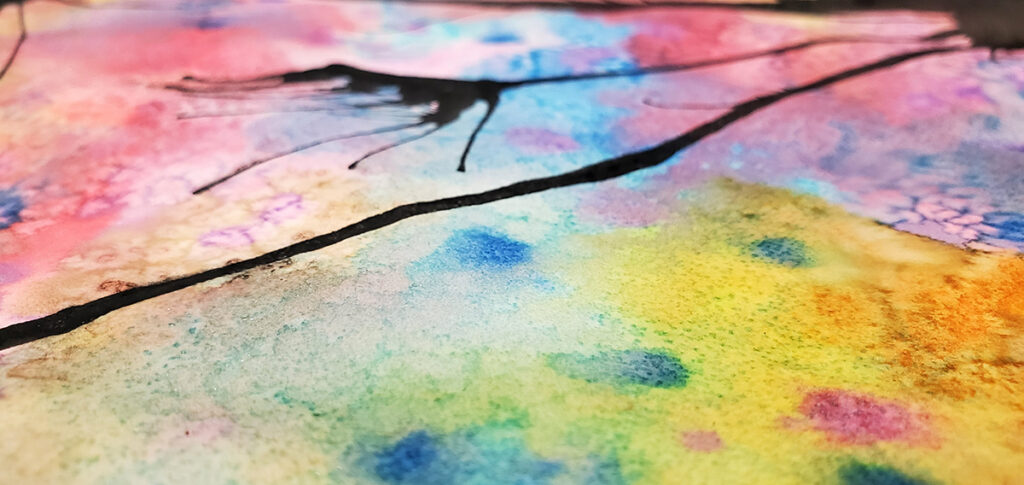
1. Crumpled Paper “Stained Glass”
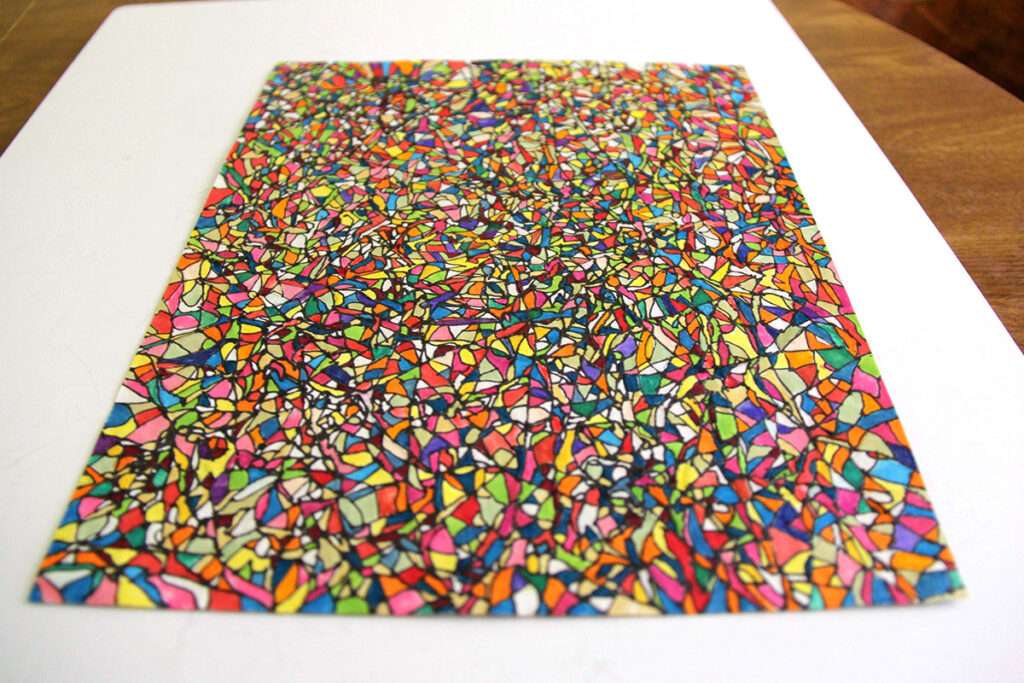
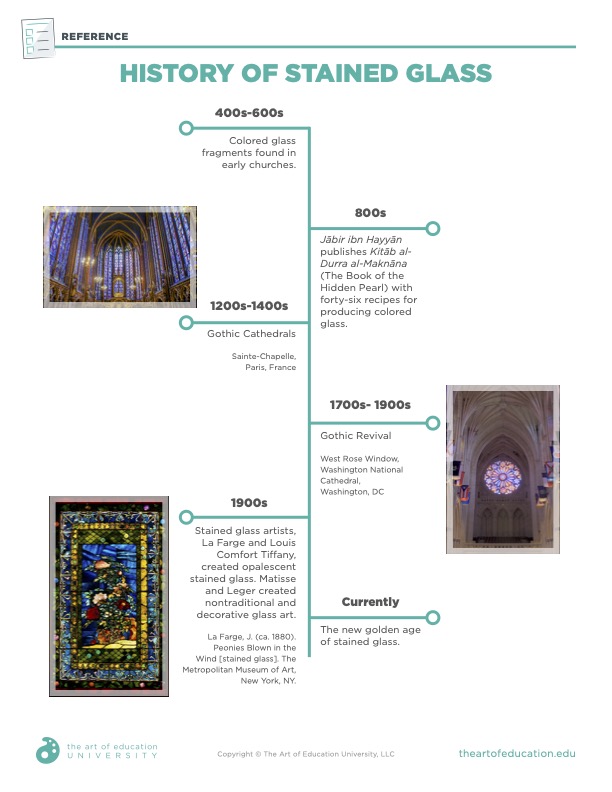
It doesn’t get much easier than this! Show students a completed version and connect it to patterns found in stained glass windows. Use this History of Stained Glass download below. You can find this resource in the Nature’s Stained Glass Lesson to help you introduce historical connections. Find this lesson and many others in FLEX Curriculum.
Students will have so much fun fracturing and coloring in their paper by following these steps:
- Crumple a half sheet of paper. After re-opening the paper, examine the tons of tiny, fractured shapes and folds.
- Create a “stained glass” look using a pencil or ultra-fine permanent marker to outline every shape. It’s fun to see the look on students’ faces when you casually mention this!
- Color in each shape, using colored pencils for a soft look or markers for a bold one. Alternate colors so that no two shapes with the same color are touching.
This wonderfully simple lesson subtly requires persistence to complete and encourages thoughtful decision-making in the color arrangement. If papers are well-crumpled and students take their time applying color, this project can quickly fill an average class period and is sure to leave students feeling satisfied.
Do you want to extend your lesson?
Try the Lesson, Radial Stained Glass, to continue building the skills from this exercise. This lesson can be found in FLEX Curriculum.
2. Abstract Papercutting
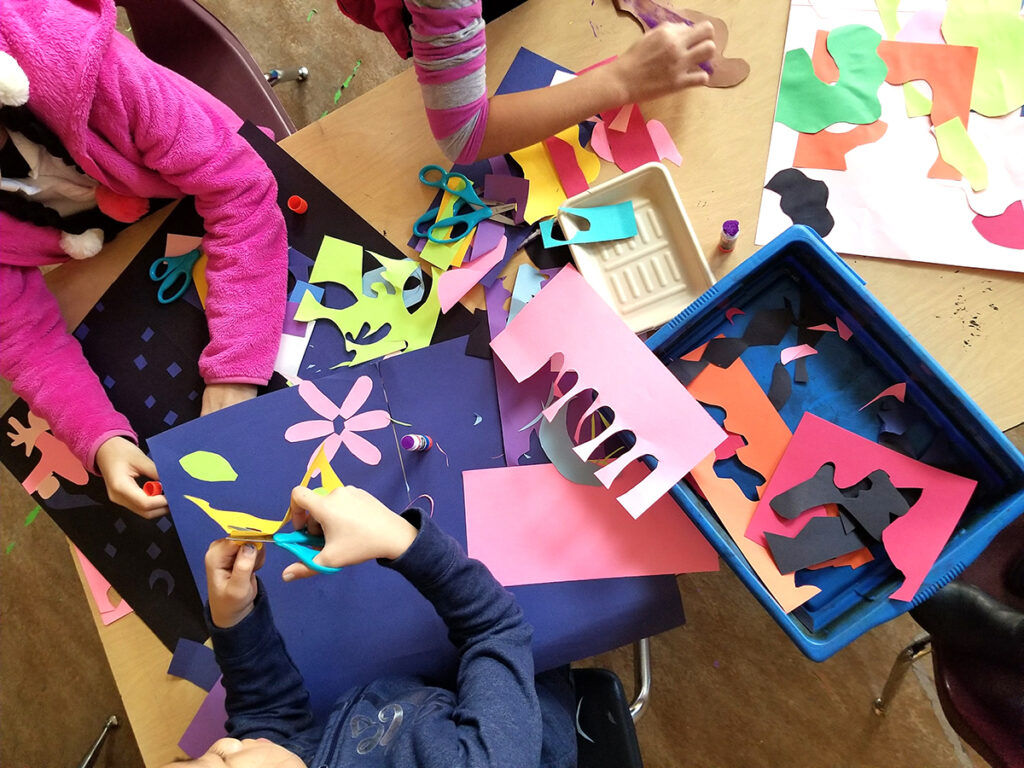
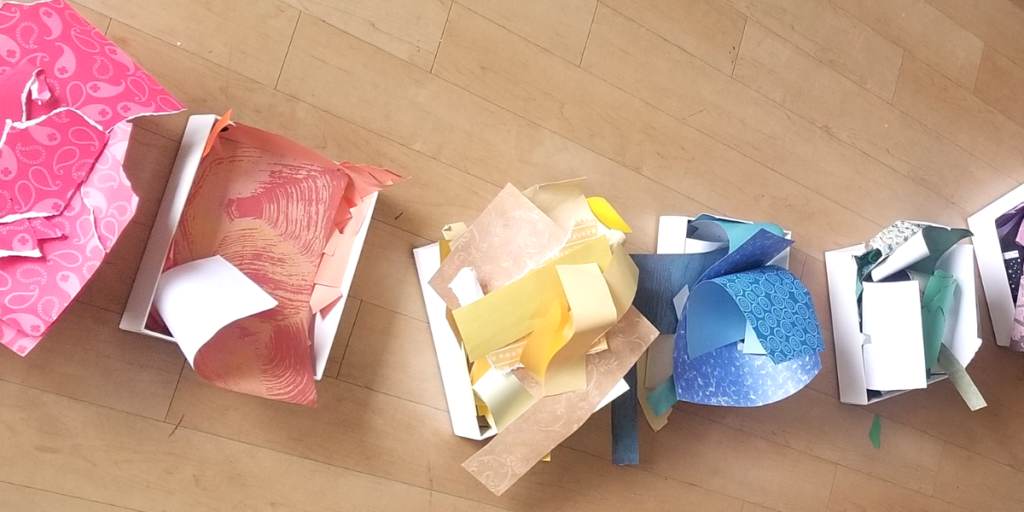
It pays to maintain color-separated boxes of scrap paper throughout the school year for projects like this! Whether you need to reduce the amount you have accumulated or want a fast project to practice color theory, cutting skills, and composition, this one’s for you. Your artists can practice warm and cool or complementary colors depending on your curriculum goals. They can also demonstrate more advanced cutting techniques such as overlapping, layering, and emphasis.
Students begin abstract papercutting by following these steps:
- Select a large piece of colorful construction paper as a base.
- Cut organic shapes from contrasting colored pieces of scrap paper using scissors.
- Apply glue to the back of each organic shape.
- Arrange the organic shapes on the base construction paper to create an exciting composition.
Do you want to extend your lesson?
You can seamlessly connect this activity to a unit about Henri Matisse’s cut-outs or an intermediate-level lesson to create a Recycled Paper Abstract Collage. Find this collage lesson and many others in our FLEX Curriculum.
3. Suminagashi Paper Marbling
Suminagashi paper marbling is a little-known, magical activity that wins students over every time. The process utterly mesmerizes students and teaches them how to experiment with patterns and color. As a bonus, students will generate multiple sheets of decorative paper for use in future projects. Suminagashi is so fun that students will even enjoy watching others do it!
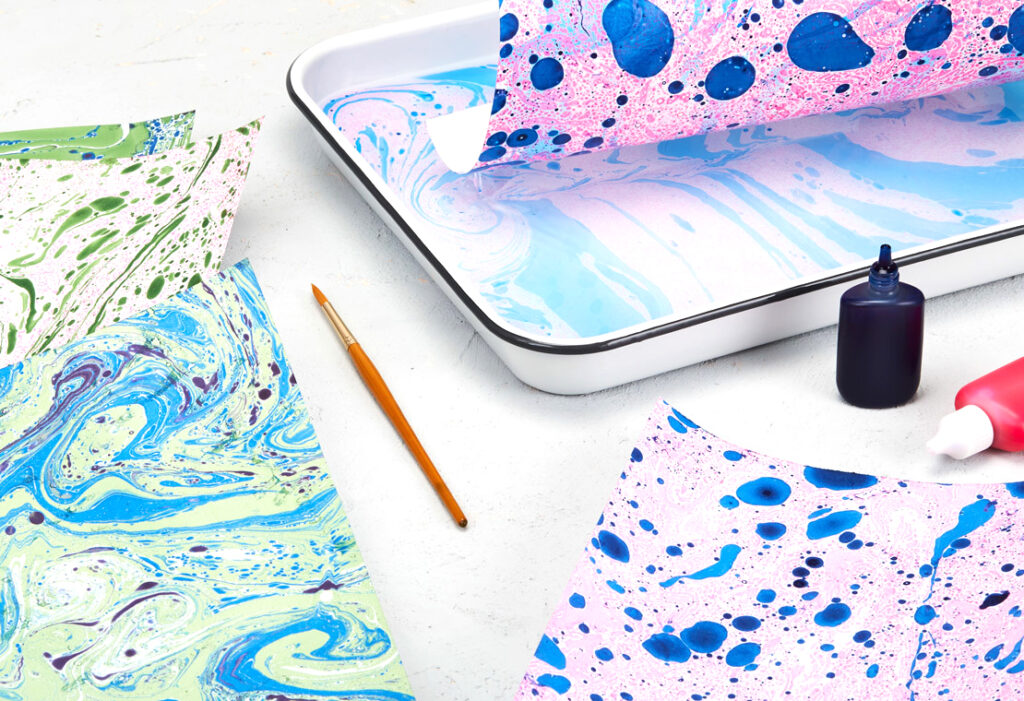
Pre-packaged kits make a suminagashi lesson easy, or you can purchase a few bulk materials to have on hand.
Here’s how to get started:
- Fill shallow trays with water.
- Drop the paper dot that comes with the kits into the water.
- Squeeze a drop of the suminagashi ink onto the dot and watch as it magically pushes the dot through the water!
- Add several subsequent drops in varying colors to create patterns.
- Manipulate the dot and influence the ink’s pattern on the water’s surface using a paintbrush or chopstick. Students will enjoy experimenting with different techniques, such as blowing the water or gently tilting the tray to see how their patterns change. Be careful not to “overmix” the ink, or colors and patterns may become muddy.
- Gently lay a piece of paper on the water’s surface for a few seconds.
- Starting from one corner, lift the paper in one smooth motion to reveal the ink design adhered to the paper.
- Allow the paper to dry.
After an experiment or two, students will learn which colors and techniques produce their desired results. Make sure you have enough kits for each station or table group in your classroom so students can try creating several papers.
Do you want to extend your lesson?
Once the papers have dried, you can incorporate them in future lessons about bookbinding, visual journaling, or collage. Try using the paper as a background in the lesson, Watercolor Coral Collage, or integrate it into a Painted Paper Weaving artwork. Find both of these lessons in FLEX Curriculum. No matter how you choose to connect this activity to your lessons, students are sure to love this intriguing process.
4. Watercolor and Salt Paintings
A fun way to scaffold watercolor projects and talk about science is by experimenting with watercolor and salt. Salt absorbs water through the process of osmosis. Students investigate color mixing by allowing painted areas to bleed into one another. Encourage them to observe how varying amounts of water and salt types in different areas correlate to the final, dried result.
This low-stakes exercise allows students to test out hypotheses about salt’s effect on watercolor paint by following these steps:
- Apply watercolor paint to watercolor paper using the wet-on-dry method.
- Sprinkle salt over the watercolor paint.
- Wet dry areas of the paper with water and then apply watercolor paint using the wet-on-wet method. Allow the paint to pool, and sprinkle salt into the pools.
- Allow areas of watercolor paints to mix, and apply salt.
- After the paper has thoroughly dried, brush the salt off the paper over a trash can and observe the effect it has created.
Do you want to extend your lesson?
Once students understand how salt applications affect watercolor paint, they can try Hide/Seek: The Art of Camouflage. In this lesson, students approach science from a different angle and practice more control of their salt application to create their desired outcome. Look for this lesson in FLEX Curriculum.
5. Value Scale Water Droplet
This small but mighty pencil and paper assignment is a tried and true plan for working with the most limited materials to generate the most significant impact. Students will be delighted as they work to create the illusion of a water droplet on paper. Plus, it’s easier than it looks!
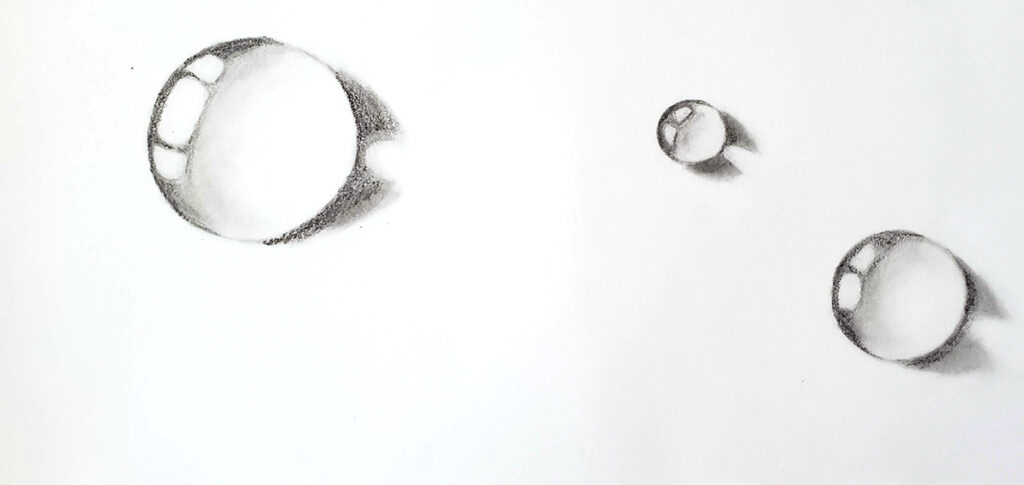
With a piece of paper, pencil, and eraser at the ready, start creating droplets by following these steps:
- Draw one to three circles on your paper.
- Select which angle you will have a light source coming from. The example above shows the light source shining from the upper left corner of the paper.
- Sketch a crescent moon shape on the light source’s side of the circle and shade it with a medium to light gradation.
- At the outer edge of the crescent, the circle’s outline will have the deepest shaded value. It should lighten and fade toward the center of the circle. The lightest value should be at the circle’s center and out toward the opposite side. Students may want to use their erasers during the blending process.
- Add “shine” highlights on the crescent by creating rounded rectangular shapes.
- Complete the effect with the shadow cast on the side farthest from the light source by shading it with the deepest value.
Do you want to extend your lesson?
Students will be thrilled to try their hand at these four additional value scale activities.
Let your one-day lessons do double duty.
There are many different times when a one-class lesson makes the most sense to implement. First, consider which skills you want your students to practice and how to maximize their learning. Is your goal to introduce a larger unit later or to briefly reinforce existing skills? Then, use one of these quick-to-organize lessons to create fun and satisfying masterpieces. You will be amazed at how engaging one-class projects can be and how prepared your students will feel to level up to the next assignment. Give yourself some breathing room, and then get back to your regularly-scheduled plans without guilt.
What are your most effective one-day art lesson ideas for middle school?
How do you use one-day lessons to scaffold larger units?
Magazine articles and podcasts are opinions of professional education contributors and do not necessarily represent the position of the Art of Education University (AOEU) or its academic offerings. Contributors use terms in the way they are most often talked about in the scope of their educational experiences.