Being an art teacher means keeping supplies in check, ordering more when needed, making art examples, teaching techniques, and more! But after students make the art, what happens to it? The work in progress needs storage space. The finished work needs to be organized for students to take home or matted, mounted, framed, and stored until it’s ready to go on display. While it takes a lot of time and space to display work properly, it’s well worth it because it makes students feel included, part of a community, and empowered.
If you don’t know where to start or you want to revamp your process and make things more efficient this year, the first thing is to assess your space and configure your room in a functional way. Take the ideas below and adapt them to what will work for you, your artists, your style, and your classroom.

Work in Progress
Work in progress (WIP) are projects students are in the middle of creating. The video below includes a great compilation of how to store in-progress works including two- and three-dimensional artworks and sketchbooks.
1. Folders and Portfolios
At the beginning of the year, have students make their own folders. These can be standard-sized or larger for DIY portfolios! Use a piece of manilla paper folded in half, old file folders, two pieces of cardboard, or even paper taped together. Label each folder with the student’s name, class period, and/or homeroom teacher. That way, if students forget to put names on their artwork but store them in their folders, you will still know whose they are! The folder can also double as a spot to store graded work, handouts, small collage pieces, and more. Watch the video below to see how Mariana VanDerMolen uses folders in her elementary art room.
2. Shelving with Boxes or Bins
Finding sturdy shelving is a must. Place a class set of artwork in individual boxes or bins to stay organized. Check out the copy room for empty paper boxes, groceries stores for larger heavy-duty cardboard boxes, and the dollar store for affordable plastic bins or paper trays. Depending on the dimensions of your boxes and bins, you can store two- or three-dimensional work this way.
A flat file storage system is ideal for large two-dimensional work. However, if you cannot get your hands on one and you are handy, you can make your own like in the tutorial video below.
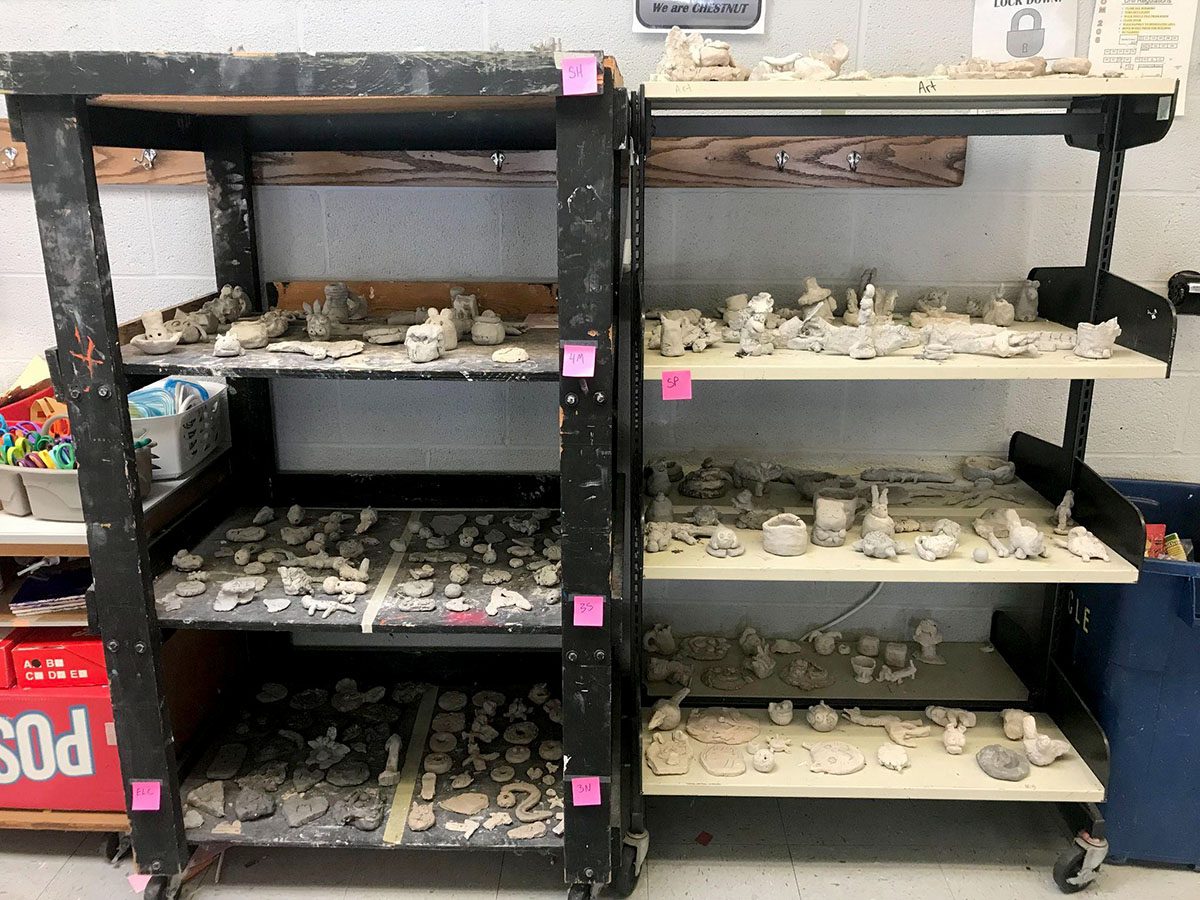
Because many sculptures take up extra room and are hard to stack or consolidate, space is usually an issue. But do not let storage challenges deter you from bringing sculpture to your students! In a pinch, any empty cart, shelving, top of cabinets, or window sill will work.
Watch the video below to see how Keisha Casiano got amazing rolling storage racks from her PTA and local businesses.
3. Drying Racks, Window Sills, and Clotheslines
Storing wet work like paintings or sticky projects can get messy. Coordinating the timing of drying projects and swapping them out for the next class can be tricky, especially if you have back-to-back or multiple classes. This can get even more complicated if projects require extended drying time, such as overnight.
Having multiple drying racks is ideal. If you are storing multiple classes’ work on one rack, use masking tape to make “flags” and label where one class starts and ends. This way, you can easily keep class sets together and you don’t have to sort through piles of artwork the next day.
If drying racks are not an option, opt for a window sill or flat space that can handle the work for a day. If you have a large classroom, lay out some bulletin board paper or a disposable tablecloth and place the work on the floor to dry! A thrifty idea is to hang a clothesline in your classroom and use clothes pins to hang the work. Just be careful using this method with extra drippy projects!
Watch the video below to see how Andrea Wlodarcyzk reimagines her existing wire shelving to store two- and three-dimensional projects!
4. Sandwich Bags and Envelopes
Never underestimate the power of a sandwich bag or an envelope. They’re not just for storing PB&J sandwiches or mailing letters! Both store lots of small parts, cutouts, or pieces. Adhere the bag or envelope to the inside cover of a sketchbook or folder so it stays put to reuse all year. Baggies are also perfect to send small artwork home, such as pinch pots, and you can buy them in bulk!
Finished Work
Finished work is artwork students have completed. You probably have piles waiting for grades or graded work waiting for display space. You can showcase work in your classroom or school halls. Branch out and display work in your district office building, town hall, or public community spaces. Check out the video below for clever ways to exhibit finished artwork.
1. Cork Strips and Bulletin Boards
Cork strips are convenient because work can be quickly stapled or thumb-tacked in place. These are great to hang in smaller spaces, such as above lockers in main hallways.

Bulletin boards are the most common space to display two-dimensional work, salon-style. If you don’t have any in your classroom, you can DIY boards on a thrifty budget, like in the video below. Make it even more cost-effective and ditch the fancy frame in lieu of foam core backing.
2. Hanging Ladder and Clothesline
A fun and makeshift way to hang work on a cinderblock wall is by using a hanging ladder or clothesline. Rig one out of string and use clothespins or paper clips to hold the work in place. Watch the video below to see how Sarah Krajewski made a hanging ladder with free paint stir sticks. Or, string a clothesline in front of a window and hang double-sided work for twice the display space.
3. Display Case or Window Sill
For three-dimensional works, a display case is an ideal choice because it protects the work. Unfortunately, not every school has a display case or there are very few due to cost and space. Another great place to exhibit sculptural pieces is on top of the short bookshelves in the school or public library. Reinvent an old book or media cart for a display case on the go, like in the video below! Cover with colored bulletin board paper or give it a quick coat of spray paint. Place the work on the shelves and roll it into place.
Whether your students have work in progress or completed pieces, choose the best way to store and exhibit art that works for you, your artists, and your classroom. The good news is, there are so many options and they don’t all have to break the bank! Although it takes time and space, it is always worth the extra effort to display student work. It advocates for your program, gives the students a sense of pride and accomplishment, and beautifies the space it’s in. Get a headstart this school year—select some methods from the list above to implement now so all you have to do later is add a few clips and staples for a fabulous and professional-looking display!
What is your best hack for hanging artwork?
How do you handle work in progress in your classroom?
Magazine articles and podcasts are opinions of professional education contributors and do not necessarily represent the position of the Art of Education University (AOEU) or its academic offerings. Contributors use terms in the way they are most often talked about in the scope of their educational experiences.