Note: Be sure to review all resources and preview all artists before determining if they are appropriate to share with your students.
Perspective drawings can feel cold and mechanical, but they can also be magical and empowering. As students gain skills in creating a realistic sense of space, they quickly realize drawing can enable them to create the world they imagine in their minds. However, the process of creating a three-dimensional image on a two-dimensional surface can be challenging and frustrating. There are precise rules to follow and each line and angle requires accuracy. The learning curve can be steep but once it “clicks” for students, the excitement is palpable!
Try the strategies below to help students understand perspective and make those epiphanies a little easier.
1. Do a quick and easy master study.
Many of us show slides highlighting orthogonal lines and the vanishing point(s). Help your students not only see the lines but feel how they construct an image. Print examples from art history that have a strong use of linear perspective. Raphael’s The School of Athens or Gustave Caillebotte’s Paris Street, Rainy Day are great examples. Make a reusable set by laminating printed images or sliding them into plastic sleeve protectors. Students love to trace the lines with dry-erase markers and then wipe the image clean for their peers.
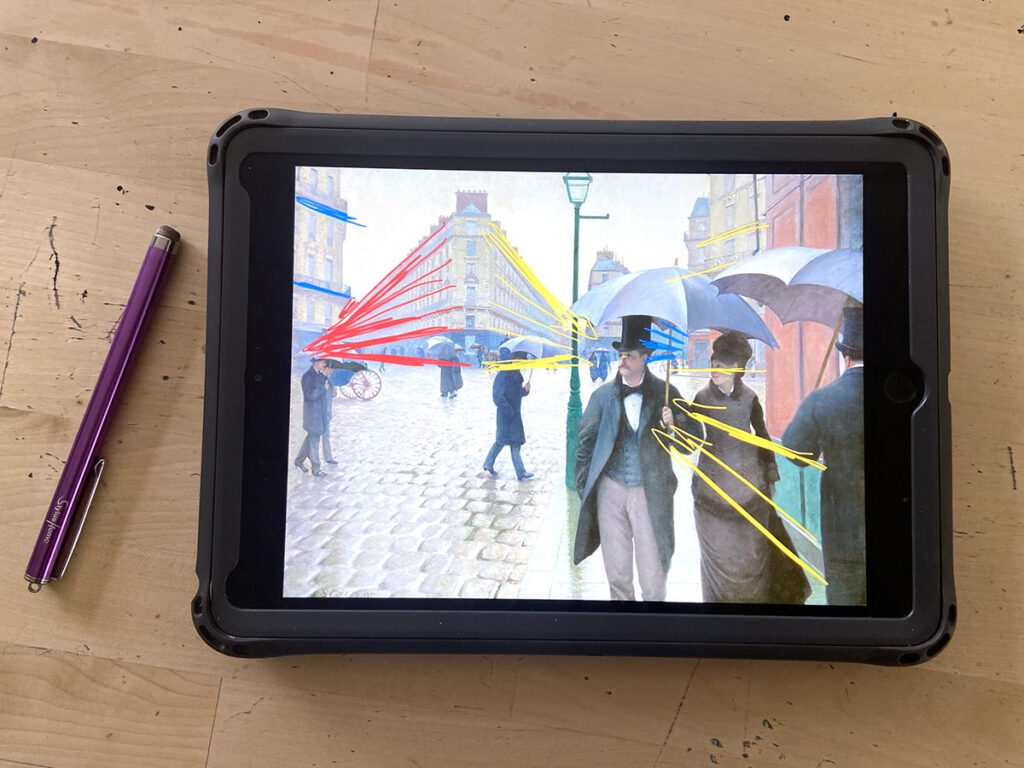
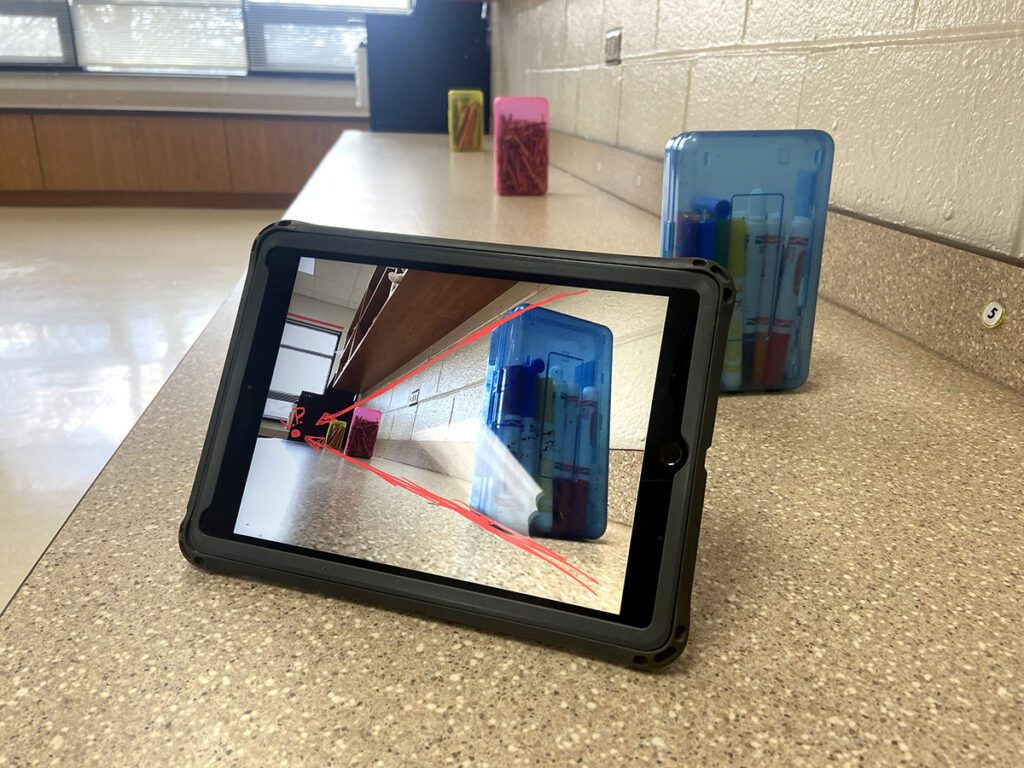
2. Encourage students to find their own digital examples.
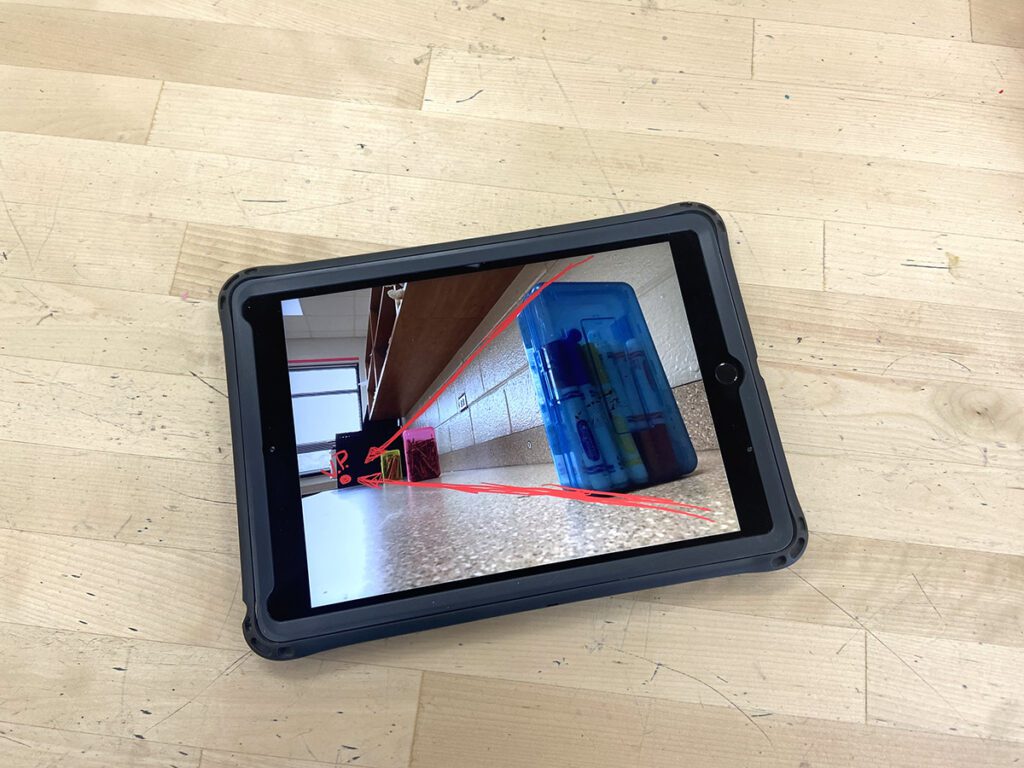
A photography scavenger hunt challenges students to discover the artistic principles they’ve learned in class in the real world. Show your students varied examples of one-point, two-point, and three-point perspective. Give them a checklist of prompts to photograph and then upload the photos to your favorite drawing app. Students trace the orthogonal lines and make arrows pointing to the vanishing points.
3. Let FLEX Curriculum allow you to focus on fun lessons with student-friendly resources while making your workload vanish!
Most students understand that things closer to us will look bigger and things farther away will appear smaller. What is difficult is keeping track of which lines are horizontal, vertical, or diagonal. FLEX Curriculum includes a handy four-and-a-half-minute student-facing What Is Perspective? video with concise explanations and clear animations. FLEX also includes several worksheets including step-by-step drawing guides and practice sheets. Check out the Perspective Collection in FLEX Curriculum for six lesson plans and every supplemental support you’ll need!
4. Engage kinesthetic learners with a physical encounter of linear perspective.
Set up a simple scene in the classroom with objects at varying distances. Stretch string taut from a fixed point (representing the viewer’s eye level) to the corners of each object. Students can look down the length of the string to see how the lines converge at a vanishing point on the horizon line.
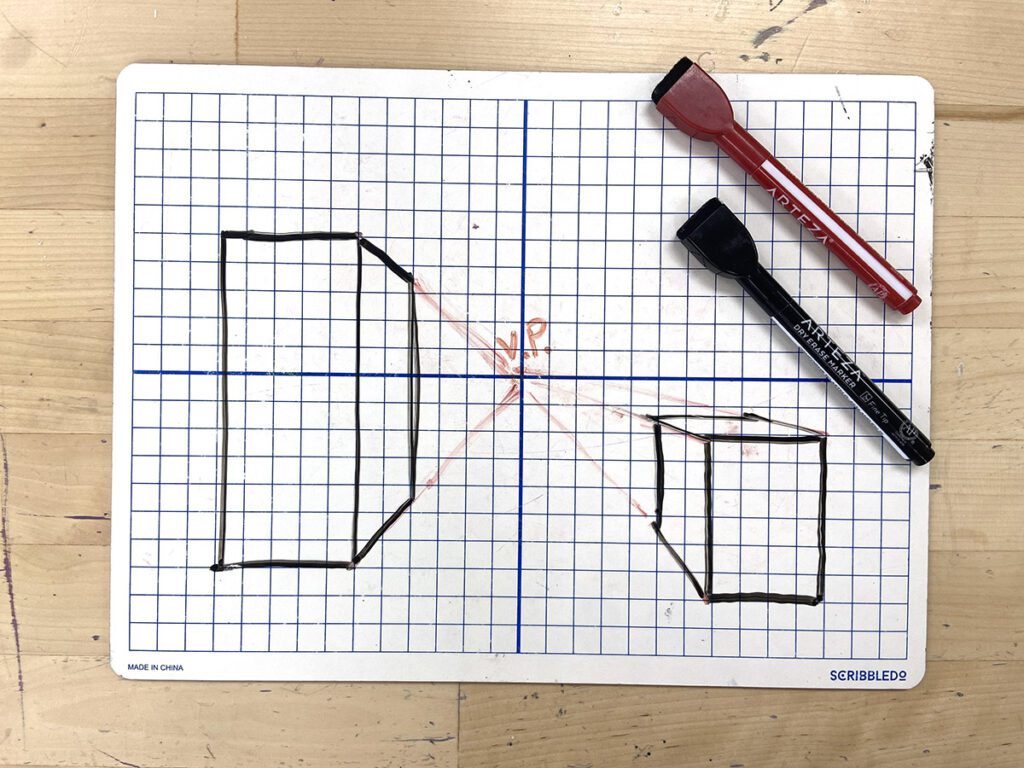
5. Use a grid to simplify guided practice.
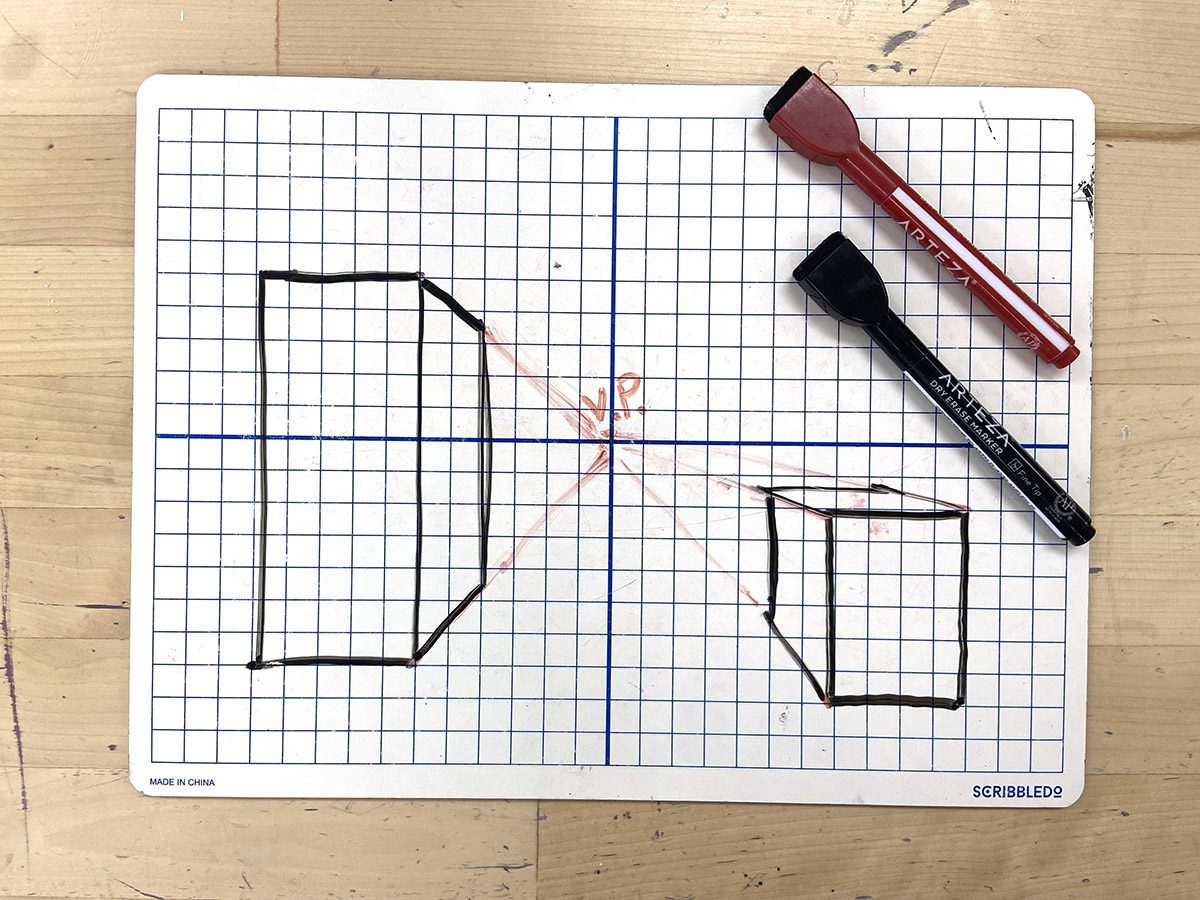
Keeping lines perfectly horizontal or vertical can be challenging for young learners. They see the orthogonal lines slope toward the vanishing point and intuitively slant other lines incorrectly. Forms appear to be leaning or falling over, which is frustrating! Create simple guided practice drawings on graph paper or a gridded dry-erase board. The grid will give students an easy guide to follow because they will only need to worry about angling lines for the orthogonal lines.
6. Build a two-point perspective machine with a rubber band and a paper clip.
Use a rubber band and a paper clip to make a simple device for students to see orthogonal lines. Tape the sides of the rubber band to the vanishing points. Attach a paper clip to the center of the rubber band to use as a handle. As the student pulls the paper clip to the corner of a form, the rubber band will become the orthogonal line.
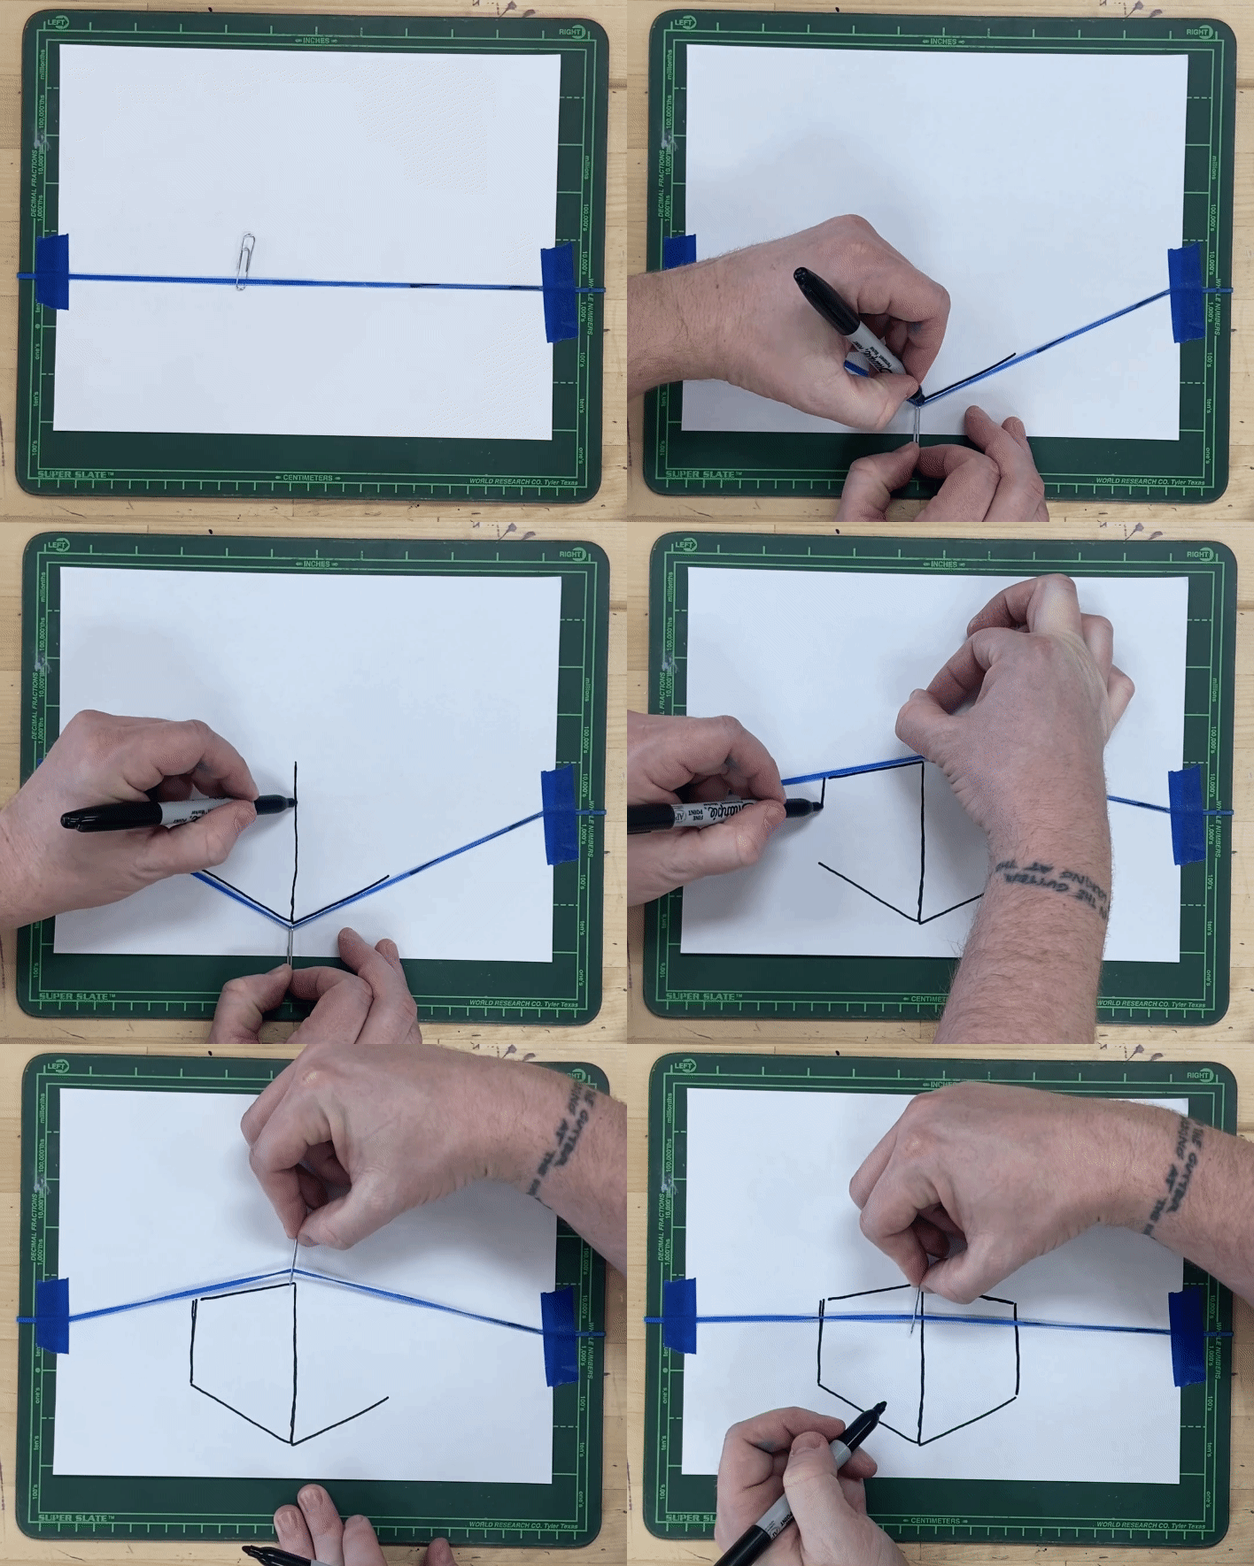
Turn this simple rubber band tool into a reusable perspective machine by mounting it onto a board. Students can slide their paper in place as they sketch. Once they’re done, they can remove their paper and return the board with mounted rubber bands in place for the next student.
7. Explore Op Art to give students room to experiment without the pressure of realism.
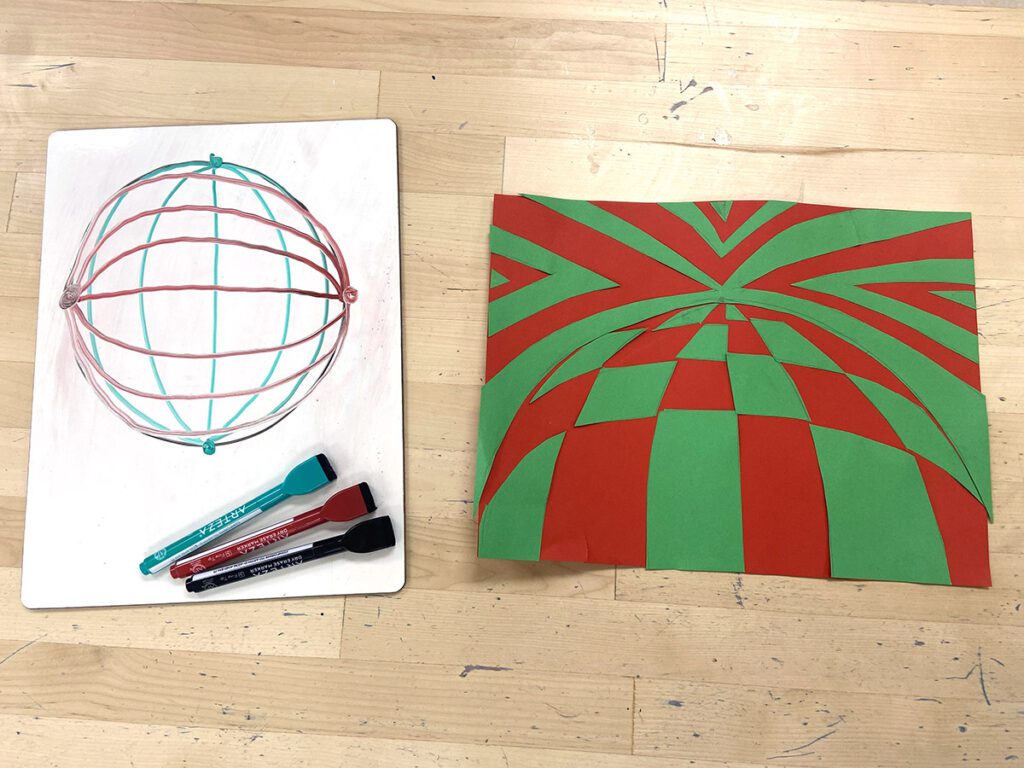
Students are awestruck when they look at works by Victor Vasarely and others from the Op Art movement. The artwork seems complex but is often composed using the repetition of simple ideas and shapes. Vasarely worked to build a “plastic alphabet” consisting of modular geometric designs. Vasarely was systematic in his approach which makes it easy for students to replicate. Draw a hexagon and then draw a “Y” in the middle to turn it into a cube. Repeat this simple drawing schema in a tessellation to fill a page with Vasarely-style cubes. Challenge students to increase the complexity by using vanishing points to add depth to the drawing.
8. Try a perspective relay race to make practicing basic forms fun.
Divide students into teams for a relay race with a bit of a twist! Each team will start with a sheet of paper, a pencil, and a ruler on one end of the room. On the other end, have a variety of small pre-cut shapes and glue sticks. When the race begins, the first player on the team runs and grabs a pre-cut shape and a glue stick. Then, they run to their paper and glue it down. The player uses the pencil and ruler to turn the pre-cut shape into a form. When the drawing is complete, they run back and tag the next teammate to repeat the process.
Mastering perspective drawing can be challenging but extremely rewarding! While we wish there was one single solution that will work for all students, unfortunately, there is not. The good news is that there are many strategies and hands-on activities to try. Use laminated images or a photo scavenger hunt to help students identify orthogonal lines. Provide grids, rubber bands, and paper clips to assist students as they draw. Introduce Op Art to ease the pressure and encourage high levels of success for all students. Make your art room a safe place to explore perspective and you will transform student frustration into artistic breakthroughs!
How do you help students understand linear perspective?
What are your favorite art history examples that use linear perspective?
Magazine articles and podcasts are opinions of professional education contributors and do not necessarily represent the position of the Art of Education University (AOEU) or its academic offerings. Contributors use terms in the way they are most often talked about in the scope of their educational experiences.
