
Imagine you’re ready to walk out of your classroom for the day. You quickly take a peek into the sink only to find it filled with dirty paint palettes and brushes. Sound familiar? No matter how often we teach proper routines for cleaning up the art room, our students slip up. But, what if I told you there was a way to prevent this from happening by doing one simple thing? The solution is for your students to create their own ceramic paint palettes.
3 Reasons Students Should Create Ceramic Paint Palettes

1. It Creates Ownership
When your students can create something unique to them, they will take ownership of the materials. Starting your semester by creating a palette will ensure students clean up and store it properly. They will not want other students to touch it, and they will be disappointed if they don’t clean it out, and their palette is ruined.
2. It Forces Students to Understand the Process
Many art materials are given to our students, and they aren’t able to appreciate the process of how they’re made. For example, many of our students just see clay that comes from a box magically wrapped in plastic. Here, they miss out on the process of mixing clay. Because of safety reasons and equipment needs, we aren’t always able to provide these opportunities to students, but when we can, we should. When students can see an artmaking process from start to finish, the learning is much more meaningful.
3. It Makes Them Feel Like an Artist
The first time one of my students was using his ceramic paint palette to mix watercolors, he said, “Wow, I feel like a real artist!” When our students are exposed to artist-grade materials, it makes them feel important and professional. Overall, this will form a deeper appreciation for art and materials students use.
Not sure how to get started using clay in your classroom? Check out ArtEd PRO’s Building a Ceramics Program.
How to Create a Ceramic Paint Palette
1. Pick a Shape and Create a Stencil
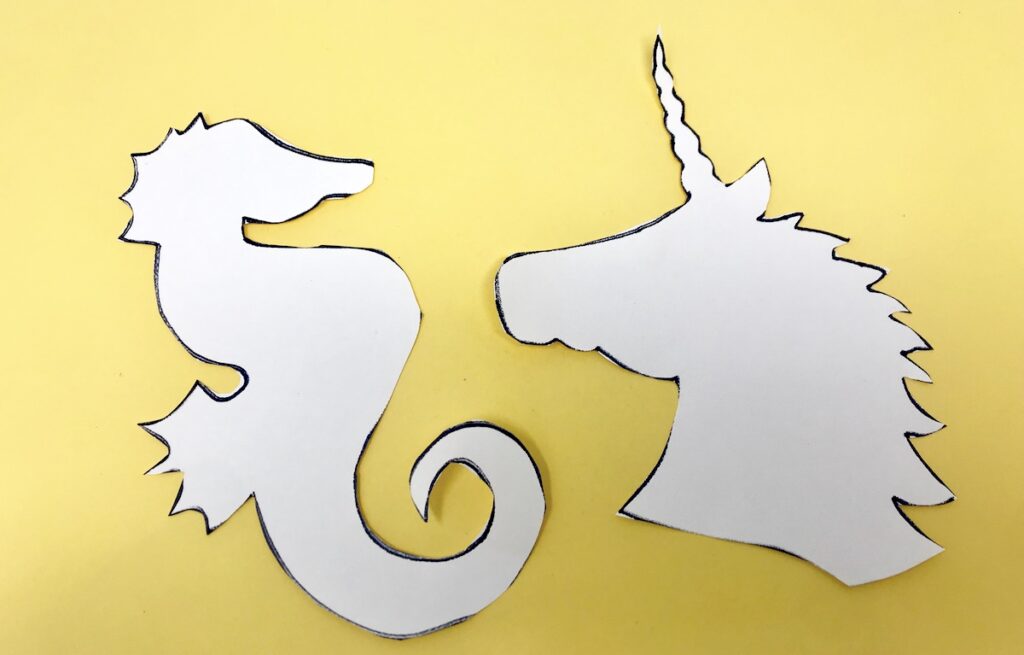
The first thing students need to do to create their ceramic palette is to pick a shape. Encourage students to pick an identifiable silhouette. Using a piece of oak tag or construction paper, draw the shape and cut it out. Students can use this as a stencil later on.
2. Create a Slab and Cut Out the Shape
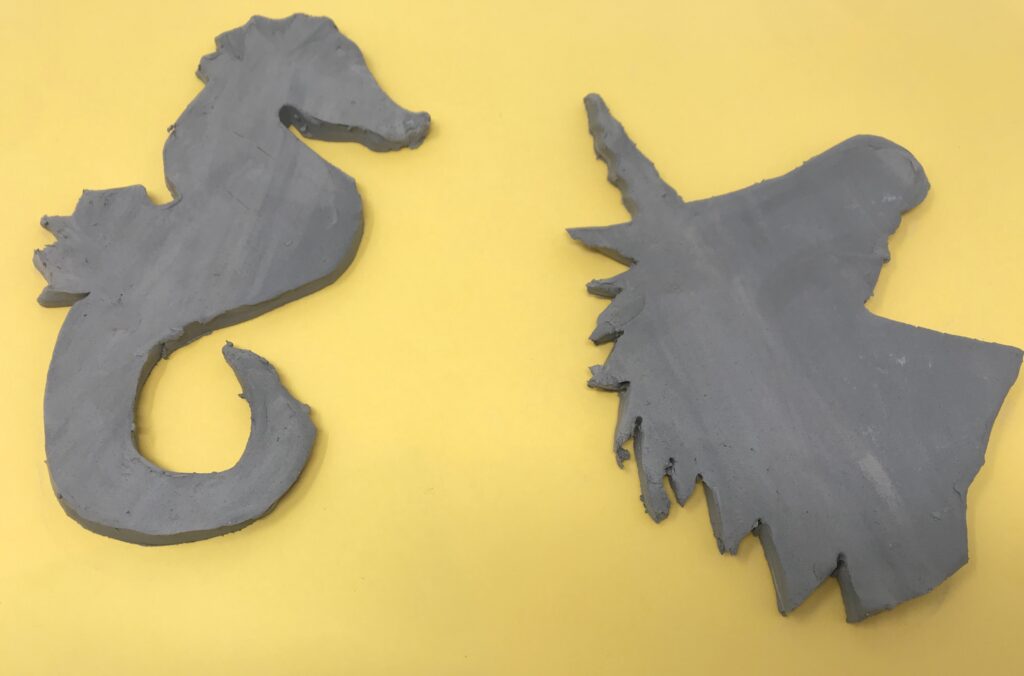
Next, students will roll out a slab. In this step, you will want to make sure the slab is thick enough that students can carve into it. However, keep the overall size in mind, as you don’t want the palettes to be too heavy. Once the slab is created, use the paper stencil to trace out the shape. Remind students to smooth out the edges after cutting.
3. Carve Out Wells
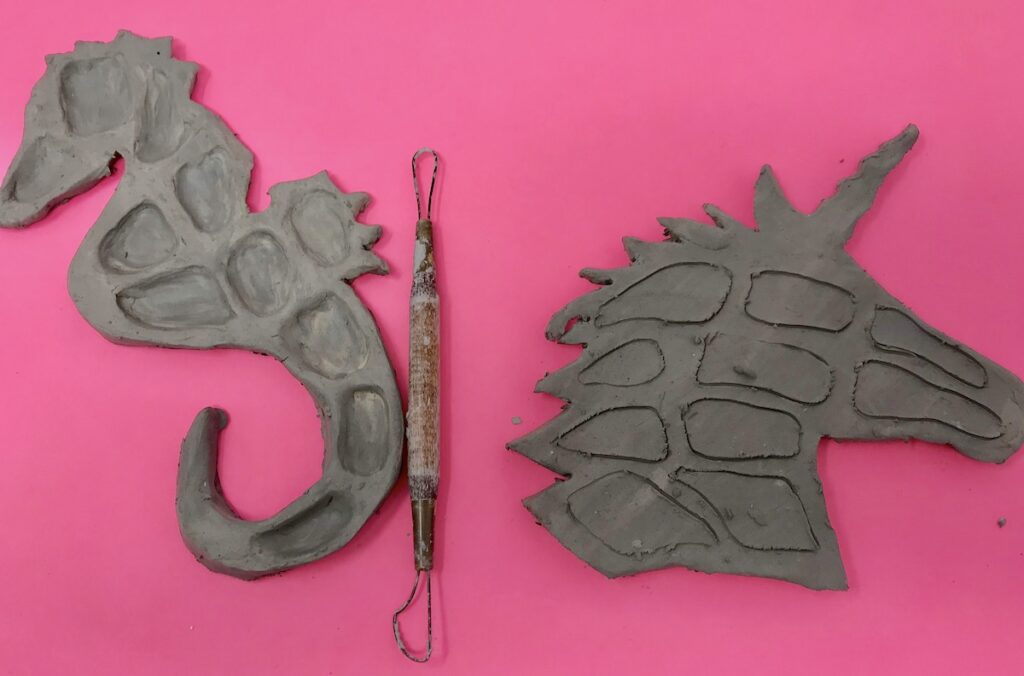
Once the shape of your palette is created, you will want to create the wells. Encourage your students to lightly draw the shapes of the wells first to make sure they are the correct size. When you’ve determined the placement of the wells, start carving them. This is a great way to introduce your students to subtractive carving, just make sure not to carve too deep!
5. Add a Foot

After the wells and top of your palette are smoothed out, the last step before firing is to add a foot. Adding a foot ring by creating a small coil will lift the palette so it will not sit directly on the table. The ceramic nature of these pieces will make them more susceptible to breakage, and the added foot helps tremendously in preventing them from sliding around.
6. Fire and Glaze
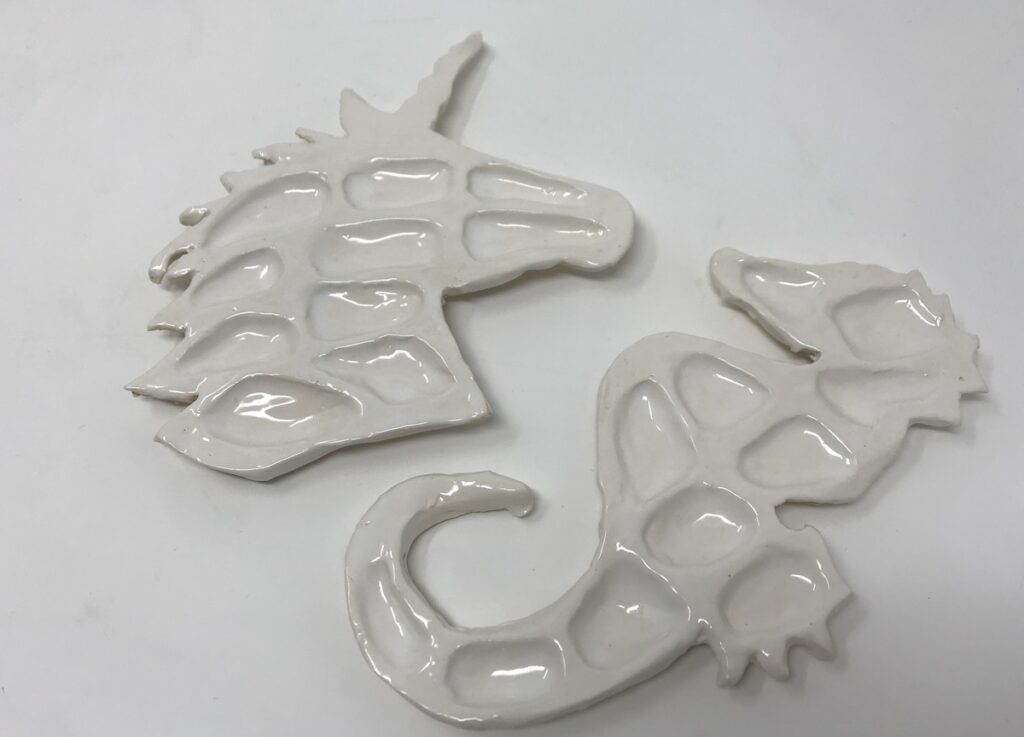
The last step before use is to fire and glaze your palettes. For students to better see what colors they are mixing, it’s best to glaze your palettes white. If you’re using a white clay body, you might try dipping the palettes in a coat of clear glaze.
7. Use Your Palettes
Now that the palette is glazed, it is ready for use! When implementing these palettes with your students, it’s important to discuss proper care as it’s their responsibility to clean and store them. The best part of this entire process is that at the end of the year, students can take their palettes with them. Hopefully, as they’ve practiced using their palette throughout the year, they will be inspired to continue using it at home.
See more of Abby’s ceramics projects with Colored Clay or Underglaze Transfers.
Allowing our students to see a process of the artmaking experience in its entirety is essential in fostering appreciation and ownership of the classroom. If you find yourself struggling with students not investing themselves in the process of artmaking, try creating a palette with your students to see how it changes their mindset.
Have you ever created a ceramic paint palette with your students?
In what ways do you take your students through an art process from start to finish?
Magazine articles and podcasts are opinions of professional education contributors and do not necessarily represent the position of the Art of Education University (AOEU) or its academic offerings. Contributors use terms in the way they are most often talked about in the scope of their educational experiences.


