Planning lessons and materials for 3D classes is already a challenge. Switching back and forth between online, in-person, and hybrid learning models can make it feel nearly impossible. How can you prepare materials? How can you maximize your studio time in class when students are in-person? Let’s take a look at some ways to scaffold and balance your plans when you’re not sure what next week will look like.
First, a few quick tips for planning your upcoming semester.
- Create an arsenal of short, fun, quick lessons with materials students already have to help fill in any irregular days.
- Build some “if this, then that” options, so you are ready for online or in-person at a moment’s notice.
- Rethink the flow of your curriculum. When in school, focus on ceramics. Moving back to online? Plan some drawing lessons.
- Students’ online time should focus on planning and preparation to maximize studio time when back in the classroom.
- Remember that transitions in and out of school will take time. Review expectations and be patient.
Now, let’s take a look at some specific ways to prepare and balance your workload in all this uncertainty.

Ceramics
In our traditional in-person setting, students create with clay and glaze, practice pinch pots and coil vessels, and throw on the potter’s wheel. How does this translate when moving in and out of online and hybrid learning?
1. When ceramics goes hybrid, flip your instruction.
Front-load instruction with video tutorials or worksheets. You can check for understanding when students come to class by reviewing key concepts as you introduce materials, tools, and techniques.
Set clear at-home expectations for ideation, preparation, and problem-solving practice. Class time is for creating and peer discussion. At-home time is for researching inspiring artists and planning sketches.
Practice at home with alternative materials, so students are ready to work with clay when they come to the building. Form and function are essential in ceramics. Students can practice pinching and coiling techniques with modeling clay.
Create templates for symmetrical coil vessels. Cut out template shapes and assemble slab ideas using cardboard. Remember to keep the scale of the works small.
The last thing you want to worry about is work drying out and falling apart with your hybrid schedule. Consider embellishment techniques. Go on a scavenger hunt to collect texture materials and then practice by making rubbings or press into mud.
2. Ceramics can happen at home with or without clay.
When creating take-home clay kits, plan a return schedule for students to bring work back to school to be fired. Students can choose their favorite and best work to be fired, so you’re not running ragged. Other works can be bisque fired and painted instead of glazed. Remember to keep work small to ensure success.
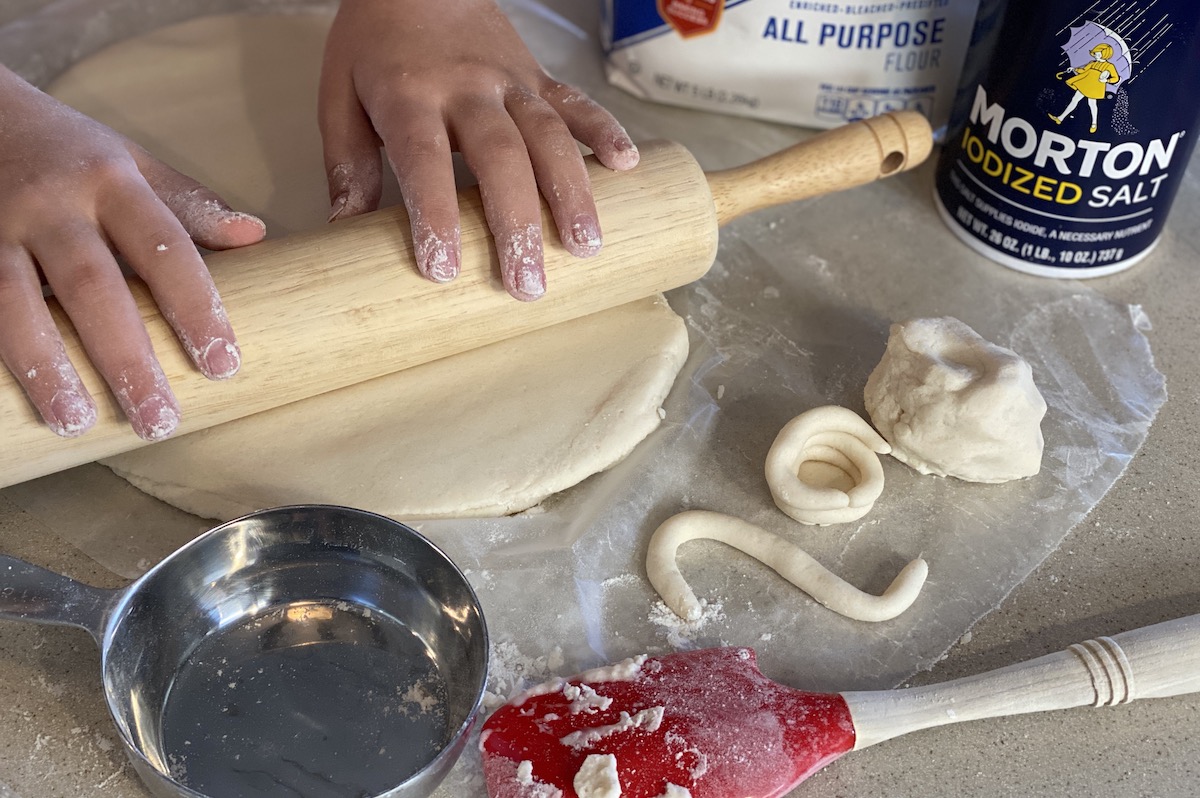
No clay? Don’t worry! Remember, form and function are key concepts in ceramics. While clay is generally the expectation, the main thing is that students are creating. There are many cool and fun apps out there to help students conceptualize what it means to create in clay. What physical work, however, will your students walk away with?
Functional items don’t have to hold water. Integrate sculpture and design thinking into your at-home lessons. Students can experiment with making their own salt dough clay, forming, baking, and painting.
Research, design, and create unique tools to sgraffito a surface or smooth an edge. While these lessons may not have the same impact as creating a vase or mug, students still gain valuable artmaking experience.

Sculpture
In our traditional setting, sculpture class focuses on multiple materials to additively or subtractively create. The biggest challenge when not teaching in-person will be access to a wide range of materials. When moving in and out of the classroom or working fully online, it’s time to get creative with materials to demonstrate essential skills.
1. Mix and match sculpture lessons with your hybrid planning.
Save your complex and messy lessons for the classroom. Parents will not be thrilled when their child’s bedroom is covered in plaster dust (nor is that safe). Instead, focus on cardboard relief, found object assemblage, or wire works while learning from home.
These materials are not only readily available but also provide a lot of flexibility in your planning schedule. These lessons don’t require as much supervision and can be easily set to the side on days back at school.
During in-person days, support students with more technical or challenging techniques. When casting or carving, remember to—once again—scale down.
Support the in-and-out flow of your week and allow students to see progress faster with these mini-artworks. Students can also practice carving techniques at home with soap, so they are ready for carving soapstone at school.
2. Get creative with materials during online sculpture.
Consider your essential skills, such as additive and subtractive techniques. Just as soap can be used as practice in hybrid, it can also be a great substitute during online learning. Students can carve amazing abstract subtractive sculptures (think Barabara Hepworth and Henry Moore) using soap and then photograph in their neighborhood to create a site-specific installation.
Challenge students with constraints. Try exploring using only paper or creating with cardboard recyclables. Given limitations, students are pushed beyond their first ideas.
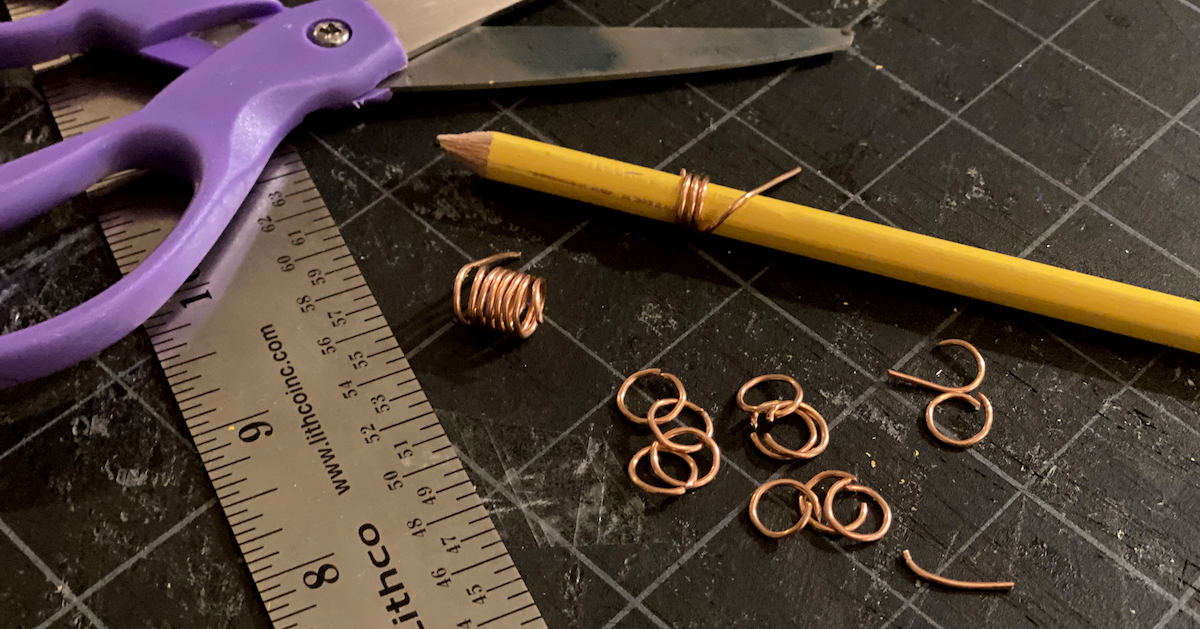
As with hybrid, choose inexpensive and versatile materials and tools. If you can provide some wire and pliers, the number of options for wire-based sculpture lessons are endless. From contour wire sculptures to armature gestures, kinetic mobiles to inserts for soft sculptures, give yourself multiple options with overlapping supplies. Speaking of soft sculpture, toss a needle and thread into your pack, and students can use old tees or other scraps to make softies.
Focus on ideation and meaning-making over technique. Assemblage art is a perfect at-home project incorporating found objects. Students can explore concepts on a deeper level when thinking about the context materials hold. Teach students a variety of fastening methods, or have them arrange and photograph as a temporary artwork.

Jewelry/Metals
Sawing, forming, and soldering are key concepts for metalsmithing. When fully in-person, students focus on learning these new tools, practicing, and applying these techniques to their functional and wearable works.
1. Use hybrid opportunities for a mini-metals experience.
Nothing is more exciting than using a torch for the very first time. Make sure your students get a taste of metalsmithing during in-person days. Even if they cannot create elaborate works, exposure to these tools and materials is essential. Remember, though, even loading a saw blade properly takes time. If you see students twice a week, they will still struggle with that one skill; and we haven’t even started sawing yet.
Just like most courses right now, you’re going to have to pare down the skills you want students to experience. Consider the major takeaways for your students. What can students successfully create in their time with you? Remember that not every piece of metal needs soldering. Cold connections are great options for students to explore both in the classroom and at home.
Teach students to use their at-home time as important preparation for their studio experience. Research, while not creating anything physical, can lead to brainstorming and design practice. Students can research contemporary metalsmiths and design a next in series.
Try combining a few artists as inspiration to respond originally and uniquely. After researching and sketching, students can create paper templates at home to be used for their in-class metalworks.
2. Metalsmithing at home is iffy; instead, focus on design and basic skills.
Just as in sculpture, consider what materials you can provide versus what students can access independently. Include materials and tools that can be used for multiple lessons.
Chain mail is a great lesson that helps students create with their hands, get into their zen mindful place, and practice craftsmanship. Students learn how to make jump rings that will support their later artworks. That repeated practice with pliers will pay off when trying out wire wrapping.
Creating with recycled materials can encourage design thinking. Teach sustainability alongside the functionality of wearable artwork. Take the pressure off mastering a new technical skill and exercise exploration and creativity. Students problem-solve how to fasten and assemble in new out-of-the-box ways and consider the context of those repurposed materials.
Cardboard wins the versatility award once again when it comes to jewelry/metals. Create those paper templates like in hybrid, but now use them to construct a non-metals replica. Students refine and cut out precise cardboard pieces to create a relief pendant or 3D ring. Students can decide on fixed assemblage using glue or create movable objects with brass fasteners.
As we continue to navigate these unprecedented times, our ability to pivot on a dime is essential. It’s time to work smarter in these situations because teaching is hard enough. Creating a bank of lessons in advance will provide sanity when transitioning in a snap. Versatile and inexpensive materials allow the flexibility to adjust when needed. Don’t forget; it’s the experiences we provide and the connections we make that our students will remember.
How have you been handling your 3D curriculum in a hybrid schedule?
What 3D essential skills do you focus on? How have you modified or adapted?
What are your most versatile tools and materials in your 3D classes?
Magazine articles and podcasts are opinions of professional education contributors and do not necessarily represent the position of the Art of Education University (AOEU) or its academic offerings. Contributors use terms in the way they are most often talked about in the scope of their educational experiences.